Adding Live chat on WordPress GFI HelpDesk integration
This topic guides you on how to add Live Chat in the WordPress GFI HelpDesk page.
Prerequisites
- An active GFI HelpDesk subscription
- Admin access to the Wordpress site
- The GFI HelpDesk WordPress app available on the Github page
Procedure
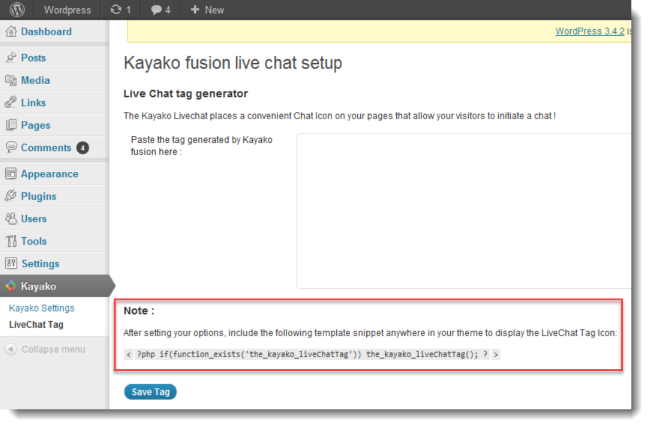
To offer Live Chat support from your WordPress site, you need to create a Live Chat tag to include on the page:
- Log in as an admin to your WordPress site.
- Go to the GFI HelpDesk Admin Control Panel and click Tag Generator on the menu sidebar.
- Select the type of Live Chat tag you want, and follow the prompts for creating it.
- Once you’ve generated the Live Chat tag, switch back to the WordPress Admin > Kayako > Live Chat Tag.
- In the text box, labeled Paste the tag generated by GFI HelpDesk Fusion here:, paste the code for the Live Chat tag you created with GFI HelpDesk.
- Before saving, copy the shorthand code below and add it in your WordPress Theme. This code should be present in your theme to display the chat icon. <?php if(function_exists('the_kayako_liveChatTag')) the_kayako_liveChatTag(); ?>
Add shorthand code in wordpress theme
The Live Chat icon should now be displayed in your WordPress GFI HelpDesk site.