Installing the service components
This topic describes how to install the GFI OneConnect components the first time, on a server within your network infrastructure.
Important notes before installation
Before running the GFI OneConnect installation:
- Change the MX records for the domain to point to GFI OneConnect and prepare the network to allow connections. For more information refer to Email routing.
- Prepare an account with the necessary permissions to install and run the GFI OneConnect services. For more information refer to Service account permissions.
Installation procedure
To install the GFI OneConnect components:
- Log in to the server using the GFI OneConnect Service Account.
- Right-click the GFI OneConnect installer and choose Properties. From the General tab, click Unblock and then Apply. This step is required to prevent the operating system from blocking certain actions by the installer.
- Double-click the installer to start the installation wizard.
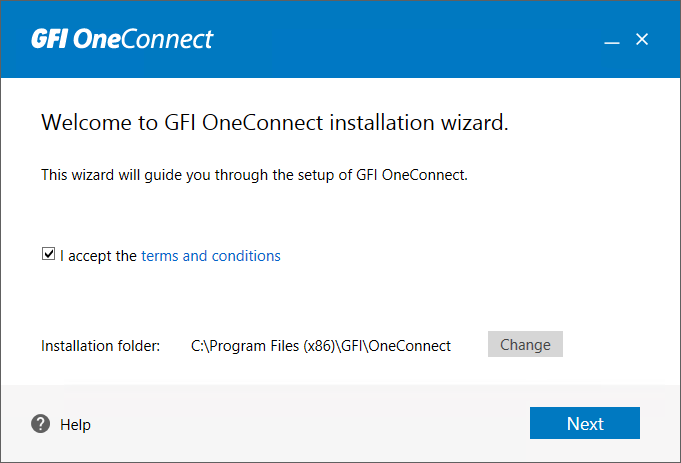
The GFI OneConnect installer Welcome screen
- In the welcome screen, read the terms and conditions. Select I accept the terms and conditions if you agree.
- Choose the folder where to install the components from the Installation folder area or use the default location. Click Next.
- In the authentication window, key in your Administrator account username and password. These are the same credentials used to register to GFI OneConnect. Click Next.
- The wizard checks if another instance of GFI OneConnect was already installed by your account. If another installation is detected, the wizard offers the option to set this new installation as secondary or primary. For more information refer to Secondary installation.
- The setup now runs numerous tests to ensure that your server meets the system requirements. If any of these tests fail, troubleshoot and apply the necessary corrective actions. Re-run the tests by clicking Re-check. When all tests are successful click Next.
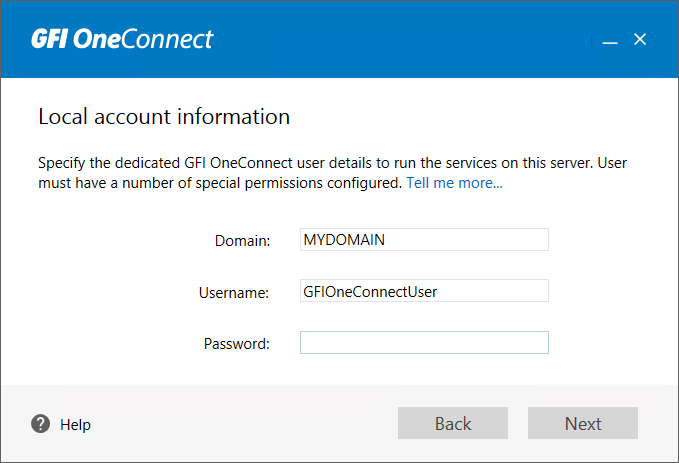
Local account information
- In the Local account information screen, key in the GFI OneConnect Service Account credentials that accesses your primary email environment. The installer should automatically populate the DomainAddress or URL of a particular network. and Username credentials since you should be logged in using this account. If these are not automatically populated, ensure that you are logged in using this account. Key in the account's Password and click Next.
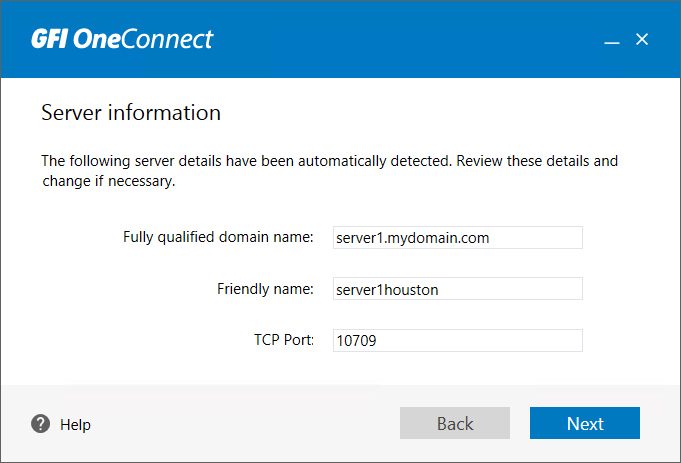
Specify the local server details
- Key in the following server details:
| Option | Description |
|---|---|
| Fully Qualified Domain Name | Key in the FQDN of the local server. Ensure that the FQDN detected by the installer is correct and that the Microsoft Exchange servers can resolve this FQDN value. |
| Friendly name | Specify a friendly name for this server. This value is shown in the ContinuityA feature provided by GFI OneConnect that queues the emails sent and received in a Data Center and ensures that your organization can keep the mail flow even when the email infrastructure is down. Admin ConsoleA web interface for adminsitrators to manage and configure GFI OneConnect. to identify this server. |
| TCP Port | Key in a port that is not used by any other application to be used by the RedirectorController. The default port number is 10709. |
Click Next.
- Review the installation summary details and click Install to start the installation.
- On install completion, click Open to load the GFI OneConnect Configuration wizard.
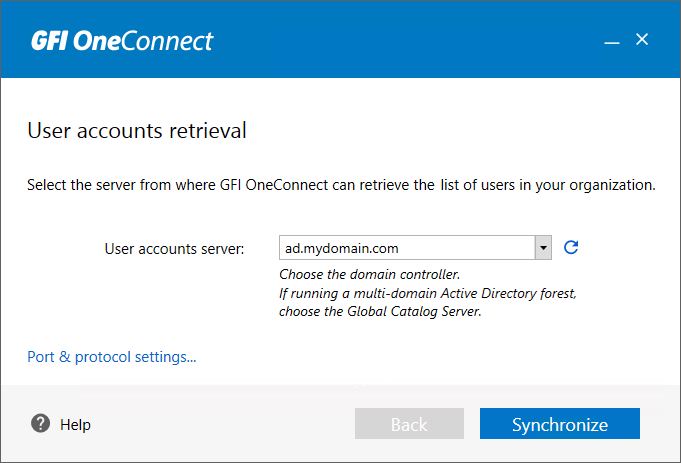
User accounts retrieval
- In the User account retrieval screen, the wizard automatically detects the Active DirectoryA technology that provides a variety of network services, including LDAP-like directory services. global catalogs or domain controllers available for use. Select the User accounts server that is physically closest to the machine. GFI OneConnect uses this server to auto-discover the list of user mailboxes. By default, GFI OneConnect uses the Global Catalog protocol (forest) to query the accounts server. If the appropriate user accounts server is not automatically detected, click Port & protocol settings... to configure the settings used to retrieve the accounts server.
- Click Synchronize when the appropriate user accounts server is selected. The wizard first checks the impersonation rights of the user account. The wizard attempts to access the user's own mailbox using Exchange Web Services. If the check fails, ensure that the user entered in step 8 above meets the Service account permissions required by GFI OneConnect. If the check succeeds, the wizard synchronizes your user data with the GFI OneConnect data center. The sync duration depends on the size of your user base.
- When the synchronization is complete, click Launch Admin Console to open the GFI OneConnect Admin Console in a web browser. For more information refer to Logging into GFI OneConnect. Alternatively you can click Synchronization & scheduling... to launch SyncManager. For more information refer to Setting up the SyncManager.