Composing emails
This topic shows how to compose new emails from the GFI OneConnect WebMail. The email recipients will not know that you are sending a message from an alternative email client.
To compose a new message:
- Log in to GFI OneConnect and click Access your emergency mailbox to launch WebMail.
- From the top menu bar, click New Message.
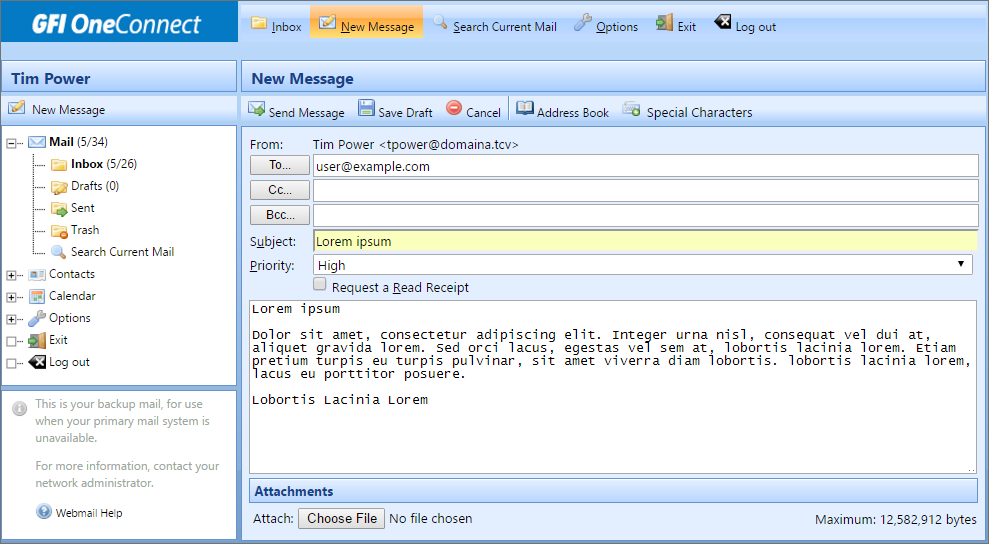
Composing a new email message in WebMail
- In the To: field add recipient information. You can:
- Begin typing the recipient’s name or email address. A list of possible matches will appear. Select the desired recipient to complete the address.
- Enter email addresses manually, separating multiple addresses with commas or semicolons.
- Insert recipients from your Contacts. To do this, click To.... In from, choose Global Address List to add an address from your organization's contacts or My Contacts to choose an address from your personal contacts list. Locate the recipient either by scrolling through the list or by using the Find box to search for the recipient. Select the recipients from the left section and click To, Cc, or Bcc to move recipient to the right section. Click OK when all recipients are added.
- Key in an email subject in the Subject box.
- To change the default priority of your messages, select it from the Priority list.
- To be notified when the recipient has opened the message, select Request a Read Receipt.
- Type the content of your message in the large text box. If you need to use special characters that are not available on your keyboard. Click Special Characters on the message menu. Select a character, right-click and select Copy. Then just paste it in your text.
- To attach items to the message, in the Attachments area, click Choose File. Find a file from disk and click Open. Repeat this process until all attachments are included. You can attach up to 12MB of data files to each message either in one 12MB file or in several smaller files that together do not exceed 12MB.
- After you verify that all address information, attachments, and text entries are accurate, click Send Message. Alternatively, to save the message for sending later, click Save Draft.