Calendar
Calendar information stored on your mail server (not on your local desktop machine) may be available in WebMail if your organization provides this data to GFI OneConnect. If your organization makes this data available, you can access your calendar through WebMail when your organization is using GFI OneConnect as its emergency email service. This data will be current as of your organization’s most recent synchronization with GFI OneConnect.
NOTES
The Calendar allows you to see your personal calendar. You cannot schedule meetings, accept new invitations, or see others’ busy/free schedules.
To access the calendar:
- Log in to GFI OneConnect and click Access your emergency mailbox to launch WebMail.
- Click the Calendar node in the left-pane to see the calendar.
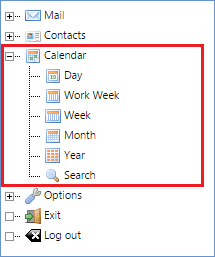
WebMail Calendar node
From the Calendar page, you can view your schedule information.
You can change the calendar view by clicking on one of the tabs across the top of the calendar page:
| Option | Description |
|---|---|
| Day | Today’s schedule shown in hour increments. |
| Work week | Monday through Friday schedule, shown in hour increments. |
| Week | The schedule for all days of the week, shown in hour increments. |
| Month | Schedule for the current month. |
| Year | Schedule for the current year. |
To look at a specific date, click Goto from the top menu bar and select the date from the calendar.
To print calendar information, change the view so that it displays the calendar information in the format you want to be printed and click Print from the top menu bar.
NOTE
When accessing details for a meeting you have tentatively accepted, the status field shows as confirmed. The WebMail calendar does not differentiate between accepted and tentatively accepted meetings.
NOTE
If calendar entries do not appear properly, or calendar entries are missing from the WebMail calendar, reset your WebMail preferences. To do this, in the left-hand menu go to Options > Global Options. Click Reset All Preferences. Log out and log back in. The missing calendar entries should now be displayed. This action sets the WebMail interface’s options back to default, so customizations have to be set again.
Searching for a specific calendar entry
- In Calendar, click Search in the top menu bar.
- In Title, enter all or part of the title of the calendar entry.
- In Description, enter all or part of the event description. Use
%as a wild card. - In Time Span, select the period of time to search.
- Click Search.
If the search does not provide the results you need, try the Advanced Search function.
- Click Advanced in the search menu bar.
- To search on Title or Location, enter search terms. These do not have to be an exact match. Use
%as a wildcard. - For time span, choose a start or end time, or select a duration.
- Click Search.
NOTE
Recurring meetings with an occurrence that matches the search criteria are listed only once in results, even if the meeting occurs multiple times within the date range of your search.