Domain Whitelist & Blacklist
The WhitelistA list of email addresses and domains from which emails are always received. contains a list of sender email addresses and domains. Emails received from whitelisted addresses, are always classified as not spam, even if the message is detected as spam. Note however that GFI OneConnect SecurityA service provided by GFI OneConnect that protects your inbound email from viruses, filters out spam and provides mail monitoring features. still scans emails received from whitelisted senders for viruses and malwareAll malicious types of software that are designed to compromise computer security and which usually spread through malicious methods..
On the contrary, emails received from email addresses or domains added to the BlacklistA list of email addresses and domains from which emails are always blocked. are always blocked and classified as spam, even if the message is not detected as spam by the scanning engine. Add to the Blacklist the senders from which you never want to receive emails.
Blacklist & Whitelist can be configured at domain level or at user level. GFI OneConnect Security administrators can manage domain lists, applicable to emails received by the organization. End-users can manage their own lists for emails received by them only.
This topic describes how to configure domain-level Whitelist & Blacklist. For information on how end-users can manage User Blacklist/Whitelist, refer to http://go.gfi.com/?pageid=oneconnect_user_help#cshid=userfilterules.
To access the DomainAddress or URL of a particular network. Whitelist & Blacklist filter rules:
- Login to GFI OneConnect using an Administrator account and navigate to Manage > Security.
- Key in your Administrator account credentials in the Security login screen.
- Choose the Domain Group Administrator role from the top-right corner Role field.
- Navigate to the Filter Rules tab.
- Select the list to access: Domain Whitelist or Domain Blacklist.
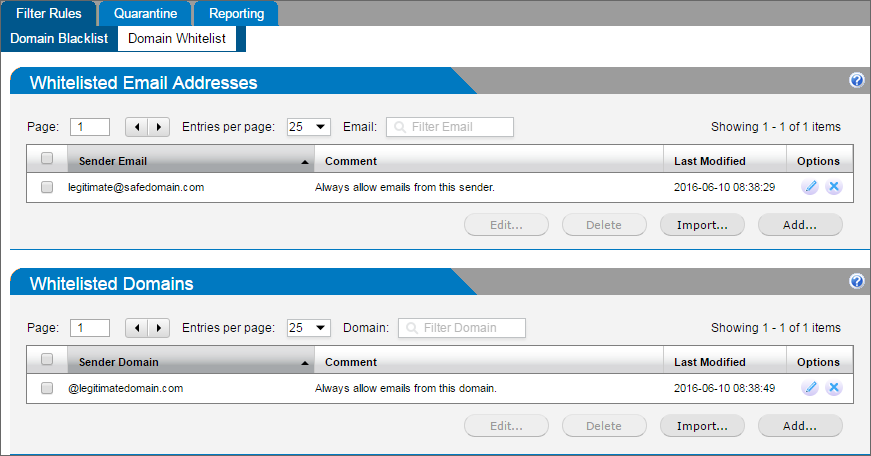
The Domain Whitelist screen
Adding entries manually
- Click Add in the Email Addresses or Domain sections.
- Key in the domain or email address to add:
- Email Address must be entered in the form user@example.com.
- Domain entries must be in the form example.com.
- (Optional) Add a comment. It may be helpful to remember why the item was added on that list.
- Click Save.
Importing a list
- Create a text file containing all the entries to whitelist or blacklist. Write one entry per line:
- Email addresses must be in the form user@example.com.
- Domain entries must be in the form @example.com.
- The text file may contain a mixed list of both email addresses and domains.
- Click Import... in the Email Addresses or Domain sections.
- Select the file to be imported and click Open.
Editing entries
- Select the entry to modify and click Edit....
- Make the changes and click Save.
Deleting entries
- Access the list you want to edit.
- Select the entry and click Delete.
NOTES
- A sender may not be added to both the Whitelist and the Blacklist at the same time.
- Whitelist and Blacklist entries specified by end-users at User level, overrule the domain level settings.