Building a multi-brand knowledge base
To create a multi-brand knowledge base, do the following:
- Log into the admin control panel.
- Click the Users link on the top toolbar, and then the Insert User Group link that appears below.
- Now, we are going set up a 'Guest' user group and a 'Registered' user group for each of three brands. So we'll need six user groups, all together:
- 'Guest - Brand A'
- 'Registered - Brand A'
- 'Guest - Brand B'
- 'Registered - Brand B'
- 'Guest - Brand C'
- 'Registered - Brand C'
- In the Group Name field, enter the name for the first group, 'Guest - Brand A'.
- In the Group Type field, select Guest.
- Click Insert to save your new group.
- You end up back on the Manage User Groups page. Click the Insert User Group link to create your next group.
- This time, the Group Name should be 'Registered - Brand A'.
- For Group Type, select 'Registered'.
- Click the Insert button to save.
- Repeat the steps above to create the remaining four user groups—a 'Guest' and 'Registered' group each for Brands 'B' and 'C'. NOTE:
For the 'Guest' user groups, GFI HelpDesk determines which template to use for guest traffic, based on the URLUniform Resource Locator is the address of a web page on the world wide web. they use to get to your help desk. More on that below.
- Next, we need to populate each user group with the user accounts that belong to them.
- Click the Staff CP link in the upper right to switch to the staff control panel.
- Click the Users link on the toolbar.
- On the Manage Users page, find the customer accounts for 'Brand A' and check the box to the left.
- At the bottom of the screen, under the Mass Action heading, select 'Registered - Brand A' from the User Group dropdown.
- Repeat the last two steps to add any customer accounts for 'Brand B' and 'Brand C' to the appropriate 'Registered' user group.
- Next, comes the templates, which control how the content in each brand appears on the support site. Because template customization is one of GFI HelpDesk's most powerful features, refer customizing the templates involved in branding a support center. Follow the steps from it to create three new Template Groups:
Next, we need to populate each user group with the user accounts that belong to them.
- Click the Staff CP link in the upper right to switch to the staff control panel.
- Click the Users link on the toolbar.
- On the Manage Users page, find the customer accounts for 'Brand A' and check the box to the left.
- At the bottom of the screen, under the Mass Action heading, select 'Registered - Brand A' from the User Group dropdown.
- Repeat the last two steps to add any customer accounts for 'Brand B' and 'Brand C' to the appropriate 'Registered' user group.
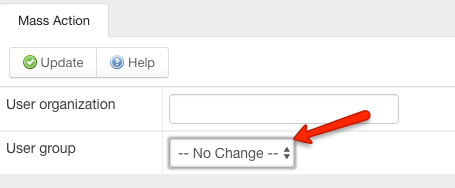
Select from User Group dropdown
Next, comes the templates, which control how the content in each brand appears on the support site. Because template customization is one of GFI HelpDesk's most powerful features, refer customizing the templates involved in branding a support center.
Follow the steps from it to create three new Template Groups:
- 'Brand_A'
- 'Brand_B'
- 'Brand_C'
Make your modifications to the templates in each group, again, following the steps outlined in customizing the templates.
Now, we are going to link each template group to its corresponding user groups.
- From the admin control panel, on the Template Groups landing page, click the title of the 'Brand_A' template group to edit it.
- From the Guest (not logged in) User Group dropdown, select the 'Guest - Brand A' user group.
- From the Registered (logged in) User Group dropdown, select the 'Registered - Brand A' user group.
- Repeat the last two steps for the 'Brand B' and 'Brand C' template groups.
- Finally, we are going to set up knowledge base categories to contain articles for each brand.
- Switch back to the staff control panel and click Knowledgebase on the toolbar.
- Next, click the Categories link and the Insert Category button to create a new knowledge base category.
- In the Category Title field, type 'Brand A'.
- Click the Permissions: Users tab at the top of the window.
- On this screen, we can control which user groups can view content in this category. In the Restrict to specific user groups select 'Yes'.
- Under User Groups leave the rows for 'Brand A - Registered' and 'Brand A - Guest' on 'Yes', and set every other row to 'Now. This displays articles in this category only to Brand A visitors.
- Click Save to create your new category.
- Repeat the steps above to create new categories for 'Brand B' and 'Brand C'.
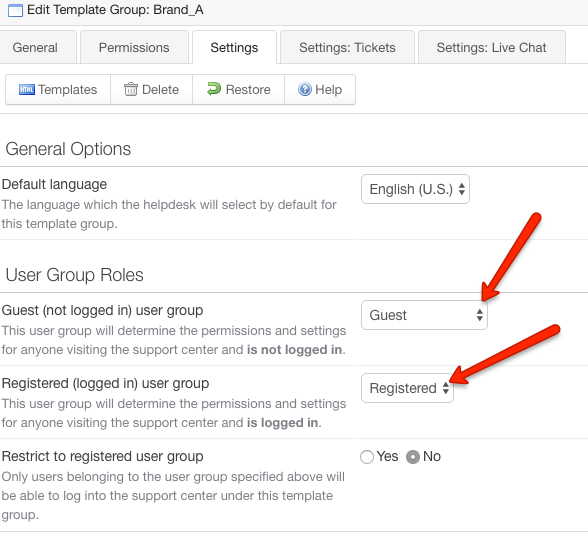
Edit template group

Set rows under User groups as Yes for Brand A
You could choose to restrict the category to only the registered group, to limit articles' visibility to logged in users.
Now, when you create articles, you can save them in the category for the appropriate brand.
The final step is to actually direct your customers to your branded support sites. Append the template group name to the end of your support site's URL:
- http://[yourgfidomain].com/index.php?/Brand_A
- http://[yourgfidomain].com/index.php?/Brand_B
- http://[yourgfidomain].com/index.php?/Brand_C
Any visitors to those URLs views the branded support site, and whether they are logged in or not controls what content they can see.