Modifying notification email templates
You can customize your notification template by following these steps:
- Log in to the GFI HelpDesk admin control panel.
- Click on Templates in the left navigation bar.
- Under that, click Groups and select the required template group.
- In the Edit Template Group window that opens, click the Templates button.
- Click General to expand the category.
- Let us start with
emailnotification_text. Click on it from the list to open the template for editing. - In the Template Contents text area, you see the default variable:
{$_notificationContentsText. Select and delete this variable: - Now, to add your preferred content to the template, you can add any combination of the following variables:Simply copy them and paste them into the Template Contents window in the order in which they should appear.
- Click the Save & Reload button.
- Next, to configure the emailnotification_html template, click the Back to return to the list of templates.
- Click emailnotification_html in the list to open it for editing.
- Look for variable
<{$_notificationContentsHTML}>and delete it, and add your own variables, as in step 7 above. - Save the Template changes by clicking the Save & Reload button on top.
- Click the Back button to return to the list of General templates.
- To edit the user notification email templates, you can follow exactly the steps as above, but you're looking for emailnotificationuser_html and emailnotificationuser_text. The same variables are supported.

Expand the general category
We are going to start with the staff notification templates, which are called emailnotification_text for plain text emails and emailnotification_html for HTML emails.

Staff notification templates
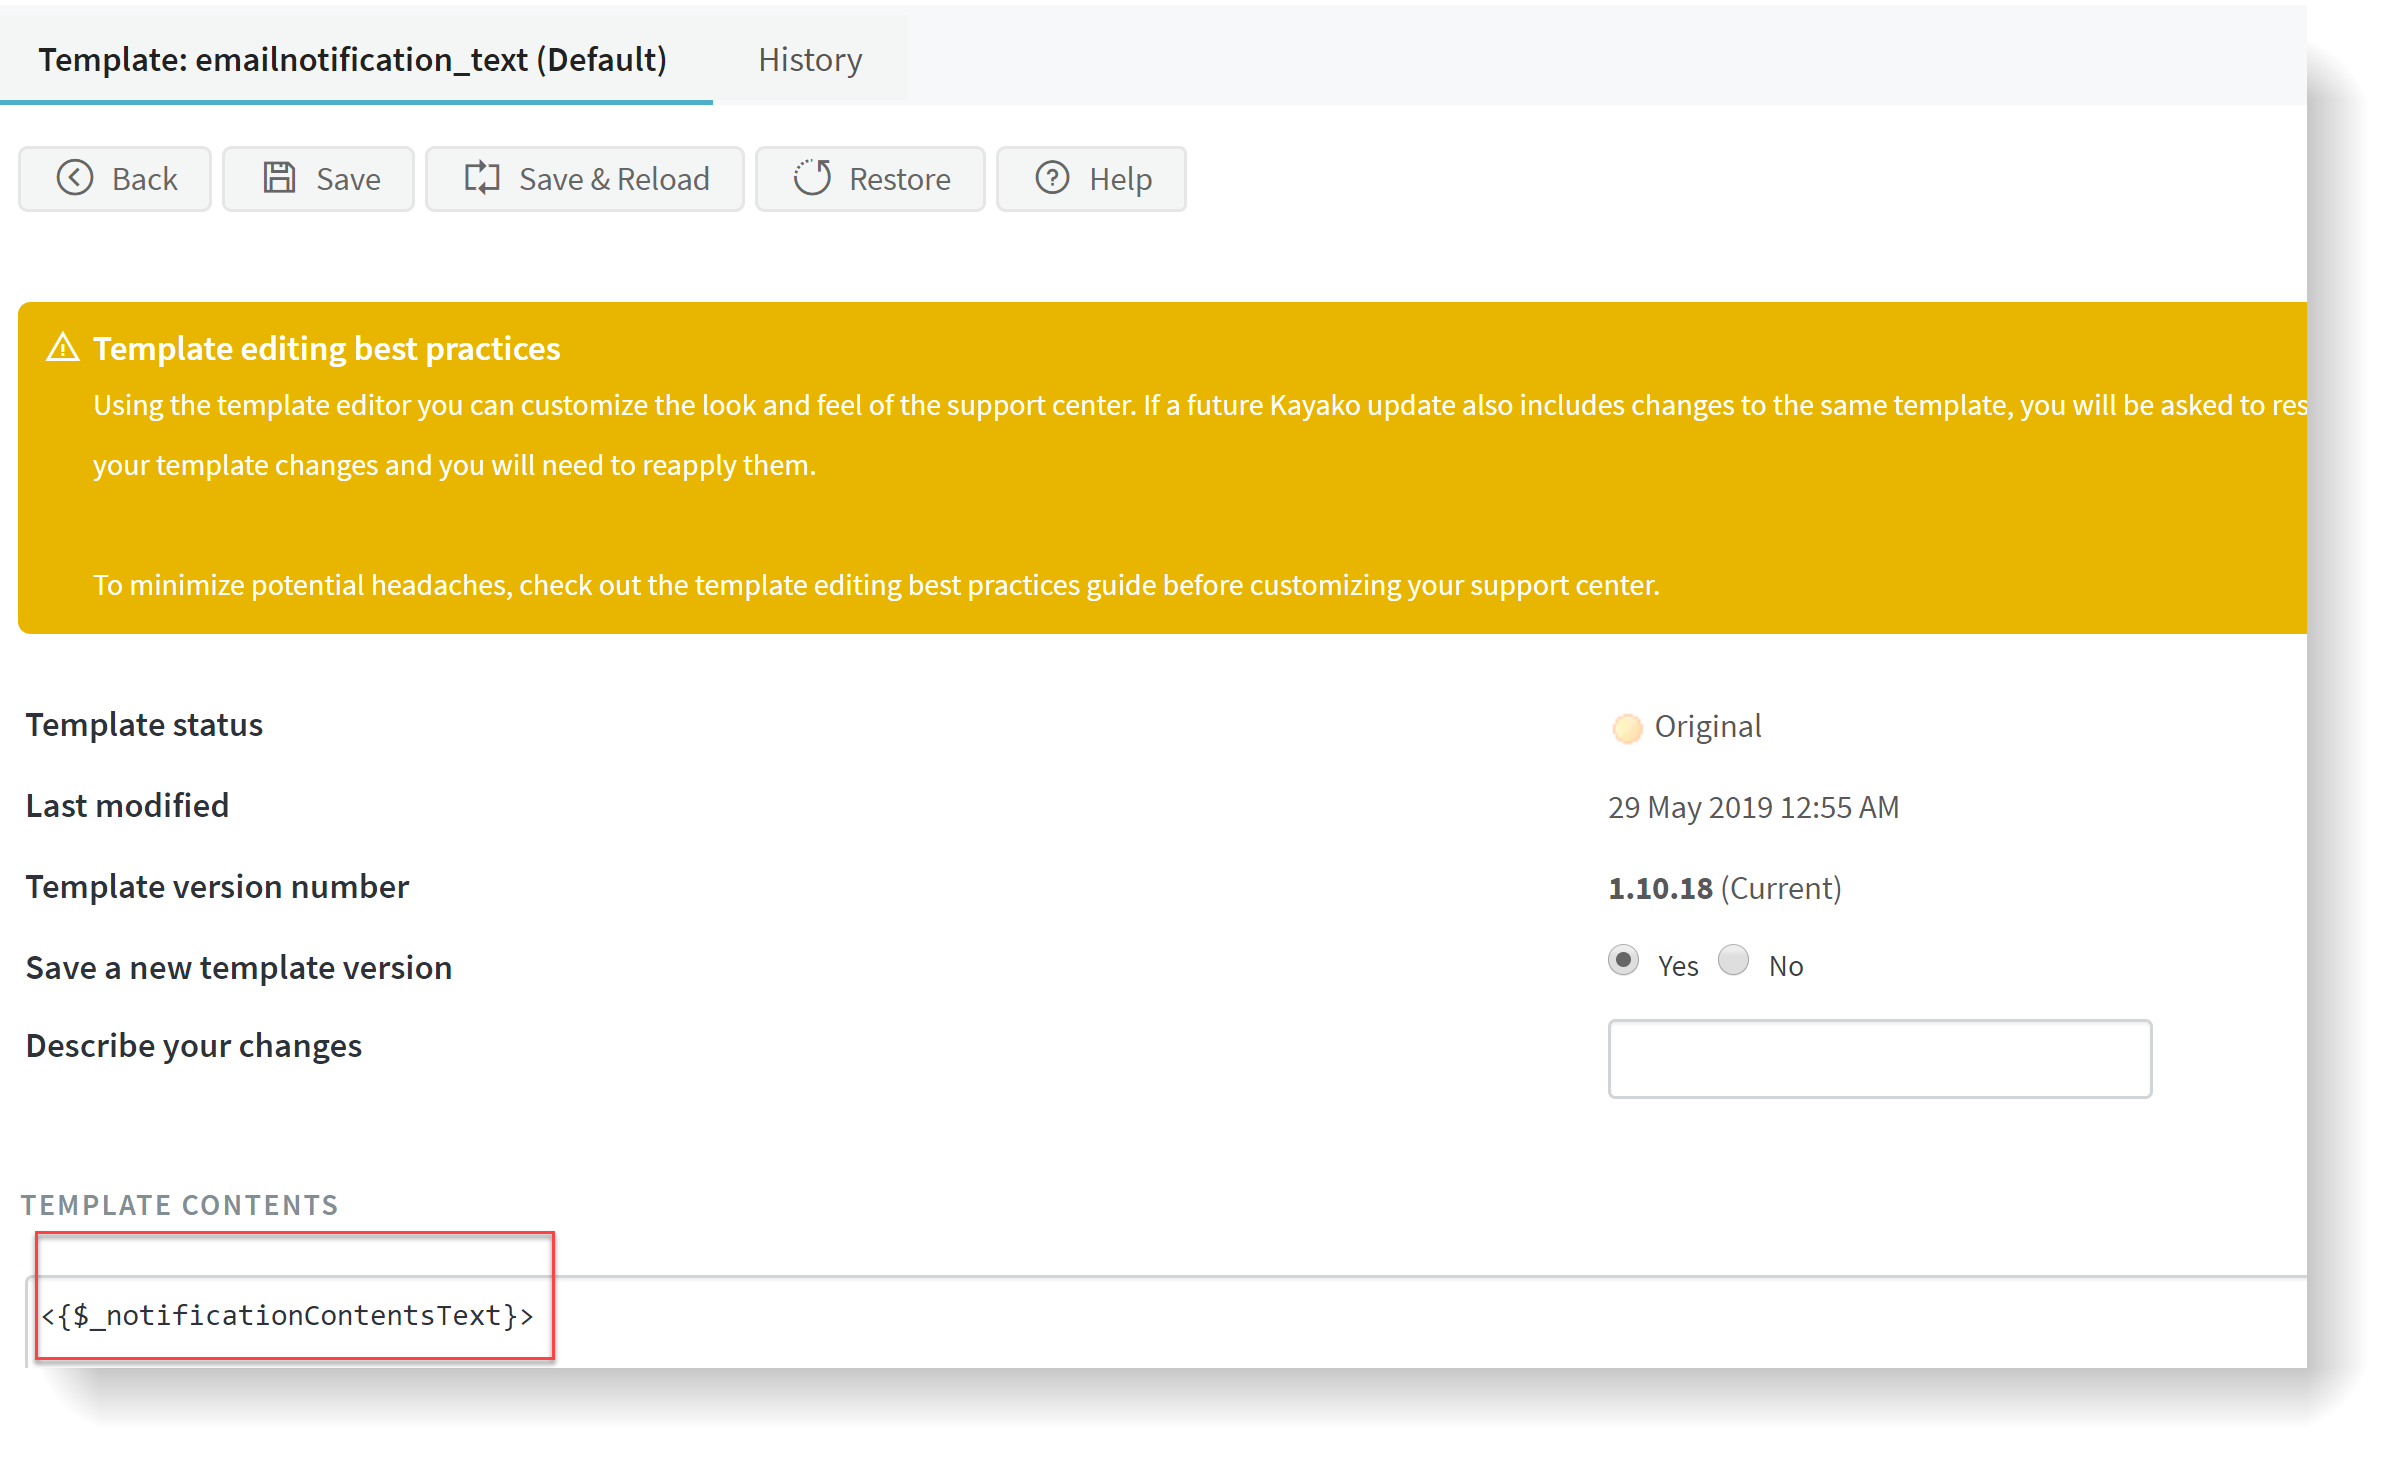
Delete variable
| Variable | Function |
|---|---|
<{$_ticketNotification[subject]}>
|
Ticket subject |
<{$_ticketNotification[ticketid]}>
|
Ticket ID/mask |
<{$_ticketNotification[ticketlink]}>
|
Ticket hyperlink |
<{$_ticketNotification[fullname]}>
|
Customer's full name |
<{$_ticketNotification[email]}>
|
Customer's email address |
<{$_ticketNotification[phoneno]}>
|
Customer's phone number |
<{$_ticketNotification[creator]}>
|
Creator (that is, user/staff) |
<{$_ticketNotification[department]}>
|
Ticket department |
<{$_ticketNotification[owner]}>
|
Ticket owner's full name |
<{$_ticketNotification[type]}>
|
Ticket type |
<{$_ticketNotification[status]}>
|
Ticket status |
<{$_ticketNotification[priority]}>
|
Ticket priority |
<{$_ticketNotification[slaplantitle]}>
|
SLA plan on ticket |
<{$_ticketNotification[templategrouptitle]}>
|
Template group used |
<{$_ticketNotification[created]}>
|
Ticket creation date & time |
<{$_ticketNotification[updated]}>
|
Last activity date & time |
<{$_ticketNotification[userorganization]}>
|
User's organization name |
<{$_ticketNotification[changedby]}>
|
The person who made changes |
<{$_ticketNotification[changes]}>
|
Changes that took place |
<{$_ticketNotification[content]}>
|
Last ticket post contents |
<{$_ticketNotification[duedate]}>
|
Reply due date & time |
<{$_ticketNotification[resolutionduedate]}>
|
Resolution due date & time |
Custom fields:
| Variable | Function |
|---|---|
<{$_customFields[GroupName][FieldName]}>
|
Custom field data |
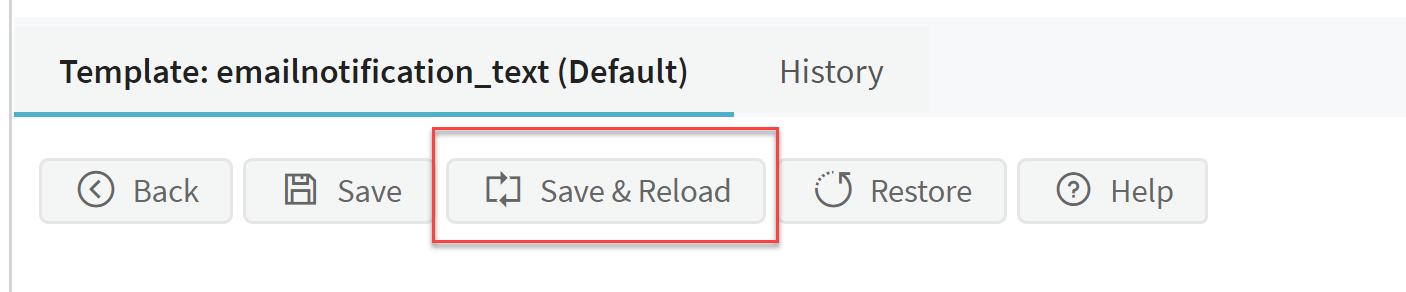
Save & reload

Click back
Click emailnotification_html
Click Save and Reload
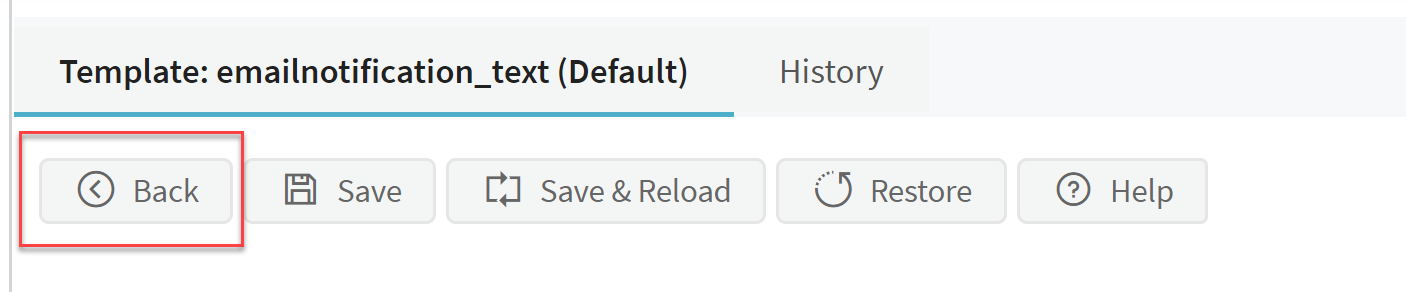
Click Back