Viewing reports in SDP
Click Reports on the top menu to view or edit existing reports, create new ones and set report schedules.

To create a custom report:
- Click Reports on the top menu to enter the device management view
- Click Create Custom Report.
- Enter a Name and Description for the new report.
- Select the Report Category.
- Choose Report Style as Aggregate to include consolidated data of all the appliances you select, or choose Per appliance to include separate data for each selected appliance.
- Set Accessibility of the report as either Public or Private as per the need.
- Select a Date Range for compiling data in the report. This is based on your time zone settings.
- Select the Appliances you want to include the report.
- Click Save.
To schedule a custom report:
- Click Reports on the top menu to enter the device management view.
- Click Schedule a Report.
- Enter a Name for the scheduled report.
- Specify email addresses of the recipients to whom you want this report to be sent.
- Select the Report Frequency. This determines how often you would like this report to generated and sent. If you select a daily frequency, you're also provided with the list of the days in a week, to include or exclude from.
- Enable or Disable the scheduler as required.
- Select the Reports to include in this scheduler. The maximum reports you can include at a time is 10.
- Click Save.
NOTE
To view all your schedules navigate to Reports > Report Central. You can also enable/disable, delete or edit a report schedule from this page.

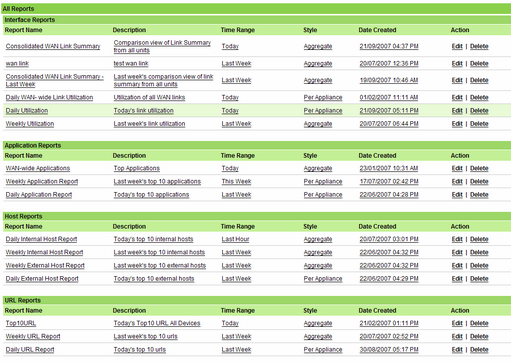
To view a report:
1. Click Reports on the top menu.
2. Select a report that you want to view from the report list.
3. All reports are listed by category. You can also click on any column to sort records by the selected parameter.
NOTE
You can personalize your reports by adding your company's logo. To load your own logo navigate to Reports and click on an existing report of your choice. Once you are able to view the report you can choose to email or save it. Both these options will give you the choice of uploading a locally saved image as your logo before completing the email/save action. The Title image field is optional and supports jpg, gif, png and bmp image file formats only (max 1MB). The image will be scaled to fit in the PDF report. For best image quality, we recommend to upload image resolution of 1024 x 450 or similar.
NOTE
All reports are based on your time zone settings. To configure your time zone settings navigate to Setup > Timezone settings.