Setting up a Microsoft Office 365 Journaling Mailbox
The following steps guide you to create a new user dedicated to email journaling with an Exchange online license. All emails exchanged between your users will be forwarded to this mailbox.
1. Login into Microsoft Office 365 as a user with administrator rights.
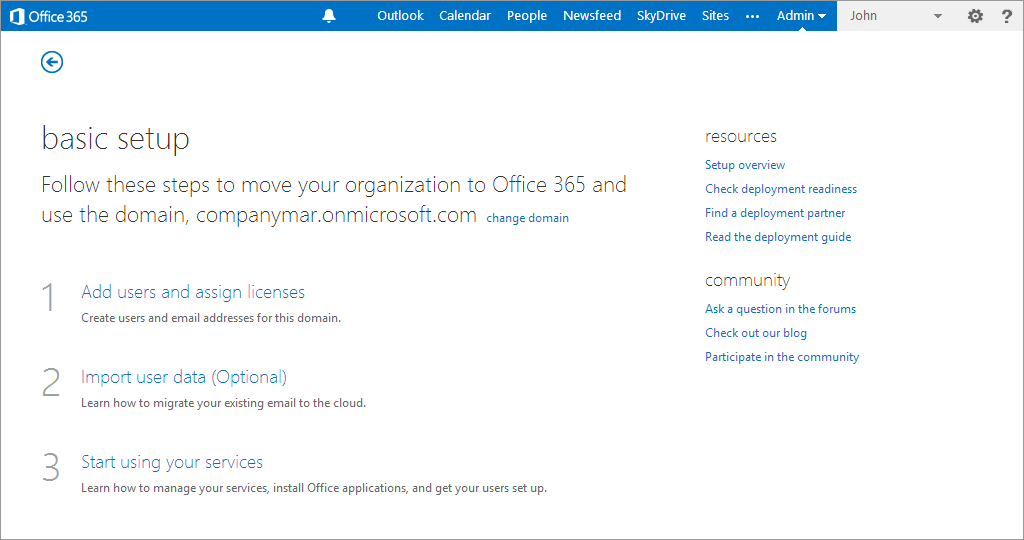
2. Go to setup > quick start > start.
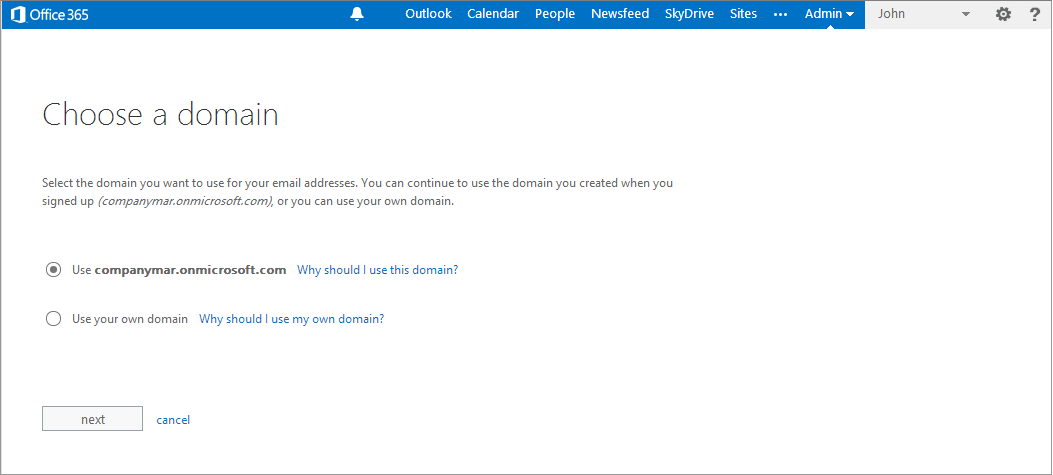
Select domain
3. Choose default domain and click next.
Select Add users and assign licenses
4. Click Add users and assign licenses. Click next.
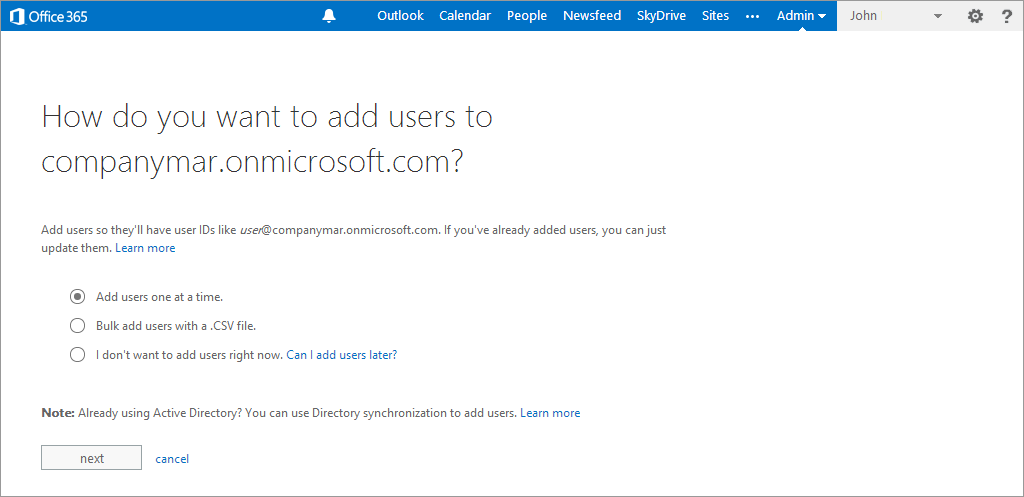
Define how to add users
5. Select Add users one at a time.
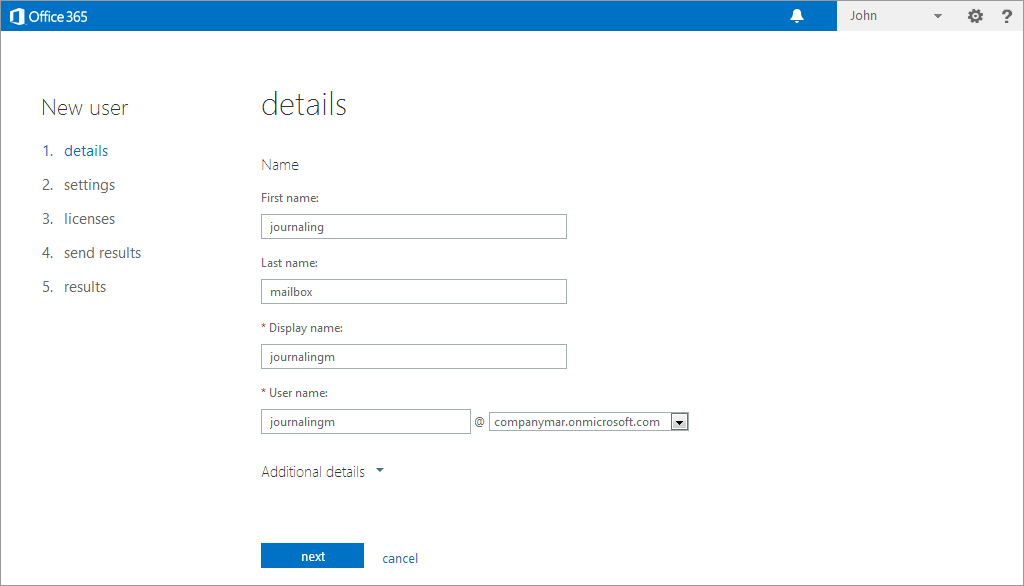
Key in new mailbox details
6. Add the following user details:
- First name, for example, journaling.
- Last name, for example, mailbox.
- Display name, for example, journalingm
- User name, for example, journalingm
7. Click next.
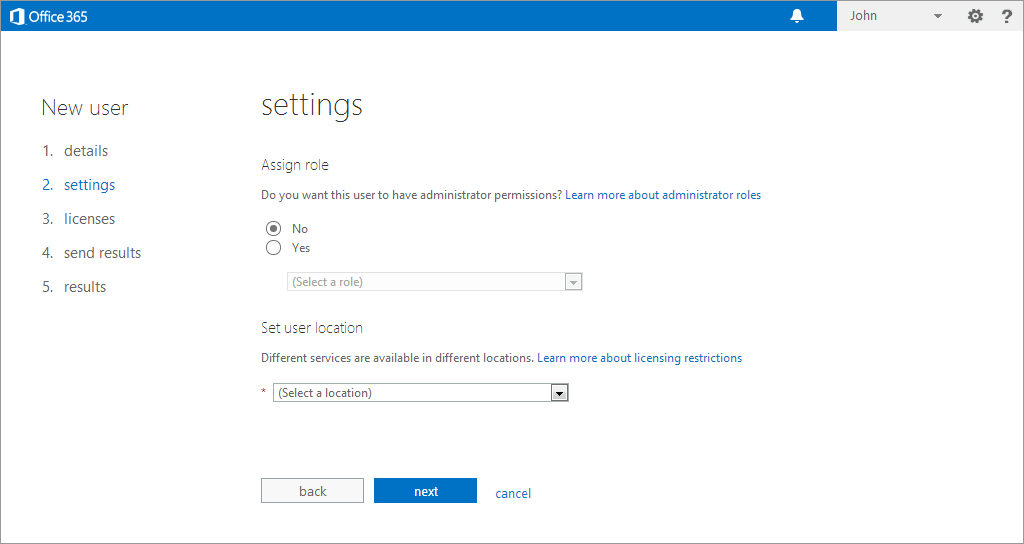
Define role and location details
8. In the Assign role page define the following settings:
| Option | Description |
|---|---|
| Do you want this user to have administrator permissions? | No |
| Set user location | Select your location from the drop down list. |
9. click next.
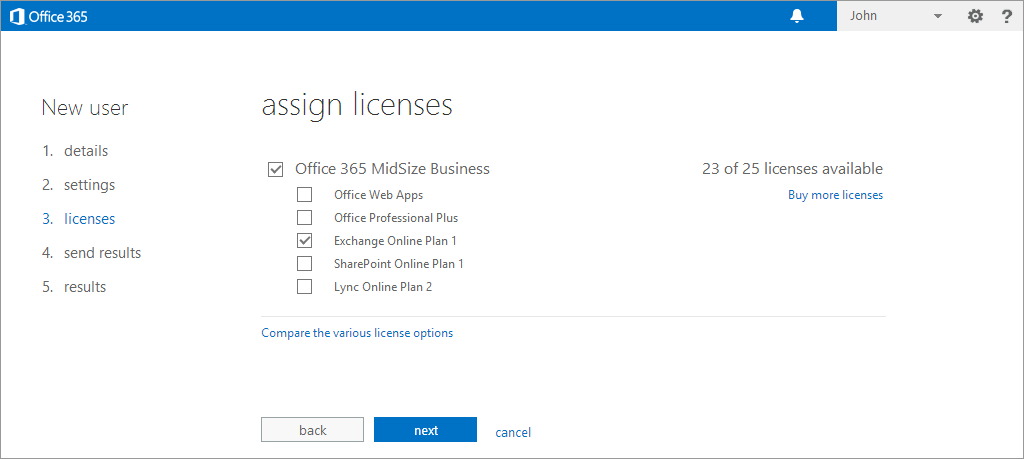
Assign license plan
10. In the assign licenses page, select only Exchange Online Plan 1, then click next.
11. In send results in email page specify the email address where you would like to receive information about the new users and any corresponding temporary passwords. These results can be emailed to up to five recipients. Enter the email addresses separated by semicolons and click create.
12. In the results page, take a note of the new user name and temporary password.
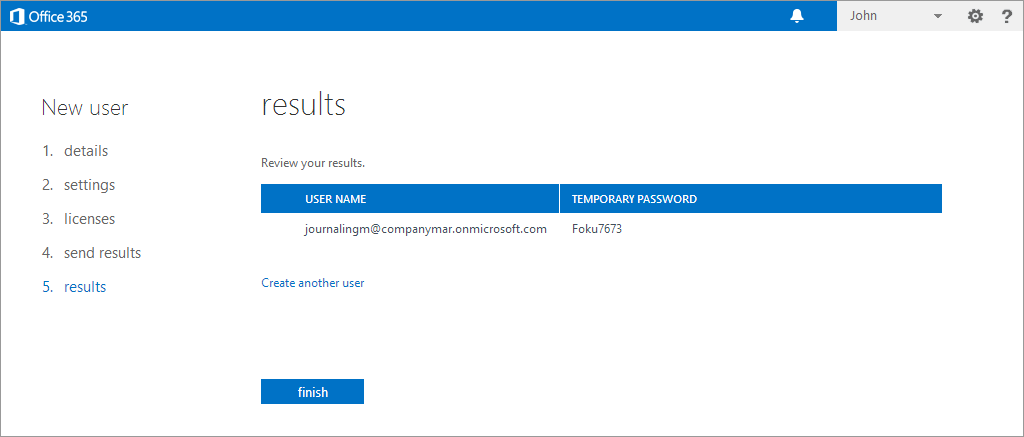
Make a note of the new user name and temporary password
13. Click finish.
See also: