Configuring unauthorized applications auto-uninstall
Application auto–uninstall entails that applications marked as unauthorized for specific scanning profiles are first validated for a successful uninstall on a test machine. Subsequently a scheduled scan based on the scanning profile for which the application is marked as unauthorized, is configured to auto–uninstall applications.
GFI LanGuard applications inventory provides a list of all applications detected during past scans. The list is used to specify unauthorized applications. You can also manually add applications to the list. You can do this by specifying the entire name as well as a partial name, specify generic names or part of an application name. GFI LanGuard automatically scans the list of applications and detects partial names. Refer to the following sections for information about:
- Setting an application as unauthorized
- Adding new applications to the unauthorized list
- Validating unauthorized applications for auto-uninstall
- Managing applicable scheduled scans
Setting an application as unauthorized
1. Click on Configuration tab > Applications inventory sub–node.
2. From the list of applications detected on the right, double click the application to set as unauthorized.

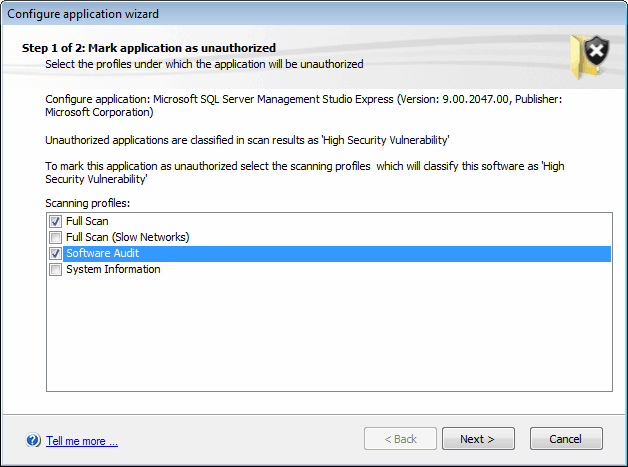
3. Select the scanning profile for which this application will be set as unauthorized and click Next.
4.GFI LanGuard can associate partial names with entries already in the list. As a result, the system will prompt you to confirm whether to apply the same changes also to applications partially have the same name.
5. Click Finish to finalize settings.
Adding new applications to the unauthorized list
1. Click Configuration tab > Applications inventory sub–node.
2. From Common Tasks, click Add a new application.
3. In the welcome screen, click Next.

Applications inventory wizard
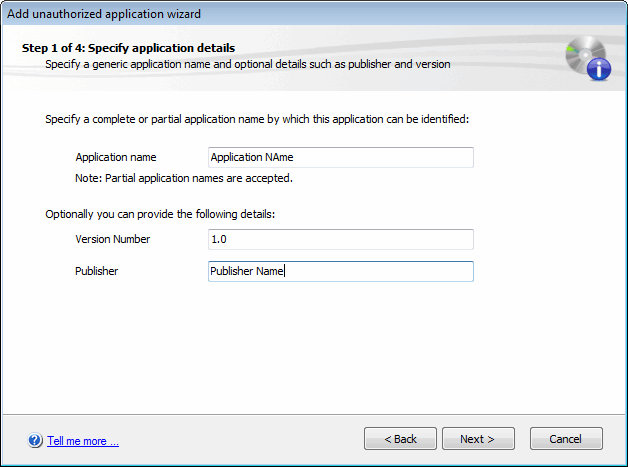
4. Specify application name. Optionally provide the version number and publisher name. Click Next.
5. Select the scanning profiles that will detect unauthorized applications (Example: Full Scan) and click Next.
6. Specify whether changes made will effect applications, which have partial/full name match. Click Next to continue.
7. Review the information and click Finish.
Validating unauthorized applications for auto-uninstall
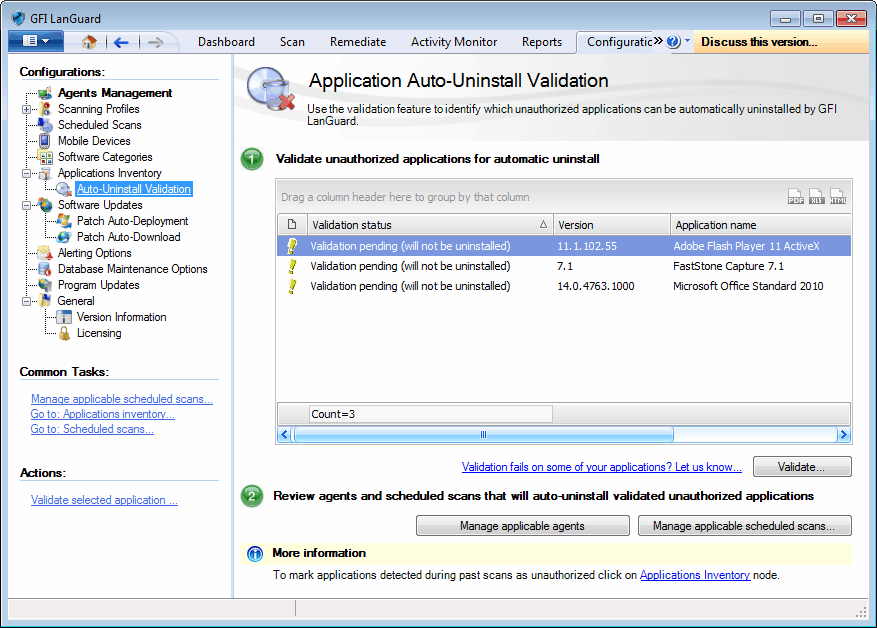
Application auto–uninstall validation enables you to validate the uninstallation procedure for the applications which are to be automatically uninstalled by GFI LanGuard. This is a requirement prior to the actual uninstallation process and no applications are un–installed during scans unless verified.
1. Click Configuration tab > Applications Inventory > Auto–Uninstall Validation

Application auto–uninstall validation
2. From the right pane, select an application to validate and click Validate.
3. In the Application auto–uninstall validation wizard, click Next.
4. Select the computer where to test the application auto–uninstall and click Next.
5. Provide the authentication details for the validation operation and click Next.
6. Review the Auto–uninstall validation wizard information and click Start.
Managing applicable scheduled scans
The Manage applicable scheduled scans button enables you to review or edit scheduled scans, which will perform the validated applications auto install. To manage a scheduled scan:
1. From the Auto–Uninstall validation pane, click Manage applicable scheduled scans.
2. From, Manage applicable schedule scans dialog, click one of the options described below:
| Option | Description |
|---|---|
| Edit selected scan… | Modify the selected schedule scan. For more information refer to Editing scheduled scan settings. |
| Create a new scheduled scan… | Add a new scheduled scan using the new scheduled scan wizard. For more information refer to Creating a scheduled scan. |
| View all scheduled scans… | Manage scheduled scans. For more information refer to Editing scheduled scan settings. |