Configuring Relay Agents
In larger networks you may experience increased network bandwidth use due to the amount of data transferred from the GFI LanGuard server to managed computers. The data consists of definition updates delivered to Agent computers and of patches being deployed to target computers.
To help avoid performance issues and to apply load balancing techniques, GFI LanGuard enables you to configure Agents as a relay of the server. Agents that are configured as Relay Agents act as caching points. These download patches and definitions directly from GFI LanGuard server or from an upstream Relay Agent and forward them to client computers (which can be Agent-based and Agent-less computers). The main advantages of using Relay Agents are:
- Reduced bandwidth consumption in local or geographically distributed networks. If a Relay Agent is configured on each site, a patch is only downloaded once and distributed to client computers
- Reduced hardware load from the GFI LanGuard server component and distributed amongst relay agents
- Using multiple Relay Agents increases the number of devices that can be protected simultaneously.
Follow the below recommendations to take full advantage of Relay Agents:
- Keep the number of computers/agents directly connected to the GFI LanGuard server or to one Relay Agent below 100.
- In geographically distributed networks, designate at least one Relay Agent for each remote site. This ensures that each file is only transmitted once from the GFI LanGuard server site to the remote site.
- Fine-tune network use by configuring cascading Relay Agents
Refer to the following sections for information about:
To configure an Agent to act as a Relay Agent:
NOTE
The machine where GFI LanGuard is installed cannot be configured as a Relay Agent. The Relays tab from the Agent's Properties dialog is missing for the GFI LanGuard host.
1. Open GFI LanGuard.
2. Click Configuration tab > Agents Management.
3. Right-click on the Agent you want to configure and select Properties. This opens the Agent's Properties dialog.
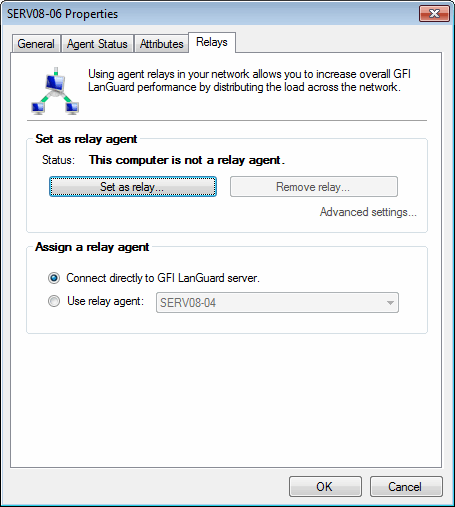
Agent Properties dialog
4. From the Relays tab, click Set as relay...
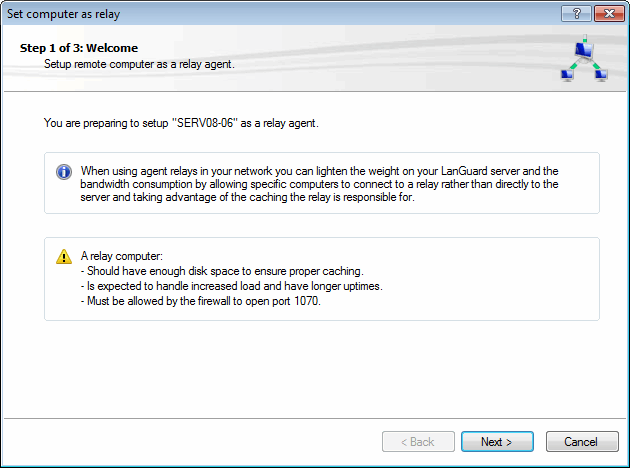
Set computer as relay wizard
5. Carefully ready the warning about resource requirements for the computer running a Relay Agent. Click Next.
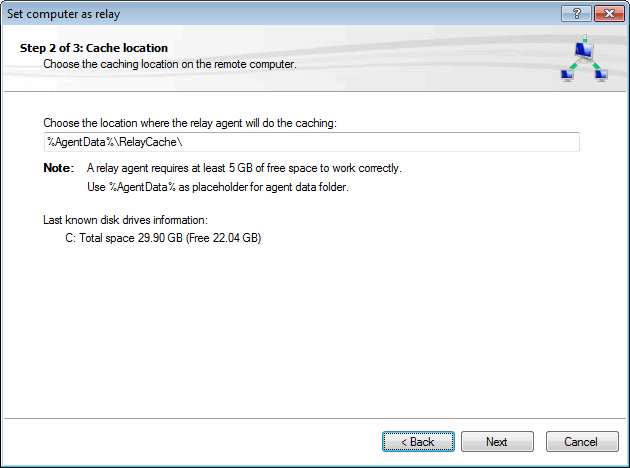
Choose caching directory for the new Relay Agent
6. Choose the caching location for the Relay Agent. The caching directory is used by the relay to store audit and remediation information when auditing remote computers. By default, the RelayCache folder is created in C:\ProgramData\GFI\LanGuard 12\RelayCache. Click Next.
NOTE
Use the %AgentData% placeholder to quickly refer to the Agent's data folder.
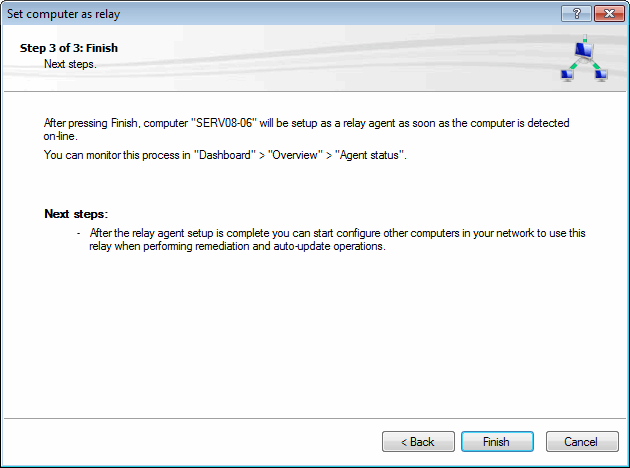
Settings summary step
7. Click Finish.
NOTE
After you click Finish, the selected Agent is configured as a Relay Agent. You can monitor this process from DashboardA graphical representation that indicates the status of various operations that might be currently active, or that are scheduled. > Overview > Agent status.
To configure Relay Agent advanced options:
1. Open GFI LanGuard.
2. Click Configuration tab > Agents Management.
3. Right-click on the Agent you want to configure and select Properties. This opens the Agent's Properties dialog.
NOTE
Alternatively, right-click on an computer/group from the computer tree and select Properties.
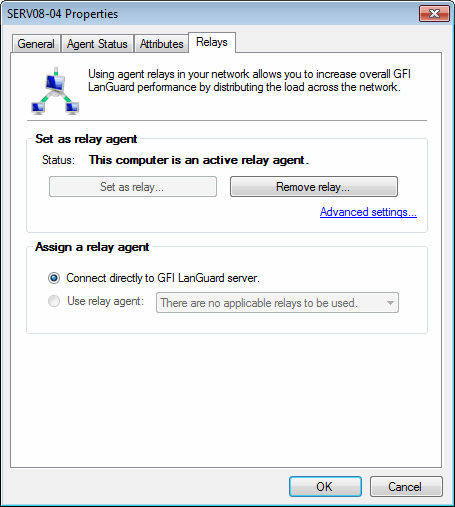
Relay Agent properties - Advanced settings
4. Click Relays tab > Advanced settings...
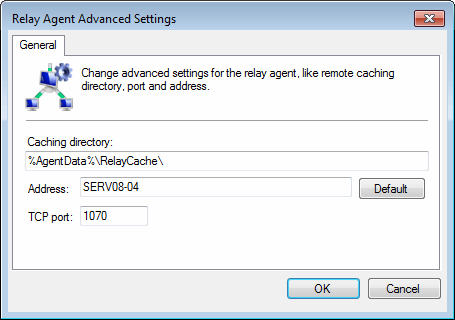
Relay Agent advances settings dialog
5. From the Relay Agent Advanced Settings dialog, configure the options described below:
| Option | Description |
|---|---|
| Caching directory | Location where the relay agent caches information when auditing remote computers. |
| Address | Displays the computer name that is running the relay agent. Click Default to restore the field to its original value. |
| TCP port |
Communication port used by the relay agent to communicate with GFI LanGuard server. Port 1072 is assigned by default and is automatically changed if GFI LanGuard detects that port 1072 is being used by another application. |
6. Click OK.
To connect a computer to a Relay:
1. Open GFI LanGuard.
2. Click Configuration tab > Agents Management.
3. Right-click on the Agent you want to configure and select Properties. This opens the Agent's Properties dialog.
NOTE
Alternatively, right-click on an computer/group from the computer tree and select Properties.
4. Click Relays tab.
5. From the Assign a relay agent area, select Use relay agent and choose the relay from the drop-down menu.
6. Click OK