Spam settings in Kerio Connect Client
NOTE
New in Kerio Connect 8.4!
Kerio Connect contains a sophisticated antispam filter.
You can:
- Let Kerio Connect move spam messages to your Spam folder automatically
- Create a "whitelist" of senders so you are sure you receive their messages
Moving messages to the Spam folder automatically
To automatically send all messages marked as spam to the Spam folder:
- Click Tools > Settings (in Windows Client), or Kerio Connect > Settings (in Mac Client), or your name > Settings (in Web Client).
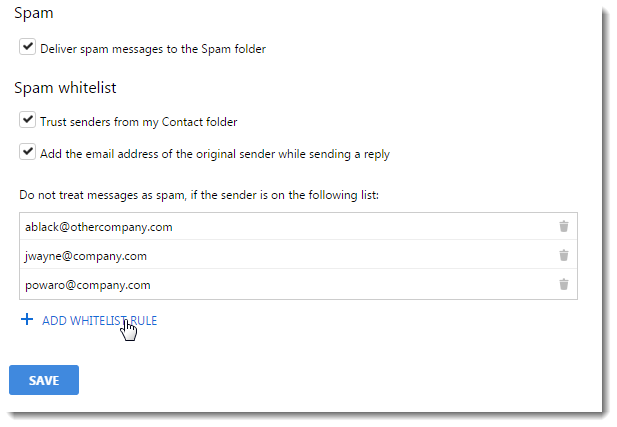
- In the Spam section, select Deliver spam messages to the Spam folder.
- Click the Save button.

Creating a spam whitelist
In Kerio Connect Client, you can create a special whitelist of email addresses. Messages sent from these addresses will never be considered spam.
To add email addresses to your whitelist:
- Click Tools > Out of Office (in Windows Client), or Kerio Connect > Out of Office (in Mac Client), or your name > Out of Office (in Web Client).
- In the Spam section, under Spam whitelist, click the
plussign. - Type the email addresses you want to add to the whitelist.
- (Optional) Select Trust senders from my Contact folder.
- (Optional) Select Add the email address of the original sender while sending a reply.
- Click the Save button.

Adding addresses from email messages
NOTE
New in Kerio Connect 8.5!
You can add messages to your whitelist directly from any messages you receive.
- Select a message in Kerio Connect Client.
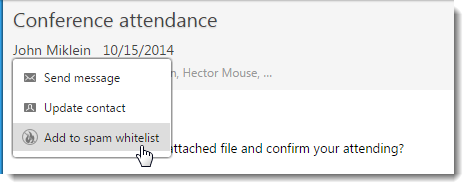
- Click any name or email address in the message header.
- Click Add to spam whitelist.

Kerio Connect adds the email address to your spam whitelist in your Kerio Connect Client settings (see above).