Sorting email messages in Kerio Connect Client
In Kerio Connect Client, you can:
- Sort messages within individual folders using different criteria
- Sort received messages into different folders using rules you set up
Sorting messages within a folder
In Kerio Connect Client, you can sort messages according to various criteria.
Kerio Connect Client remembers your preferences in each individual folder.
Preview pane on the right
- Go to a folder where you want to sort the messages.
- Click the Sorting icon
 in the bottom bar.
 - Select how you want to sort the messages.
- To sort messages in the reverse order, repeat the same procedure. For example, if you sorted messages by date, with the most recent on top, click Date again to list them with the oldest on top.
Preview pane on the bottom or hidden
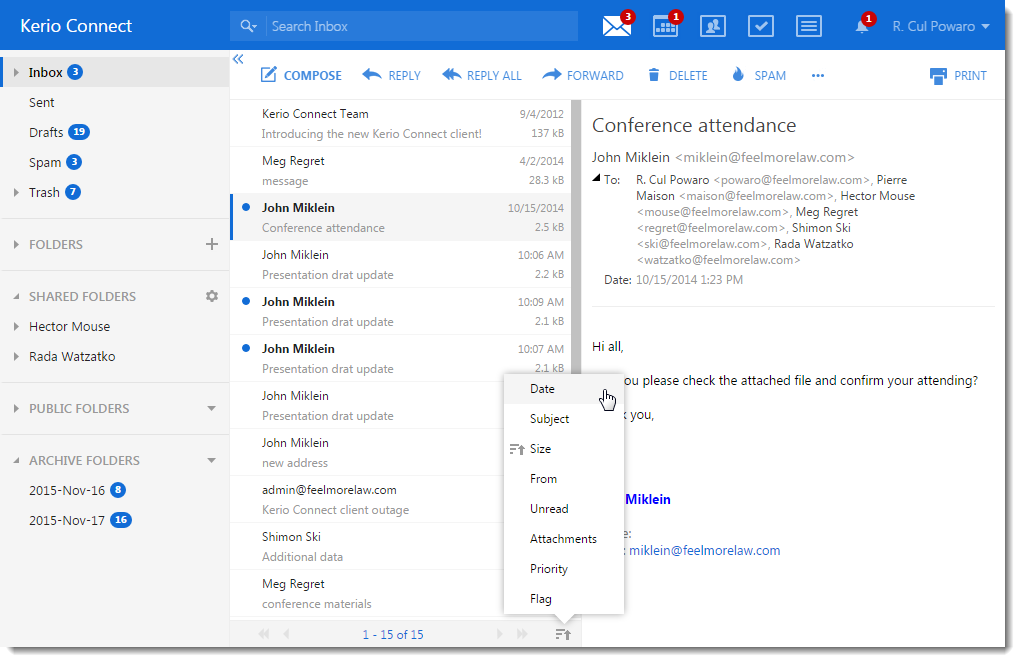
- To sort messages, click any header in the message list.
- To reverse the order, click the same header again.
Sorting messages into folders
Messages delivered to Kerio Connect Client are stored in the Inbox folder.
If you have additional folders, you can move messages in three different ways:
Drag messages
You can drag messages to another folder.
Use the context menu
NOTE
New in Kerio Connect 8.5!
Right-click a message, click Move and select a destination folder.
Select the Move also future messages from checkbox to create a filter rule for messages from the same sender.

Create filters
Create filters with various conditions to move them automatically.
Creating filters
To automatically sort messages into folders or forward them to another address, use filters.
The order of the filters is important (see Arranging the order of filters below).
- Click Tools > Settings (in Windows Client), or Kerio Connect > Settings (in Mac Client), or your name > Settings (in Web Client).
- In the Filters section, click New filter.
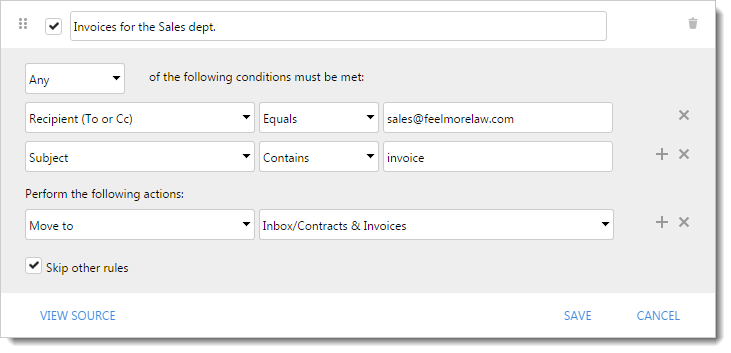
- Type a name for the filter.
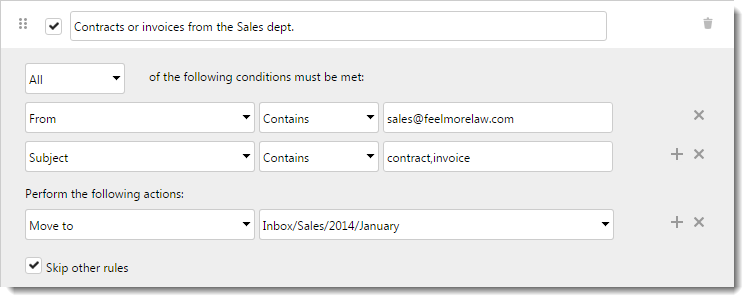
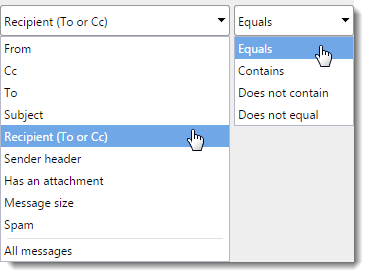
- Set the conditions for the filter. Use a comma (,) or semi-colon (;) to separate multiple items (see Example 3 below).
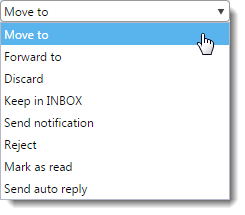
- Set the action to be taken.
- You can also select the Skip other rules option (see below).
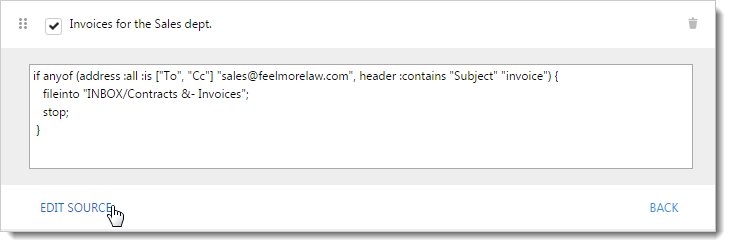
- You can edit the Sieve script of the rule by clicking on View Source > Edit Source.
- Click Save.
Kerio Connect 8.4 and older
- Click your name in Kerio Connect Client and select Settings.
- In the Filters section, click New Filter.
- To display all filter settings, click the icon

- Set your filter(s).

- For each filter, you can also check the Skip other rules option (see below).
- Save your settings.
Arranging the order of filters
The order of filters is important. The filter at the top of the list is applied first.
You can drag & drop filters to sort the list.
If you check the Skip other rules option, no further filters are applied when the filter's action is executed.
See Example 1 below.
Editing and deleting filters
Click a filter to display it.
Double-click a filter to edit it.
To disable a filter temporarily, unselect the filter checkbox.

To delete a filter, click the Trash icon next to the filter name.

NOTE
For Kerio Connect Client 8.4 and older, hover you mouse over a rule and click the edit or delete icons.
Examples of filtering rules
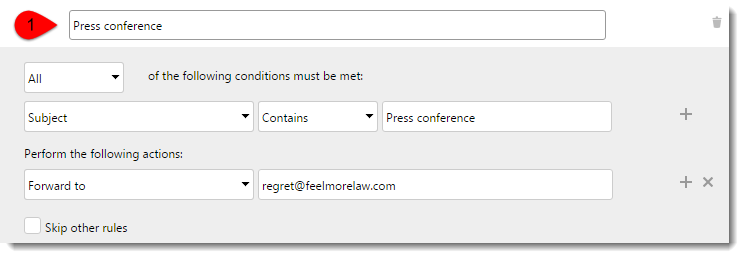
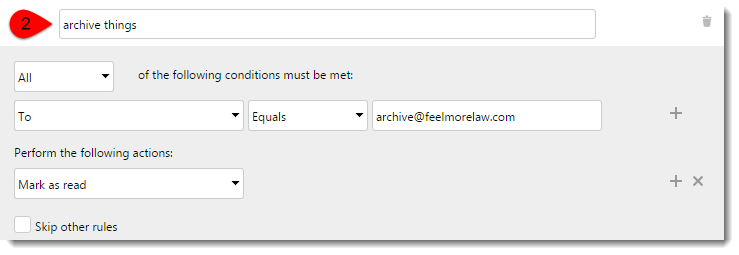
Example 1: Order of filters
Mr. Powaro receives a message entitled Dept. meeting from Hector Mouse (email address mouse@feelmorelaw.com).
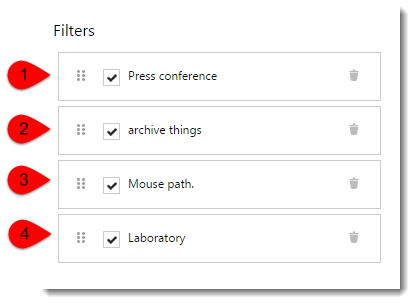
Kerio Connect checks the filters from 1 to 4:
- Filter 1 forwards messages with subject Press
conference to
regret@feelmorelaw.com. As the subject is notPress conference, this filter does not apply and Kerio Connect continues to filter 2.
- Filter 2 marks messages from
archive@feelmorelaw.comas read. As the sender is notarchive@feelmorelaw.com, this filter does not apply and Kerio Connect continues with filter 3.
- Filter 3 moves messages from
mouse@feelmorelaw.comto folderPathology department. This condition is met. The message is moved to folder Pathology department. In the filter 3 definition, the option Skip other rules is checked, so Kerio Connect applies filter 3 and skips the other filters.

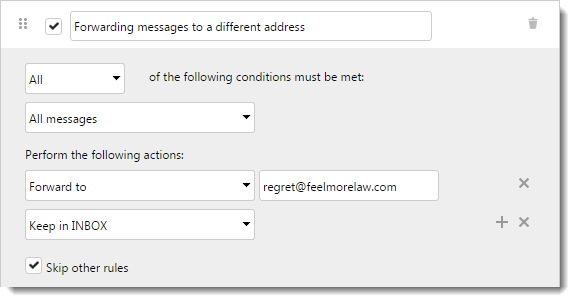
Example 2: Forwarding incoming messages to another email address
Creating a filter for forwarding incoming messages to another address.
Example 3: Adding multiple entries to an item in the rule
If you want to add multiple entries to an item, use a comma (,), or a semi-colon (;).
Messages from the address sales@feelmorelaw.com which contain the words contract or invoice in the subject are moved to folder Contract & Invoices.