Add storage to the XenServer virtual appliance
By default, all Exinda Virtual Appliances come with a single 50GB (fixed-size) disk. Usually, you will want more storage for features such as WANWide Area Network Memory and Edge Cache. This is achieved by adding an additional disk to the Virtual Appliance.
The size of the disk you should add largely depends on the amount of RAM allocated to the Virtual Appliance. As a general rule, you should add a maximum of 100GB of disk storage per 1GB of RAM. So if you have given 4GB of RAM to your Virtual Appliance, you can add up to 400GB of extra storage.
IMPORTANT
You must power off the virtual appliance while changing the virtual machine configuration.
- From the Storage tab in the Exinda Virtual Appliance settings, click Add.
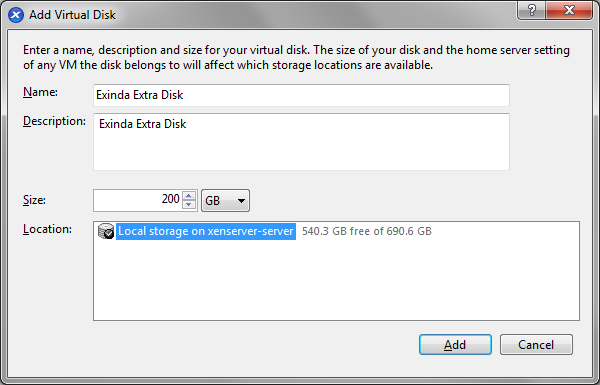
- Specify the size of the additional disk to create. This space will be added to the default 50GB that comes with the Virtual Appliance. So if you add a 200GB disk here, the total storage for the Virtual Appliance will be 250GB.
- Then click Add. The Virtual Appliance storage should look something like this:

- When the Virtual Appliance is next booted, you can use the storage commands in the CLICommnad line interface to provision the new storage. The
show storagecommand lists the current storage allocations as well as the Virtual Appliance's disks.
(config) # show storage
Services:
cifs: available - 3743.46M free of 3876M total
edge-cache: available - 3723.53M free of 3872M total
monitor: available - 9882.83M free of 10G total
users: available - 974.62M free of 1024M total
wan-memory: available - 17.21G free of 17.65G total
Disks:
xvda10(internal): in use - 36.22 GB
xvdb: not in use - 214.7 GB
Total: 36.22
Unallocated: 0
- The output shows that our new 200G disk is called 'xvdb' and it's currently not in use. The
storage disk addcommand is used to provision the new disk.
(config) # storage disk add xvdb
This will erase all data on the disk. Do you really want to do this (Y/N)? [N] Y
- After this command has executed, another look at
show storageshows that the new disk is now in use and our 200G is ready for allocation.
(config) # show storage
Services:
cifs: available - 3743.46M free of 3876M total
edge-cache: available - 3723.53M free of 3872M total
monitor: available - 9882.83M free of 10G total
users: available - 974.62M free of 1024M total
wan-memory: available - 17.21G free of 17.65G total
Disks:
xvda10(internal): in use - 36.22 GB
xvdb: in use - 200.00 GB
Total: 236.21G
Unallocated: 200G
For more information on adding disks in general and allocating storage, see Configuring Storage.