Additional NICs
By default, all Exinda Virtual Appliances come with four NICs. The first NIC is the Management Interface (for managing the Virtual Appliance) and the second NIC is the Auxiliary Interface (for use with HA, clustering, and out-of-path deployments).
There are 2 options when it comes to placing the Virtual Appliance in line:
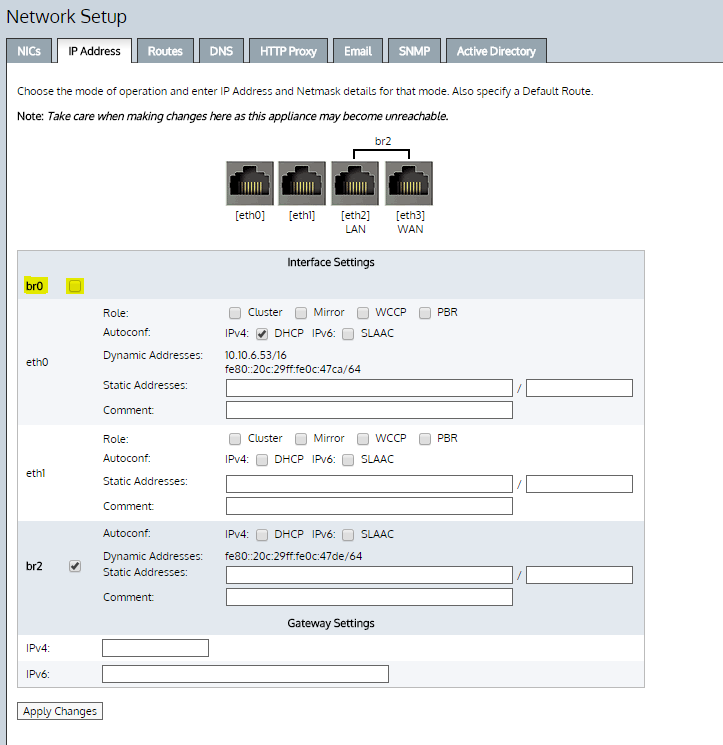
- Convert the first two NICs into a bridge, so that the Management Interface becomes a LANLocal area network Interface and the Auxiliary Interface becomes a WANWide Area Network Interface. This is achieved by booting into the Virtual Appliance and navigating to the Configuration > System > Network > IPInternet protocol Address page on the Web UI, advanced mode. From this page, you can select the br0 checkbox to bridge the first two NICs together. In order to manage the Virtual Appliance, an IP Address must be specified for this bridge. Stay cautious when using this option as this will cause the first two NICs to be bridged.
IMPORTANT
You must power off the virtual appliance while changing the virtual machine configuration.
- Use the 2 extra NICs as LAN and WAN ports. These 2 additional NICs can be bridged to allow the Virtual Appliance to be placed in line.
The following steps describe how to add extra NICs to the Virtual Appliance. You need to add extra NICs in pairs, in order to create LAN/WAN bridges.
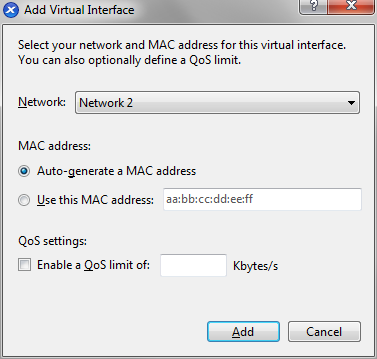
- From the Networking tab in the Exinda Virtual Appliance settings, click Add Interface.
- Choose the network to map this new NIC to, then click Add.
- Take care when using this option as this will cause the first two NICs to be bridged.
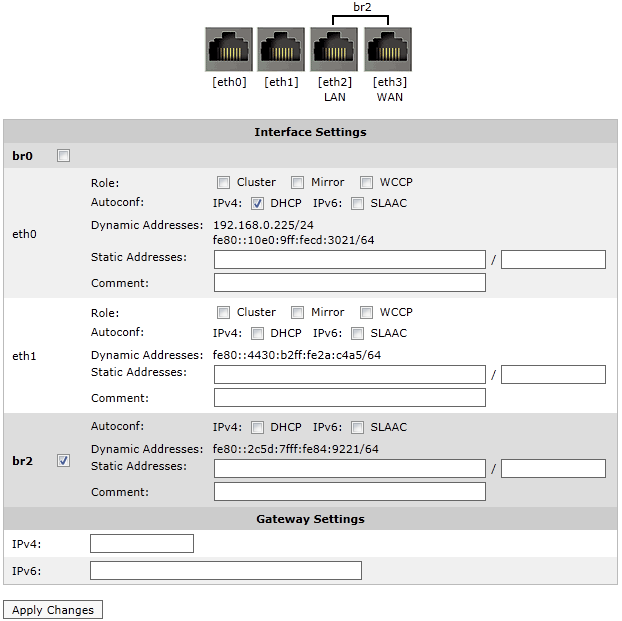
- When the Virtual Appliance is next booted, the new NICs will be automatically detected and any additional NIC pairs will be bridged. Below is what the System -> Network -> IP Address page on the Web UI looks like after 2 extra NICs have been added.