Increase storage by adding new virtual drives
During the process of installing the virtual machine, you needed to connect the virtual hard drive (VHD) to the Exinda Virtual Appliance. Prior to powering the VM on for the first time, it is likely that you should need to increase the size of the VHD. You can also make this adjustment after bringing the Exinda Virtual Appliance into service. You make adjustments to the size of the VHD in the Hyper-V Manager by adding additional hard drives to the VM.
Prerequisites
Before starting this task, ensure that the virtual machine is switched off.
Procedure
- Open the Hyper-V Manager.
- In the left pane, right-click on the virtual machine you need to edit and select Settings. The Settings dialog box for the virtual machine opens.
- In the left pane, under Hardware, select any IDE Controller item. The Hard Drive settings open in the right pane.
- Select the Hard Drive option in the right panel and click Add.
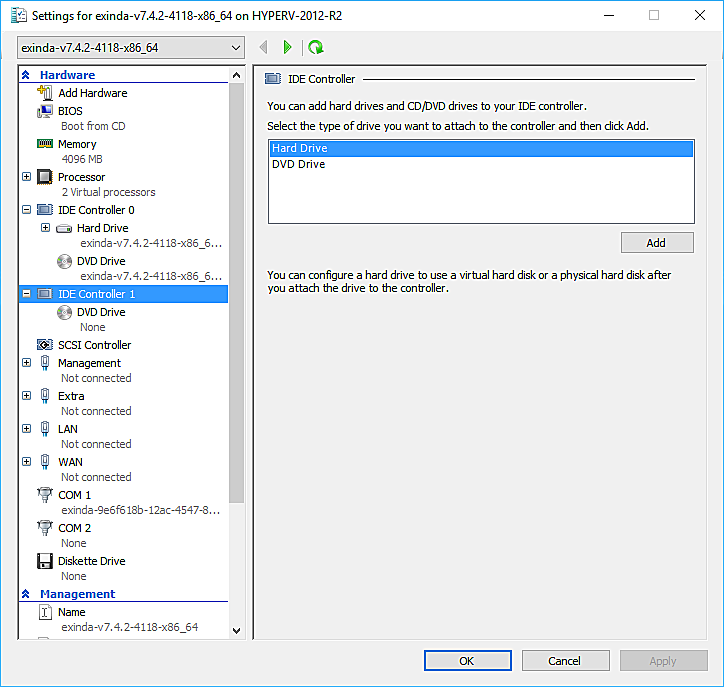
- In the Hard Drive section, select “IDE Controller 1” as the Controller and “1 (in use)” as the location. By default, this is the only slot available in the virtual machine to which to insert a new Virtual Hard Drive. However, if more hard drives are needed in the future, you could remove the DVD Drives present by default given that these are not needed in the appliance. In such a case, Controller 0: Location 1 and Controller 1: Location 0 will also be available for further use.
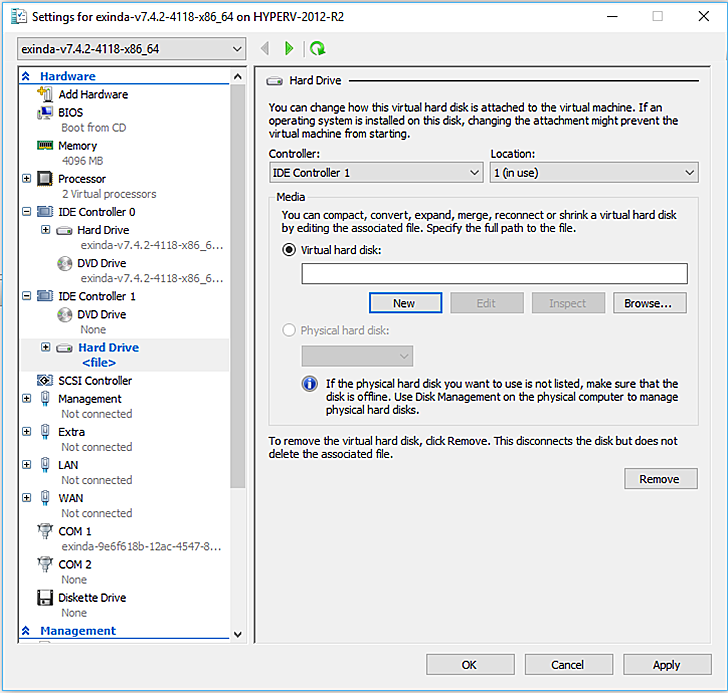
- Click New. The New Virtual Hard Disk wizard opens.
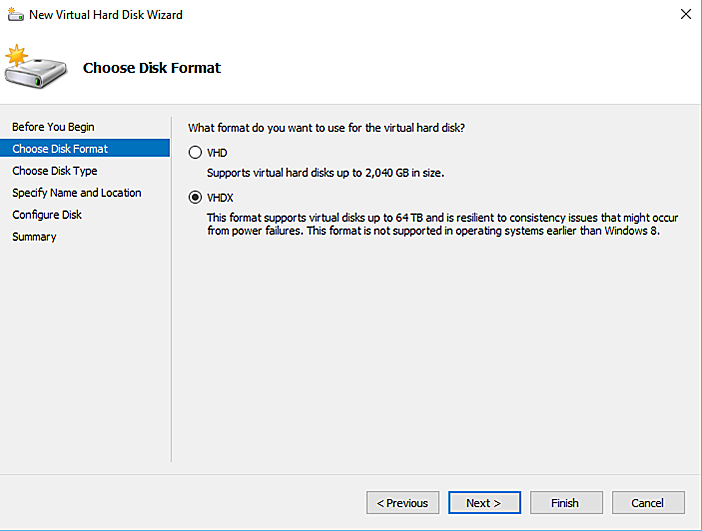
- Select VHDX as the Disk Format type and click Next.
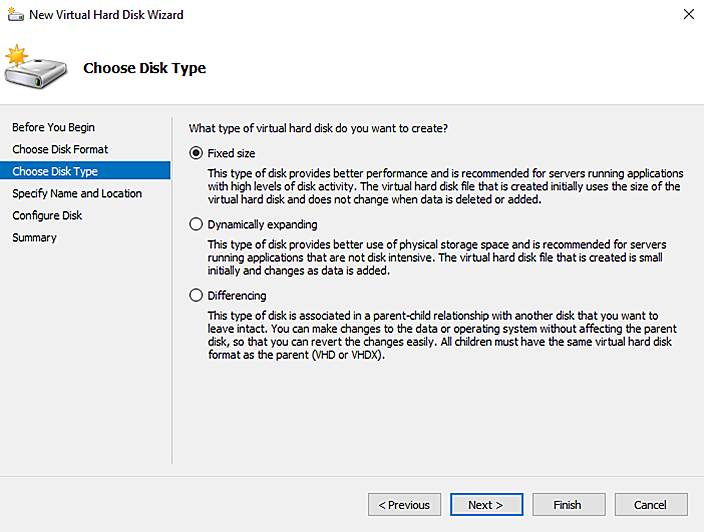
- In the Choose Disk Type section, select the Fixed Size option and click Next.

- Specify a Name and Location for the virtual hard drive, and click Next.
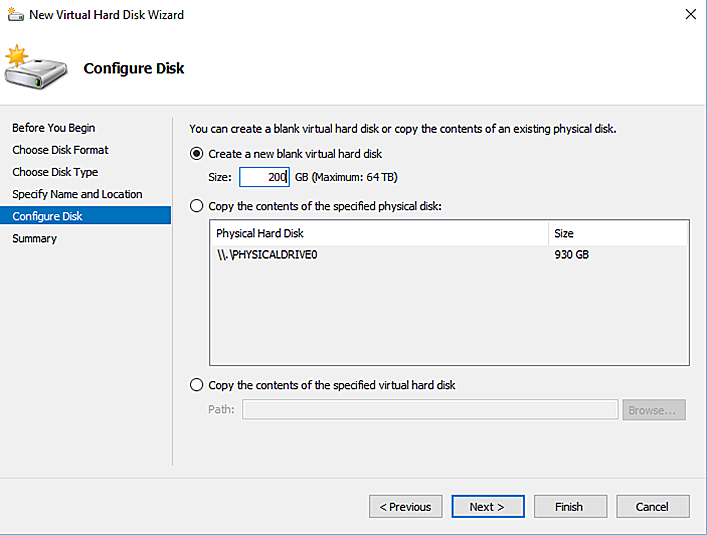
- Set the Disk Size based on the license you have acquired and then click Next. The minimum recommended sizes are the following:
- EXNV-VM Small: 250 GB Total (Add a 200GB Disk)
- EXNV-VM Medium: 250 GB Total (Add a 200GB Disk)
- EXNV-VM Large: 500 GB Total (Add a 450GB Disk)
- EXNV-VM Extra Large: 500 GB Total (Add a 450GB Disk)
- EXNV-VM Extra Extra Large: 500 GB Total (Add a 450GB Disk)
- Click Finish to create the hard drive. This can take a few minutes.
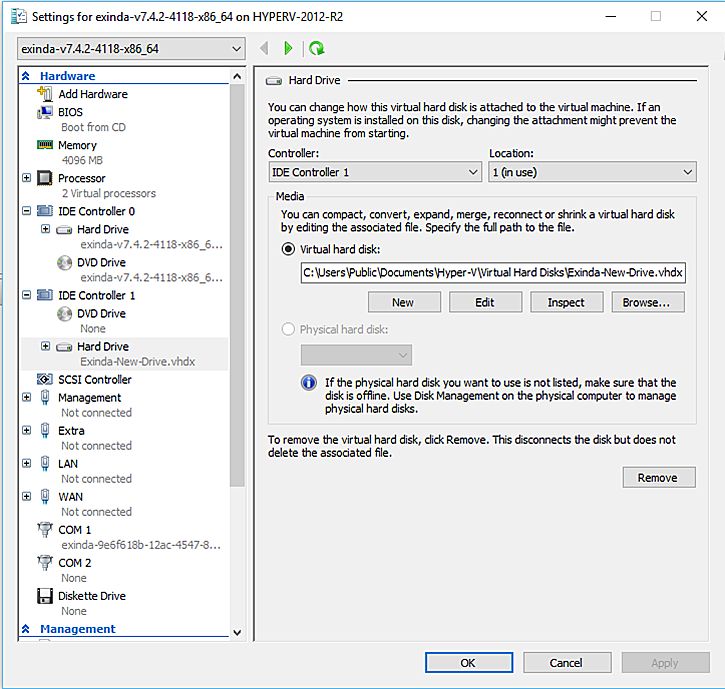
- When the Hard Drive settings page for the newly created drive opens, click OK.
- Start the virtual machine. When the VM starts, it will automatically recognize the new drive, but the new storage must be manually added the virtual appliance.
NOTE
Before connecting, the management interface must already have been configured with an IPInternet protocol address or will obtain an IP address using DHCPDynamic Host Configuration Protocol. You need to make sure that the Management Interface is connected to the proper Virtual Switch in your Hyper-V environment.
- Find the IP address assigned to the management interface by right-clicking on the VM and selecting the Connect option. This provides console access.
- Log on to the appliance using the default credentials (username: admin, password: exinda). You might need to accept the EULA before proceeding.
- Apply the following commands. The output contains the IP address you need to access the appliance web user interface.
exinda> en
exinda># show int eth0
- Connect through HTTPS to the Exinda appliance using a browser.
- Once logged on, click Configuration > System > Setup > Storage.
- Add the new drive.
NOTE
The following screenshot assumes that the chosen controller was 1, and the location was 0, so the new drive is sdd.
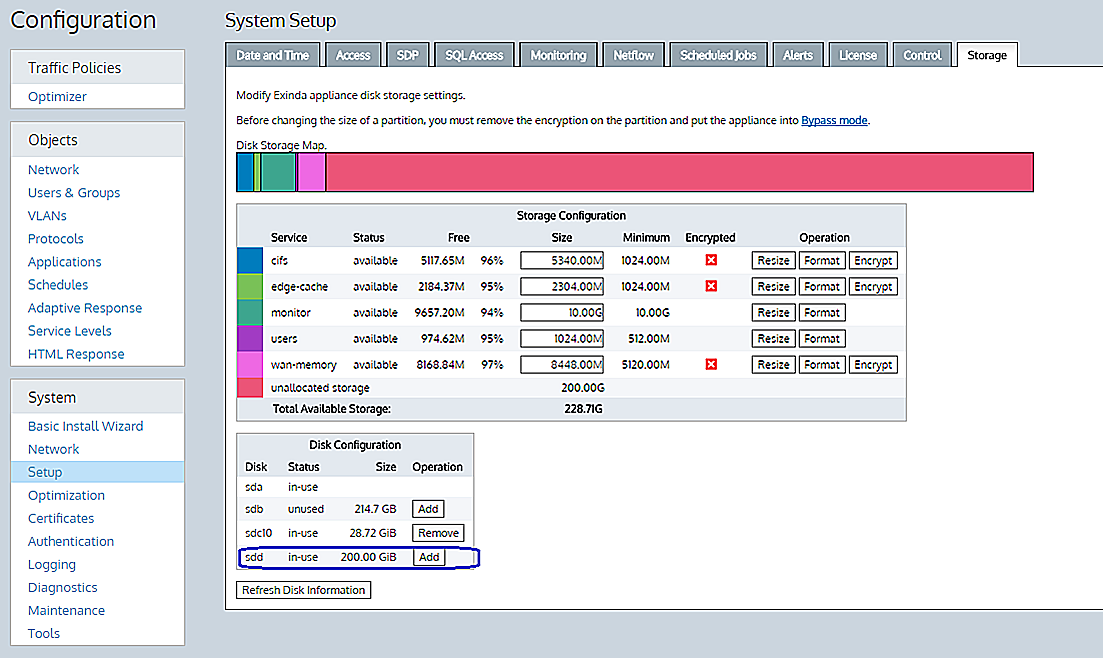
The new space appears as “unallocated storage” inside the “Storage Configuration” section.
NOTE
Exinda recommends that you resize the “monitor” partition to at least 100GB. If you are licensed for acceleration, you should allocate most of the remaining storage in "wan memory" partition (cache partition for all TCPTransmission Control Protocol protocols), but if you are accelerating CIFS/SMB protocols, allow some storage in the "cifs" partition.
- Allocate the storage as appropriate.