Attaching an Archive Store
GFI Archiver can be detached and attached again, for example when moving GFI Archiver to a new server. For information on how to detach an Archive Store, refer to Detaching an Existing Archive Store.
1. From Configuration tab, click Archive Stores.
2. Click Attach Archive.
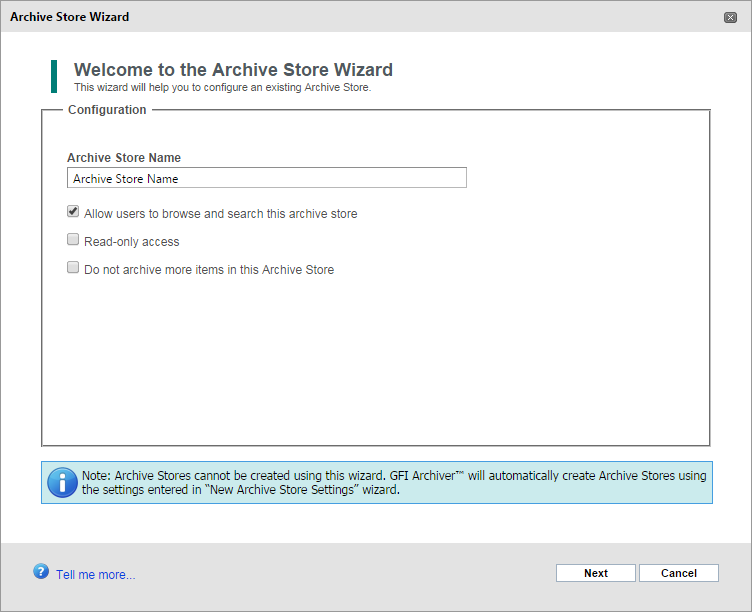
Attaching an Archive Store
3. In the Configuration screen, perform one of the following:
Archive Store Name
|
Move cursor in this field and type to edit the current name. |
Allow users to browse and search the archive store
|
Select to enable users to search within this particular Archive Store. |
Read-only access
|
Enable this option to stop emails from being deleted from the selected Archive Store (when Email Deletion is enabled). While emails can be viewed, new emails are not archived. Additionally, users are also prevented from adding labels to archived emails. |
Do not archive more emails in this Archive Store
|
When enabled, no further emails are archived in the selected Archive Store and it is marked as 'Full'. If Email Deletion is enabled, users are able to remove emails from this Archive Store. Additionally, users are able to add labels to archived emails. A new archive store will be created when new emails need to be archived to that particular date range. |
4. Click Next.
5. Select the database type where you want to store archived emails and click Next.
6. Specify the Database File Location, Email File Location and Search Index Location and click Next.
7. Review the Archive Store Summary and click Next.
8. Click Finish.