Configuring resources in Kerio Connect
Resources are meeting rooms and other facilities, such as conference rooms, cars, parking lots.
You can schedule resources in an email client when creating new events in calendars.
Resources do not count against your license.
Creating new resources
- In the administration interface, go to Accounts > Resources.
- Select a domain and click Add.
- Type a name for the resource and select the resource type.
- Room — The resource is available as a room/location or as an attendee
- Equipment — The resource is available as an attendee
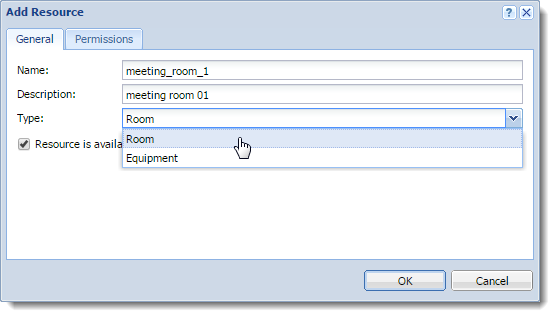
- Select the Resource is available option.
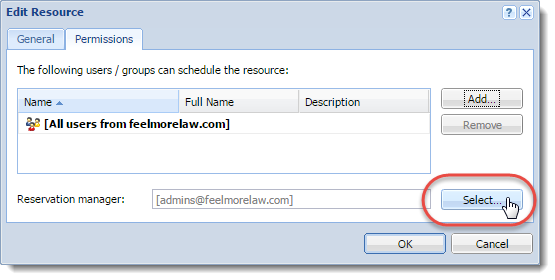
- On the Permissions tab, add users who can schedule the resource by default, permissions to use resources are set to all users from the domain. You can add single users, groups, a whole domain, or a whole server.
- On the Permissions tab, select a reservation manager. By default, the domain administrator is the reservation manager. You can add single users, groups, a whole domain, or a whole server. For details, see the Assigning reservation managers section below.
- Click OK.
Kerio Connect publishes all resources to a public calendar.
Assigning reservation managers
Each resource has a reservation manager. Reservation managers are users who manage the resource calendar.
In Kerio Connect Client, resource managers can:
- Add events directly to the resource calendars, and edit them
- Delete any event in the resource calendar
NOTE
In Kerio Connect 9.0.2 and older, resource managers can only delete other users' reservations for resources.
By default, the domain administrator is the reservation manager. To change the reservation manager:
- In the administration interface, go to Accounts > Resources.
- Double-click a resource and switch to the Permissions tab.
- Click Select in the Reservation manager section. Kerio Connect displays a list of all users and groups.
- Switch to the desired domain and select a user as the reservation manager. You can add single users, groups, a whole domain, or a whole server.
- Click OK.
Removing resources
You can remove resources either temporarily or permanently:
- Temporarily — Double-click the resource in the Accounts > Resources section, and clear the Resource is available option.
- Permanently — Select the resources in the Accounts > Resources section, and click Remove.
Using resources
For more information refer to Scheduling resources in Kerio Connect.
Troubleshooting
If any problem with resources occurs, consult the Debug log: right-click in the Debug log area and enable Resource Service.