Brooktrout Fax Board
The list of currently supported Brooktrout cards is available from http://go.gfi.com/?pageid=FM_BrooktroutCards. Installation guides, product documentation and support are available from the Dialogic Technology website at http://www.dialogic.com/default.htm.
NOTES
- The current Brooktrout boards are Universal PCI (3.3/5 volts); however always check the technical details of the adapter to make sure it is suitable for the server hardware.
- You must always install GFI FaxMaker software before installing Brooktrout or Trufax drivers.
- Ensure that the correct Brooktrout card driver is installed. For more information on Brooktrout drivers refer to http://go.gfi.com/?pageid=FM_BrooktroutDrivers.
Brooktrout TR1034, Trufax ISDN cards or Trufax Analog cards
To install Brooktrout fax cards:
1. Switch off the computer where you want to install the Brooktrout Fax card. Plug in the card following the instructions supplied with the hardware.
2. Restart the computer. Ignore any Add New Hardware wizard dialog by pressing Cancel.
3. Navigate to <GFI installation folder>\brooktrout\.
4. Double click the executable file brooktrout_tr1034.exe.
5. In the Welcome dialog, click Next. Read and accept the End User License Agreement dialog and click Next to continue installation.
6. Set to the path where GFI FaxMaker is installed. If require changing the default installation path, clicking Browse and specify the required path; else continue with the installation, by clicking Next.
7. Click Install to install drivers and click Finish to finalize driver installation.
NOTE
If the installation has detected existing Brooktrout drivers on the computer, you are asked to reboot your computer. This is required just in case the mentioned drivers where being used (i.e. were locked) and could not be replaced with the newly installed drivers.
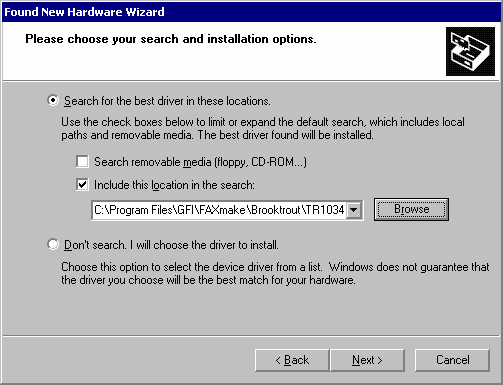
Add New Hardware wizard: Search and install options dialog
8. Go to Control Panel > Add New Hardware. Select Include this location in the search and provide the path where you have installed the Brooktrout TR1034 drivers. If you have opted to install the drivers in the default path, you should find these drivers in the same path where GFI FaxMaker is installed; else you should specify the same location that you have used in step 6 of this installation.
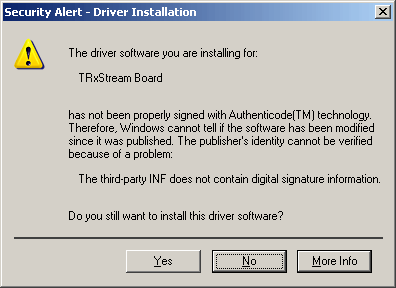
Confirm installation of unsigned drivers
9. Confirm the installation of uncertified drivers. Click Yes to proceed and install the new hardware.
10. Go to Start > All Programs > GFI FaxMaker Brooktrout TR1034 Drivers > Brooktrout Configuration Tool.
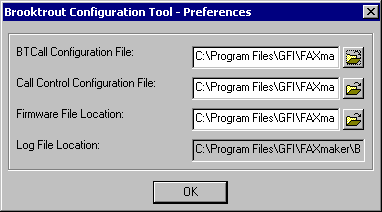
Configuration tool preferences dialog
11. Click Next and confirm the file paths. Click OK to proceed with setup.
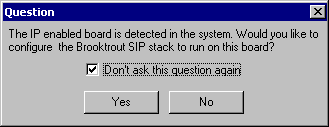
Configure Brooktrout SIP stack
12. If you have an IP enabled fax card, you will be asked to configure the Brooktrout SIP stack (i.e. FOIP - Fax over IP). Click Yes to proceed to the main configuration tool dialogs.
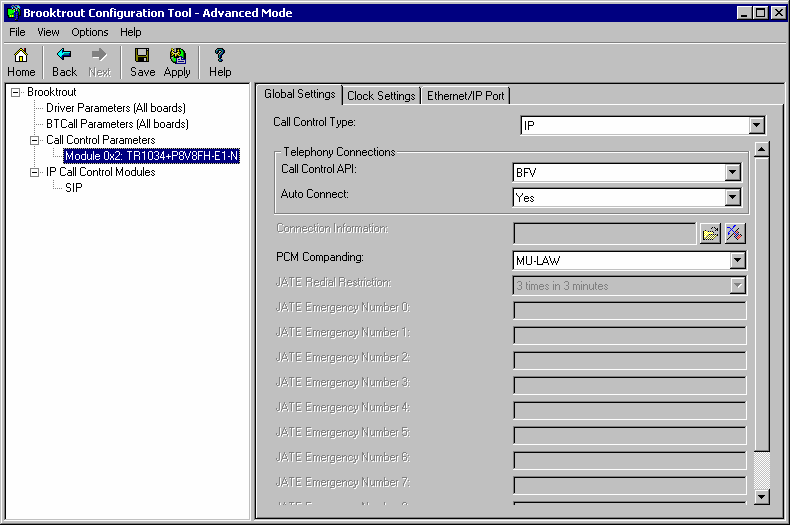
Brooktrout configuration tool window
13. Check that the settings match your setup. If you did not make any configuration changes (i.e. you have left all settings as default), click Apply and close the Brooktrout Configuration tool. If you need configuration assistance, you can refer to the help included in the configuration tool.
NOTES
1. If the drivers do not work immediately when you start the GFI FaxMaker Fax Server or some lines refuse to send or receive, please reboot the computer.
2. If an analog board refuses to dial out, make sure that the Tone Dialing option is enabled for the line in the GFI FaxMaker Configuration > Lines/Devices node.
3. If using multiple Brooktrout boards in one chassis, make sure that they are of the same type. Having different Brooktrout boards in one chassis is not a supported setup. Also make sure that the rotary switch on the Brooktrout boards are setup in as sequential numbers starting from 2. I.e.: Module 1 rotary switch set to 2, Module 2 rotary switch set to 3, etc...
Troubleshooting Brooktrout cards
To troubleshoot any hardware installation issues, download the Brooktrout diagnostics software from Dialogic Technology and ensure the card is installed properly. If the card is not recognized or not running, contact Dialogic Technology technical support.
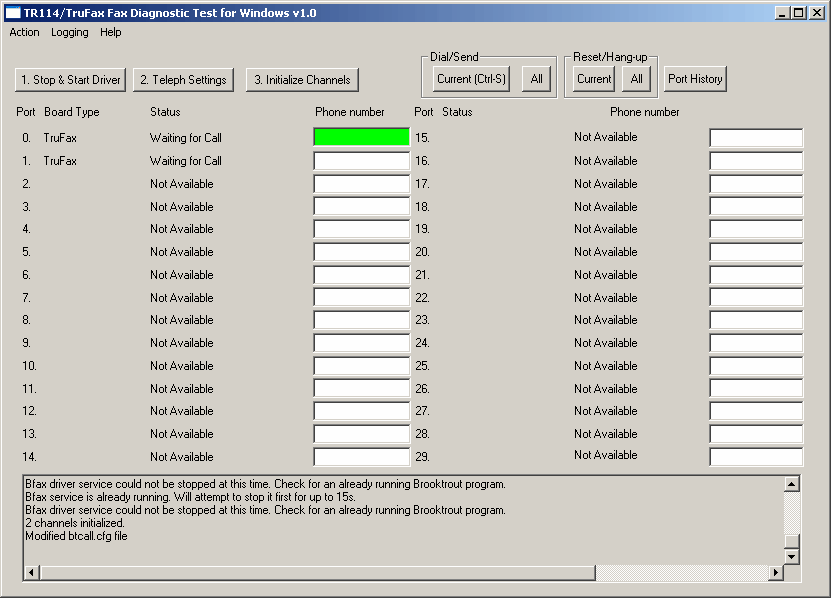
Brooktrout diagnostics software