SSH Module
GFI LanGuard includes an SSH module which handles the execution of vulnerability scripts on LinuxAn open source operating system that is part of the Unix operating system family./UNIX based systems.
The SSH module determines the result of vulnerability checks through the UI (text) data produced by an executed script. This means that you can create custom Linux/UNIX vulnerability checks using any scripting method that is supported by the target operating system.
Keywords
The SSH module can run security scanning scripts through its terminal window. When a security scan is launched on Linux/UNIX based target computers, vulnerability checking scripts are copied through an SSH connection to the respective target computer and run locally.
The SSH connection is established using the logon credentials (i.e. username and password/SSH Private Key file) specified prior to the start of a security scan.
The SSH module can determine the status of a vulnerability check through specific keywords present in the text output of the executed script. These keywords are processed by the module and interpreted as instruction for the GFI LanGuard. Standard keywords identified by the SSH module include the following:
| Keyword | Description |
|---|---|
|
TRUE: / FALSE |
These strings indicate the result of the executed vulnerability check/script. When the SSH module detects a TRUE: it means that the check was successful; FALSE: indicates that the vulnerability check has failed. |
|
AddListItem |
This string triggers an internal function that adds results to the vulnerability check report (i.e. scan results). These results are shown in GFI LanGuard after completion of a scan. This string is formatted as follows: AddListItem([[[[parent node]]]],[[[[actual string]]]]) |
|
[[[[parent node]]]] |
Includes the name of the scan results node to which the result will be added. |
|
[[[[actual string]]]] |
Includes the value that will be added to the scan results node. NOTE Each vulnerability check is bound to an associated scan result node. This means that ‘AddListItem’ results are by default included under an associated/default vulnerability node. In this way, if the parent node parameter is left empty, the function will add the specified string to the default node. |
|
SetDescription |
This string triggers an internal function that will overwrite the default description of a vulnerability check with a new description. This string is formatted as follows: SetDescription([New description]) |
|
!!SCRIPT_FINISHED!! |
This string marks the end of every script execution. The SSH module will keep looking for this string until it is found or until a timeout occurs. If a timeout occurs before the ‘!!SCRIPT_FINISHED!!’ string is generated, the SSH module will classify the respective vulnerability check as failed. NOTE It is imperative that every custom script outputs the ‘!!SCRIPT_FINISHED!!’ string at the very end of its checking process. |
Adding a vulnerability check that uses a custom shell script
In the following example a vulnerability check is created (for Linux based targets) which uses a script written in Bash. The vulnerability check in this example will test for the presence of a dummy file called ‘test.file’
Step 1: Create the script
1. Launch your favorite text file editor.
2. Create a new script using the following code:
#!/bin/bash
if [ –e test.file ]
then
echo "TRUE:"
else
echo "FALSE:"
fi
echo "!!SCRIPT_FINISHED!!"
3. Save the file in <GFI LanGuard installation folder path> ..\Data\Scripts\myscript.sh
Step 2: Add the new vulnerability check
1. Launch GFI LanGuard.
2. Click the GFI LanGuard button and select Configuration > Scanning Profile Editor. Alternatively, press CTRL + P to launch the Scanning Profiles Editor.
3. From the middle pane, select the category in which the new vulnerability check will be included (for example, High Security Vulnerabilities…).
4. In the new window, add a new vulnerability by clicking Add in the middle pane.
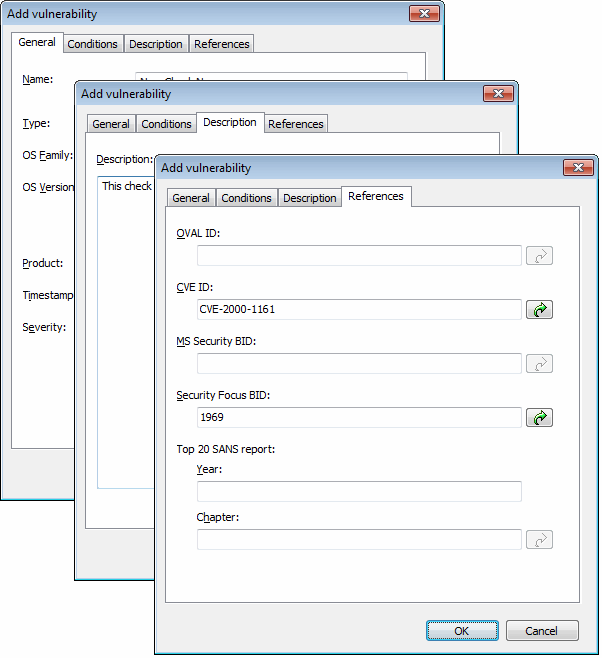
Add vulnerability dialog
5. Go through the General, Description and Reference tabs while specifying the basic details such as the vulnerability name, short description, security level and OVALA standard that promotes open and publicly available security content, and standardizes the transfer of this information across the entire spectrum of security tools and services. ID (if applicable).
6. Choose the Conditions tab and click Add button. This will bring up the check properties wizard.
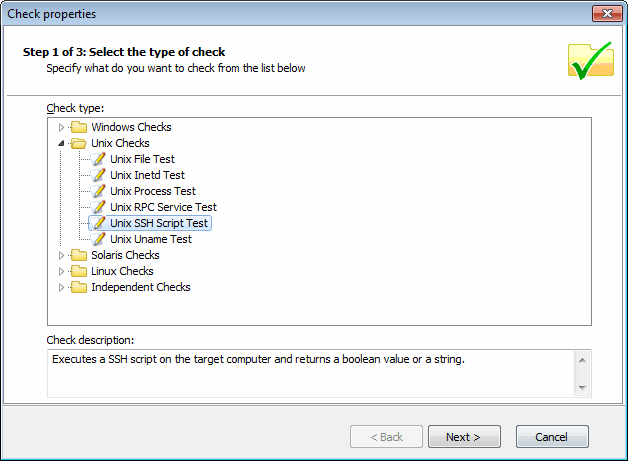
Adding vulnerability checks - Select type of check
7. Select Unix checks > SSH Script Test node and click on Next button to continue setup.
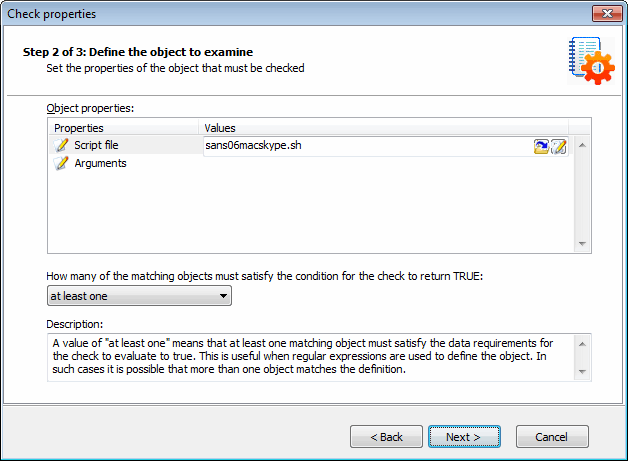
Adding vulnerability checks - Select SSH file
8. Click Choose file and select the custom SSH Script file that will execute during this check. Click Next to proceed.
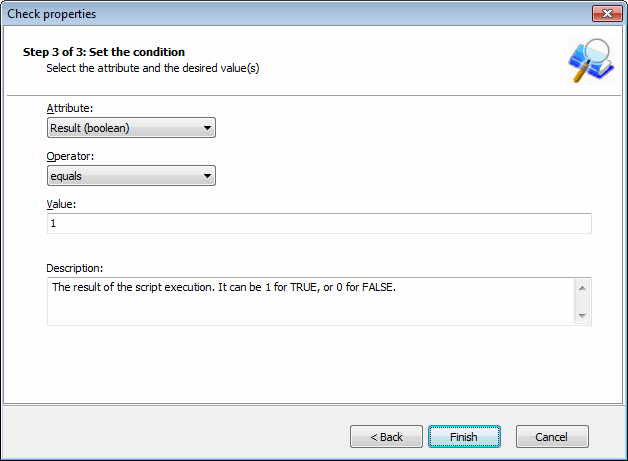
Adding vulnerability checks - Define conditions
9. Select the relative condition setup in the wizard to finalize script selection. Click Finish to exit wizard.
10. Click OK to save new vulnerability check.
Step 3: Test the vulnerability check/script used in the example
Scan your local host computer using the scanning profile where the new check was added.
1. Log on to a Linux target computer and create a file called ‘test.file’. This check will generate a vulnerability alert if a file called 'test.file' is found.
2. Launch a scan on the Linux target where you created the file.