Installation procedure
Important notes
- During upgrade, GFI FaxMaker services and operations are stopped. Ensure that there are no faxes in queue as these are permanently lost during upgrade.
- Check that you are installing GFI FaxMaker on the machine that meets the system and hardware requirements.
- Log on as Administrator or use an account with administrative privileges.
- GFI FaxMaker 19.2 and later offers two types of licensing services:
- Using the GFI Account credentials. The username and password are retrieved from GFI Accounts and assigned to the user at the moment of the registration of the account.
- Using a license key. When upgrading to a new major release you also need to upgrade your license key. For more information refer to Obtaining a GFI FaxMaker subscription.
- Save any pending work and close all open applications on the machine.
- Disable anti-virus software on the server machine during the upgrade. Re-enable it once upgrade is complete.
Start installation
- Download the GFI FaxMaker installer. Go to https://www.gfi.com/products-and-solutions/email-and-messaging-solutions/gfi-faxmaker/download
- Right-click the GFI FaxMaker installer and choose Properties. From the General tab, click Unblock and then Apply. This step is required to prevent the operating system from blocking certain actions by the installer.
- Launch the GFI FaxMaker installer.
- Select installation language and click OK.
- In the welcome screen, click Next.
- To check for a newer build other than the one being installed, select Check for a newer build of GFI FaxMaker on the GFI web site and click Next. Otherwise, select Do not check for a new build and click Next.
NOTE
An active Internet connection is required to check for newer build.
- Read the license agreement and click Agree to accept and proceed.

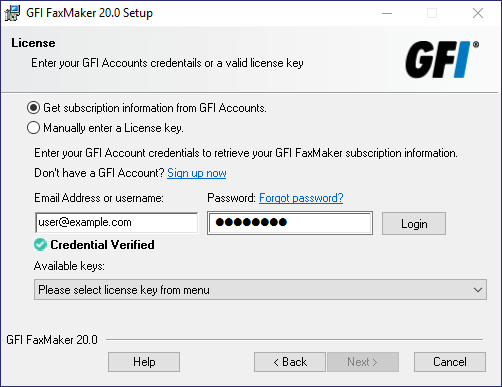
GFI FaxMaker license page wizard
- Select a method to enter your subscription details. The options are:
| Option | Description |
|---|---|
| Get subscription information from GFI Accounts | This option is selected by default. In the Email Address or username and Password fields, enter your GFI Accounts Portal credentials or the account used when signing up to download GFI FaxMaker. Click Login to retrieve the license keys registered to your account. Choose a key from the Available keys drop-down. If you do not have a GFI account yet, click Sign up now and fill in the registration form. For more information refer to Obtaining a GFI FaxMaker subscription. |
| Manually enter a License key | Select this option the copy and paste a license key if you already have one at hand. Click OK to validate the license. |
- Click Next.

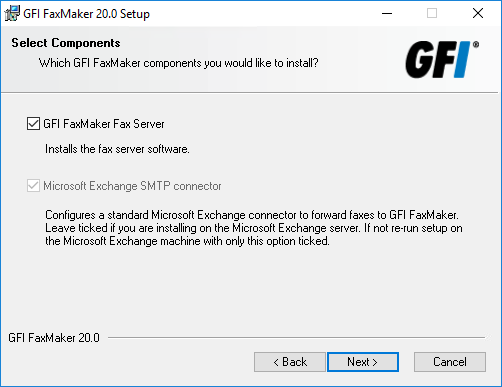
Selecting what components to install
- Select the component to install:
|
Component |
Description |
|---|---|
|
GFI FaxMaker Fax Server |
Installs GFI FaxMaker on the machine. |
|
Microsoft Exchange SMTPSimple Mail Transport Protocol connector |
Installs the GFI FaxMaker Microsoft® Exchange connectors only. Use this option when GFI FaxMaker is not installed on the Microsoft® Exchange server to automatically create the connectors. If choosing this option, in the next screen specify the IP address of the GFI FaxMaker server and proceed to install the connectors. NOTE: Do not select this option when running setup on a machine that is not the Microsoft® Exchange server or not using Microsoft® Exchange as your mail server. |

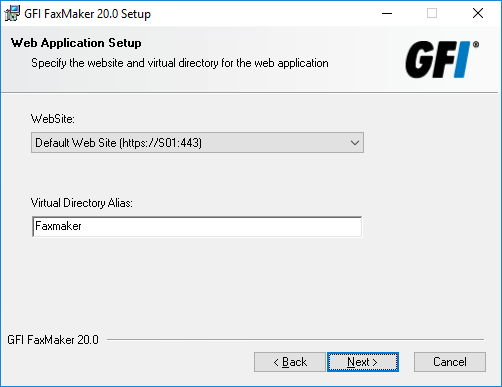
Web application settings
- Choose the IISInternet Information Services website where to host the GFI FaxMaker virtual directory and key in a name for the Virtual Directory, which by default is Faxmaker. For more information about how to use the web interface refer to The GFI FaxMaker web interface. Click Next.

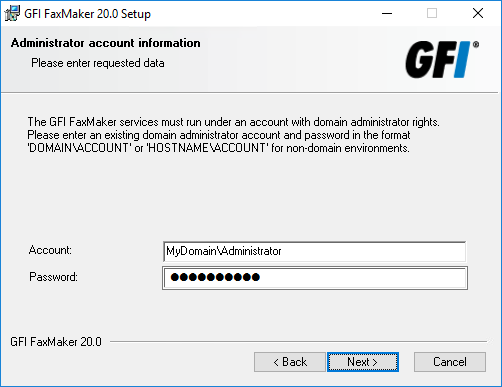
Account name for services
- Provide credentials of an account with administrative privileges, used for GFI FaxMaker services management. Click Next.
NOTE
If changing the password after installing GFI FaxMaker, update the password for the GFI FaxMaker services from the Services applet. When GFI FaxMaker is installed in a domain, these credentials are also used to connect to Active Directory and retrieve the list of users.
- Click Next to continue installing GFI FaxMaker to the default folder, or Browse to select a new installation path.
- Click Next to install GFI FaxMaker. In certain environments, you may be prompted to restart the IIS SMTP service.
- Click Finish.
After installation, the GFI FaxMaker Configuration Wizard is automatically launched to help you configure basic settings. For more information refer to Run the GFI FaxMaker Configuration Wizard.