Create a pre-population job in the Exinda Web UI
Add and configure pre-population jobs in the Exinda Web UI. SMB traffic can be stored in SMB object cache and WANWide Area Network memory cache, and HTTP can be stored in either WAN memory cache or Edge cache depending on the configuration of your policies.
- On your browser, open the Exinda Web UI (
https://Exinda_IPInternet protocol_address). - Key-in the User and Password.
- Click Login.
- Click Configuration > System > Optimization and click the Pre Population tab.
- In the Add New Pre-Population area, type a name for the pre-population job.
- Select the type of cache to pre-populate.
- Type the hostname or IP address of the server containing the cache.
- Type the path to the file or cache directory on the server.
- To recursively fetch all the files in the specified directory, as well as those in sub-directories, select Yes.
- Select the appropriate schedule job for how frequently the cache should be updated. If no jobs are available, create a job schedule.
- If required, type the username and password for the server.
- Click Add New. The job appears in the list of configured Pre-population jobs.
- To begin pre-populating the selected cache, in the list of configured pre-population jobs click Start. The content from the specified location begins to populate the cache.
- To view the communication between the server and the Exinda appliance, click Monitor > Real Time > Conversations.
Examples -
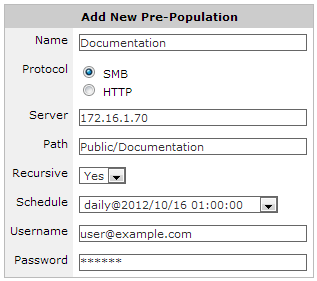
- Intranet Windows File Share—all files and folders from the "Public\Documentation" folder. Show image...
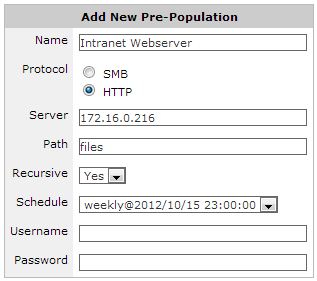
- Intranet HTTP—all files and folders from a directory called "files" on an intranet web server. Show image...