Reports in EMC
In tenant view, click Reports on the top menu to view, edit, or delete existing reports, create new ones, and schedule reports. Besides, the EMCExinda Management Center, SaaS service to centrally monitor and configure multiple Exinda appliances supports updating reports in bulk.

The Report option
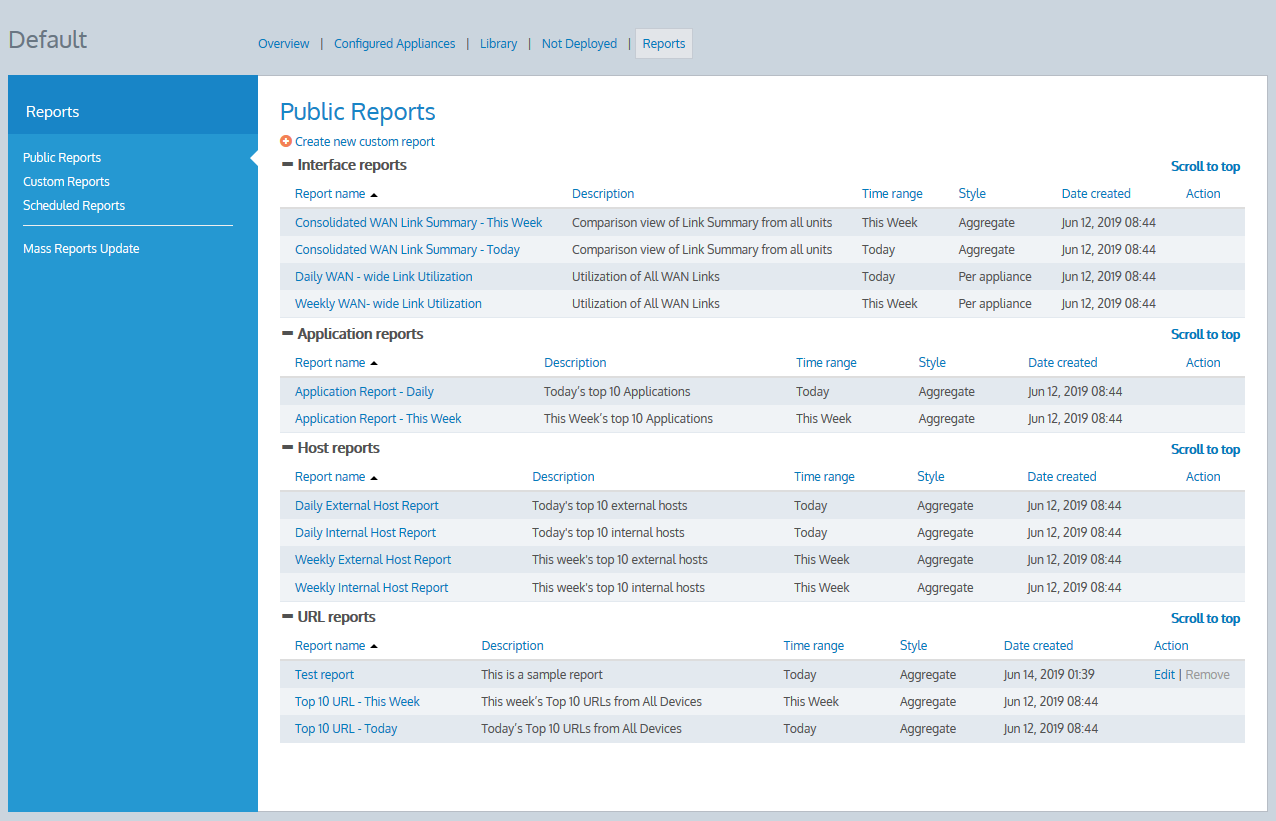
All reports in the EMC are split by report accessibility. Public reports are available for all users. Private reports are available only for the user who created them. Custom reports which you create can be either public or private.
The EMC also includes a set of predefined public reports. You cannot edit or delete these reports.

The Public Reports page
- This hour: From the time now (rounded to 0 decimal places) to
+60 minutes - Last hour: From the time now (rounded to 0 decimal places) to
−60 minutes - Today: Today from
00h00m00sto23h59m59s - Yesterday: Yesterday from
00h00m00sto23h59m59s - This Week: From Monday of the current week,
00h00m00sto Sunday of the current week,23h59m59s - Last Week: From Monday of the previous week,
00h00m00sto Sunday of the previous week,23h59m59s - This Month: From the start of the current month,
00h00m00sto the end of the current month,23h59m59s - Last Month: From the start of the previous month,
00h00m00sto the end of the previous month,23h59m59s - This Year: From the start of the current year,
00h00m00sto the end of the current year,23h59m59s - Last Year: From the start of the previous year,
00h00m00sto the end of the previous year,23h59m59s
Viewing reports
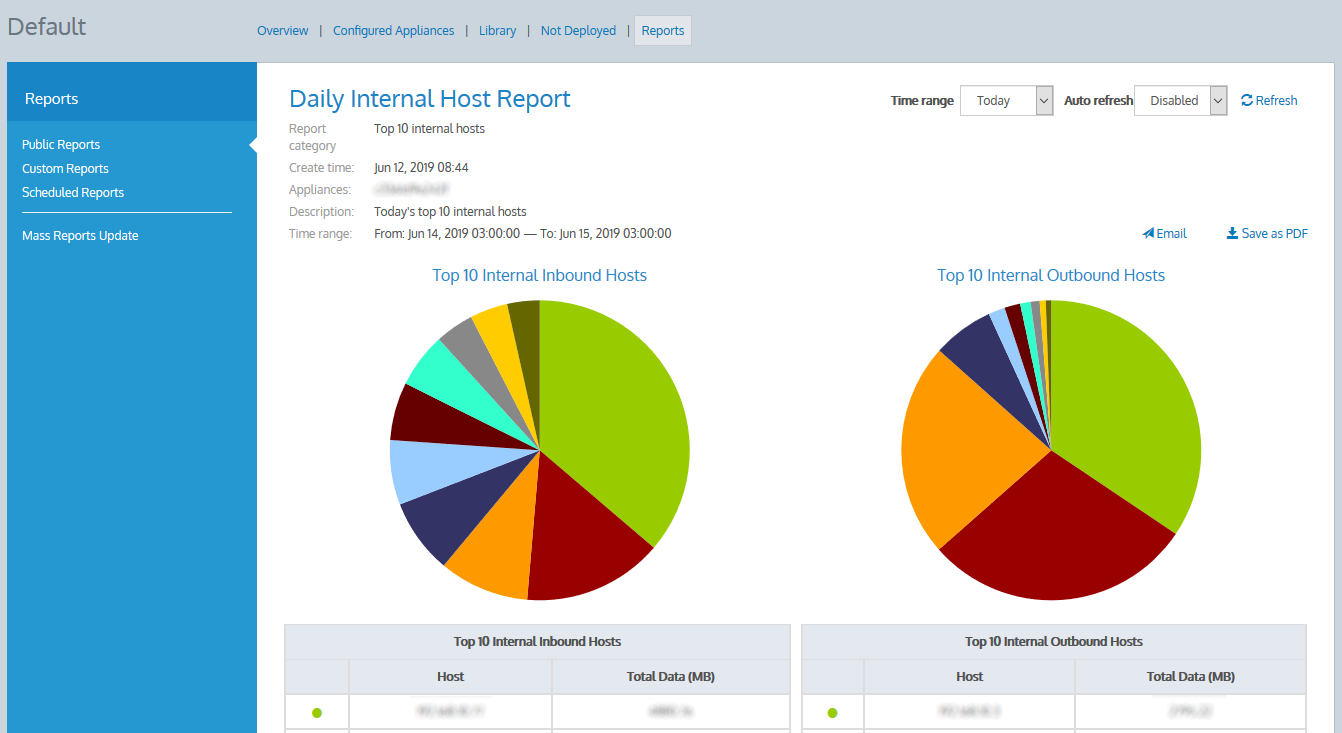
You can view any report in yourbrowser, then export the results into PDF and sent it by email. Additionally, you can personalize the PDF by adding your company's logo.
- Go to the tenant for which you want to view reports.
- Go to Reports >Public Reports or Reports > Custom Reports.
- Select a report that you want to view from the report list. All reports are listed by category. You can also click on any column to sort records by the selected parameter.
The report page opens with the generated report.

A report example
- On the report page, click Save as PDF.
- Specify the report title.
- Optionally, upload a logo image. The EMC supports jpg, gif, png and bmp image file formats. The maximum image size is 1MB. The image resolution must be 1024x450.
- Click Download.
- On the report page, click Email.
- Specify one or more emails (separated by commas) to send the report to.
- Specify the report title.
- Optionally, upload a logo image. The EMC supports jpg, gif, png and bmp image file formats. The maximum image size is 1 MB. The image resolution must be 1024x450 px.
- Click Send.
Creating and editing custom reports
You can create, edit, and delete your own reports. Additionally, you can change visibility, time range, and add or remove appliances for multiple reports in bulk.
- Go to the tenant for which you want to create reports.
- Go to Reports > Custom Reports or Reports > Public Reports.
- Click
 Create new custom report.
 - Enter a Report name and Report description for the new report.
- Select a Report category.
- Choose Report style as Aggregate to include consolidated data of all the appliances you select, or choose Per appliance to include separate data for each selected appliance.
- Set Report accessibility of the report as either Public or Private as required.
- Select a Time range for compiling data in the report. This is based on your time zone settings.
- Select the Appliances you want to include the report.
- Click Create.
- Go to the tenant for which you want to edit the report.
- Locate the report on theReports > Custom Reports or Reports > Public Reports page. You can edit public reports and private reports which you created.
- Click Edit next to the report.
- Change the report settings as required.
- Click Save.
- Go to the tenant for which you want to update reports.
- Go to Reports > Mass Reports Update.
- Under Public Reports and Custom Reports, select the reports for update.
- Select appliances to include in this report.
- Select if you want to Add or Remove the appliances.
- Under Report accessibility, select if you want to make the reports public or private.
- Under Time Range, specify the report frequency.
- Click Save.
- Go to the tenant for which you want to delete the report.
- Locate the report on theReports > Custom Reports or Reports > Public Reports page. You can delete public reports and private reports which you created.
- Click Delete next to the report.
Scheduling reports
You can schedule reports to run daily, weekly, monthly, or yearly. A PDF with the report is then sent by email to users in your organization. The schedules can be updated if required. You can also resend or download the latest report manually by clicking ZIP or Email in the On Demand column.
Note that you can schedule a maximum of 10 active reports, that is, the reports that are generated and sent on schedule. The unused reports can be deactivated.
- Go to the tenant for which you want to create reports.
- Go to Reports > Scheduled Reports.
- Click
 Create new scheduled report.
 - Enter a Schedule name for the scheduled report.
- Specify email addresses of the recipients to whom you want this report to be sent.
- Select the Report frequency and specify the time when the report is created. The report frequency determines how often you would like this report to be generated and sent. If you select a daily frequency, you're also provided with the list of the days in a week, to include or exclude from.
- Under Scheduled state, Enable or Disable the scheduler as required.
- Under Public Reports and Custom Reports, select the reports to include in this scheduler.
- Click Create.
The report is created and set to Active status.

The Scheduled Reports page
- Go to the tenant for which you want to create reports.
- Go to Reports > Scheduled Reports.
- Select Deactivate next to the report to put the it on hold.
- Select Activate next to the report to make it active.