Managing Events Browser views
Event logsA collection of entries which describe events that occurred on the network or on a computer system. GFI EventsManager supports different types of event logs including: Windows Event Log, W3C Logs, Syslog, SNMP Traps and SQL Server audit events. are automatically categorized in different folders, according to the event log type and the source from which it was generated. In GFI EventsManager, these folders are referred to as Views.
GFI EventsManager includes a comprehensive list of views that enable you to start categorizing processed event logs upon installation. New views can be created and the existing ones can be modified. The following sections provide with information about managing the Events Browser views:
Creating Root Views and Views
In Events Browser, GFI EventsManager enables you to create the two different types of views described below:
| View | Description |
|---|---|
| Create root view… |
Enables you to create top-level views which may contain a number of sub-views. This creates a new set of views beneath the ones that ship with the product (Example: All Events view). |
| Create view… |
Create views within root views. Custom views can be added to the default root views and views. |
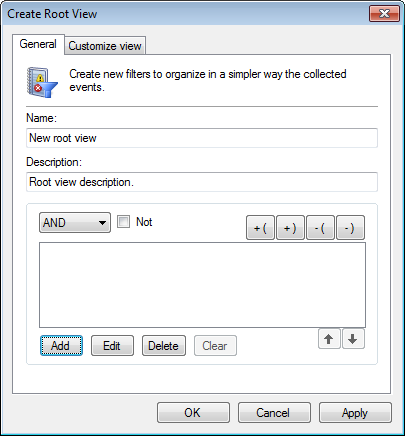
To create a Root view/View:
1. From Events Browser > ActionsThe activity that will be carried out as a result of events matching specific conditions. For example you can trigger actions whenever an event is classified as critical. Actions supported by GFI EventsManager include Email alerts, event archiving and execution of scripts., click Create root view…/Create view…
Note
Both options launch the same Create view dialog and are both configured in the same way. The difference is the positioning of the new custom view.
Custom view builder
2. Key in a name and description for the new view.
3. Click Add to add filtering conditions to your view. If no conditions are specified, the view will display information from every event that is generated.
Edit view restriction
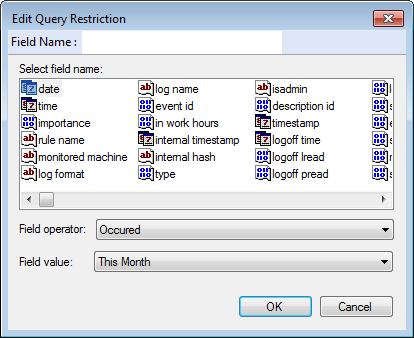
4. Select a field from the list of available fields and specify the Field operator and Field value. Repeat this step until all required conditions are specified. Click OK. For more information, refer to Defining Restrictions.
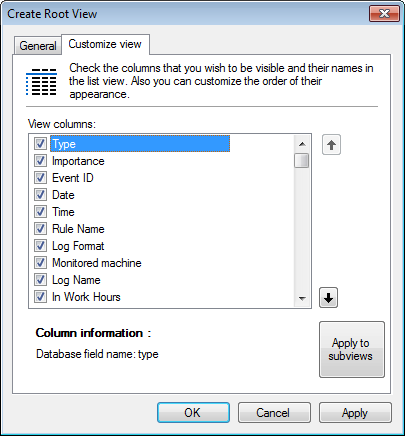
Customize View tab
4. Click Customize view tab to select the columns to show in the new custom view. You can also arrange their order of appearance using the Up and Down arrow buttons.
5. (Optional) Click Apply to subviews to apply the selected columns to all subviews of the root view.
6. Click Apply and OK.
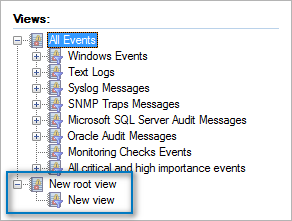
Sample: New Root Views and Views
Editing a view
1. From Events Browser > Views, select the view to edit.
2. From Actions click Edit view…
3. From the View Properties dialog, add, edit or delete conditions according to your requirements.
Deleting a view
1. From Events Browser > Views, select the view to delete.
2. From Actions, click Delete view. Alternatively, right-click on the view you want to delete and select Delete view.