Configuring SMB File Acceleration
Use the following instructions to configure the Exinda Appliance to use the SMB optimization features. The SMB file acceleration configuration has several options for managing transfers under a variety of situations.
- Go to Configuration > System > Optimization.
- On the right, select the SMB tab.
- Select, as needed, the Enabled check boxes for SMB1 and SMB2.
NOTE
Under the SMB1 section there are several options that you can use. The "Read Ahead" and "Read Behind" options, however, relate only to SMB1 traffic. For the "Data to Prefetch" option, this again relates only to SMB1.
- In the Acceleration Options section complete the following, as needed:
- To prefetch data from the SMB server in anticipation of subsequent client requests, select Read Ahead.
- To update the SMB cache, aggregating requests to the SMB server, select Write Behind.
- To enable caching of SMB file attributes such as file access times and size, select Meta-Data Caching.
- In the Data to Prefetch field, specify the amount of SMB data to prefetch when performing read-ahead or write-behind.
NOTE
The default value is 1024 kb. If you experience network latency with file transfers, for example if latency is greater than 500 milliseconds, increase the amount of data being prefetched for the SMB1 cache.
- To accelerate digitally signed connections, in the SMB Signing area select Enabled.
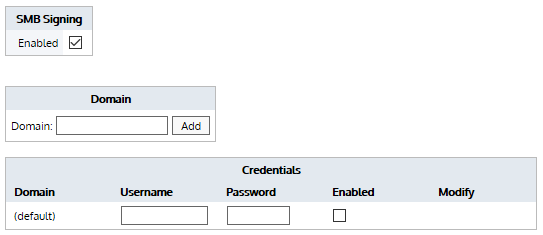
- In the Domain area, type the NetBIOS name, not the fully qualified domain name, of a domain or computer where shared files are located, and click Add. The domain appears in the SMB signing Credentials section below. If necessary, add any other domains as well.
- In the Credentials area, type the Username and Password to use when generating the signing key.
IMPORTANT
The account used for signing the key must be able to authenticate against the specified server, but should be a highly restricted account that does not have permissions to access the files being requested by the client computers, or administrator access to the domain.
- Select whether the authentication credentials are enabled or disabled.
NOTE
The Exinda Appliance will use the recorded credentials for the requested domain. If the appliance is unable to connect to that domain because the server is unavailable or because of incorrect credentials, the status of the signed connection is reported as Bypassed or Unhandled.
If the request is for a domain that is not registered on the Exinda Appliance, the credentials for the (default) domain are used. If the credentials are incorrect for the requested domain, the status of the signed connection is reported as Bypassed or Unhandled.
- In the Compatibility Options area, if on your network there are Exinda appliances that are running a firmware version prior to v6.3, select Support versions (pre v6.3.0) Enabled.
- Click Apply Changes.