Customizing Kerio Connect
In Kerio Connect, you can:
- Define custom email footers
- Translate the interfaces into another language
- Create a custom page for Kerio Connect Client (For more information refer to Customizing the Kerio Connect Client login page.)
- Add a custom logo to Kerio Connect Client
Defining custom email footers
For each domain, you can customize email footers that are automatically added to all messages sent from this domain.
- In the administration interface, go to the Configuration > Domains section.
- Double-click the domain and go to the Footer tab.
- Enable the Append the footer to outgoing messages option.
- Create the footer (in plain text or HTML).
- If you do not want to append footers to messages for internal recipients, select the Don't append if... option.
- Click OK.

If user defines their own email signature, this domain footer is displayed below the user's signature.
When a user replies to a message, Kerio Connect places the domain footer below the whole conversation and the user's signature below the individual replies.
NOTE
If users send digitally signed or encrypted messages, Kerio Connect does not append any footers to the message.
Adding automatic user and company details to domain footers
You can use special field identifiers to add user and/or company details to the footer:
- Fill in the information in the users' account details.
- Create company locations.
- In the administration interface, go to the Configurations > Domains section.
- Select a domain and click Edit.
- Click the Footer tab.
- Define the footer using items in the Field drop-down list.
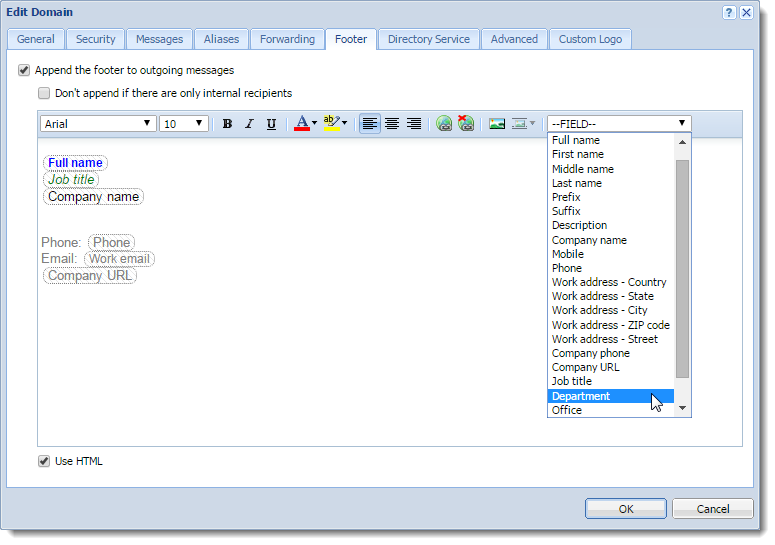
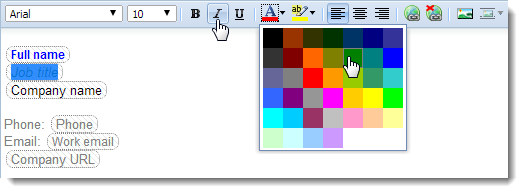
- If you select the Use HTML option, you can format the fields: select the field and apply formatting attributes.
- Click OK.
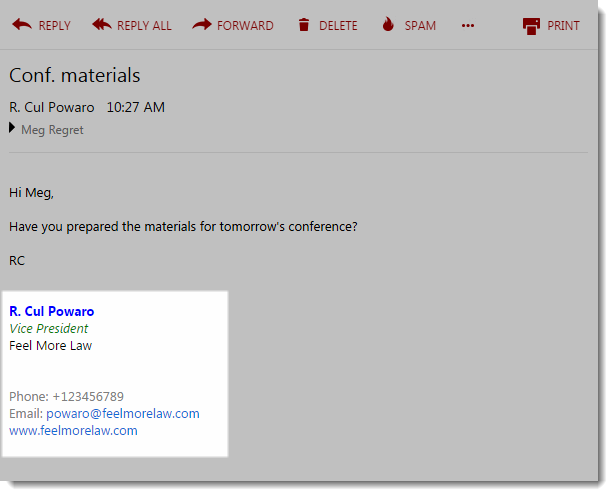
The final footer might look like this:
NOTE
If users send digitally signed or encrypted messages, Kerio Connect does not append any footers to the message.
Adding a custom logo to Kerio Connect Client
Kerio Connect Client displays a default logo in the top left corner.
For version 8.5 and newer, you can change the logo:
- Globally for all domains
- For each domain separately
If you set both logos, Kerio Connect Client displays the logo configured for a particular domain.

Changing the logo for all domains
- In the administration interface, go to Configuration > Advanced Options > Kerio Connect Client.
- In the Custom logo section, select Use custom logo for Kerio Connect Client.
- Click Select file and locate your image.
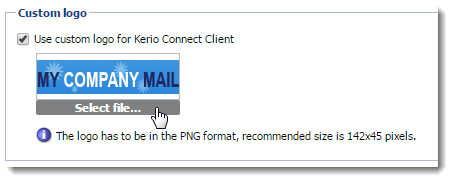
- Click Apply.
Changing the logo for individual domains
- In the administration interface, go to Configuration > Domains.
- Double-click a domain and go to the Custom Logo tab.
- Select the Use custom logo for Kerio Connect Client option.
- Click Select file and locate your image.
- Click OK.
Localizing the user interface
Kerio Connect Client 8.1 and later
For more information refer to Translating Kerio Connect Client to a new language.
Kerio Connect Client 8.0
You cannot add new translations to Kerio Connect Client 8.0.However, you can overwrite one of the existing translations:
- Go to the installation directory of Kerio Connect.
- Open the
web\webmail\translationsfolder. - Select a language file to overwrite and open it in a text editor. The file contains both the source language (English) and the target language.
- Translate into the target language.
- Save the file and restart Kerio Connect.
IMPORTANT
The text in the language files must be coded in UTF-8.