Filtering messages on the server
NOTE
New in Kerio Connect 9!
Users can filter messages in their mailbox with Kerio Connect Client filters. Administrators can apply message filters directly on the Kerio Connect server.
For example, you can:
- Forward messages sent to a former employee to another mailbox
- Send an auto-reply to messages sent to a particular email address or even a domain
- Add recipients to specific messages
- Reject messages with large attachments
How message filters work
Kerio Connect applies Incoming rules (previously Receiving rules) to all recipients in the message. In the Outgoing rules (previously Sending rules), messages are considered separately for each recipient.
Here is an example of a message sent to multiple recipients. You can see the order how Kerio Connect processes the rules:

You can find specific examples below.
- Forwarding messages to public folders
- Prohibiting sending messages to remote recipients for individual users
- Sending a copy of a message to another email address
- Rejecting messages with large attachments
- Sending an auto-reply message
Creating incoming rules
Kerio Connect applies incoming rules to all messages that come to the server from local or remote senders.
These rules are applied before the outgoing rules and before the user filters in Kerio Connect Client.
- In the administration interface, go to Configuration > Content Filter > Message Filters.
- In the Incoming rules section, click Add.
- In the description field, type a name for the filter.
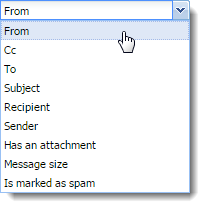
- Specify the conditions for the filter. To specify multiple email addresses, use a comma (,), or a semi-colon (;). Regular expressions and the
?/*placeholders are not supported.
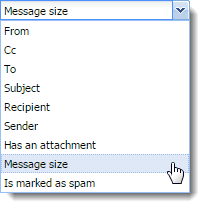
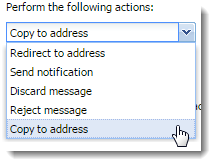
- Specify the actions.
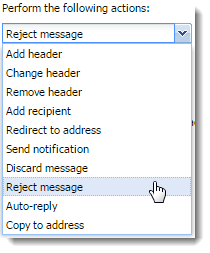
NOTE
You can use placeholders for headers values — ${size} for message size, ${subject} for message subject, and so on.
- (Optional) Select the Stop any other rules option. The rules are processed from the top. If the message matches the rule, no other rules are processed.
- Click OK.
- Click Apply.
Creating outgoing rules
Kerio Connect applies outgoing rules to all messages that Kerio Connect sends to local or remote recipients.
These rules are applied after the incoming rules and before the user filters in Kerio Connect Client.
- In the administration interface, go to Configuration > Content Filter > Message Filters.
- In the Outgoing rules section, click Add.
- In the description field, type a name for the filter.
- Specify the conditions for the filter. To specify multiple email addresses, use a comma (,), or a semi-colon (;). Regular expressions and the
?/*placeholders are not supported.
- Specify the actions.
NOTE
You can use placeholders for headers values — ${size} for message size, ${subject} for message subject, and so on.
- (Optional) Select the Stop any other rules option. The rules are processed from the top. If the message matches the rule, no other rules are processed.
- Click OK.
- Click Apply.
Example 1 - Forwarding messages to public folders
To forward messages to public folders, you must create:
- An alias email address for the public folder
- Server rule for forwarding the messages
You want all messages sent to accounting@company.com that include invoices as attachments to be sent to a public folder Invoices.
- In the Accounts > Aliases section, create an alias that points to a public folder.

- Go to the Configuration > Content Filter > Message Filters section.
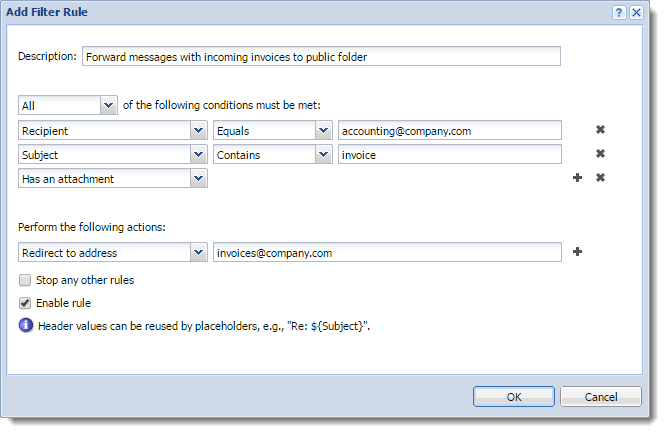
- In the Incoming rules section, click Add.
- Set the condition to Recipient > Equals > accounting@company.com.
- Click the plus sign to add another condition.
- Set the condition to Subject > Contains > invoice.
- Click the plus sign to add another condition.
- Set the condition to Has an attachment.
- Set the action to Redirect to address and type the alias email address of the public folder.
NOTE
If you use Add recipient or Copy to address, Kerio Connect delivers the message to other recipients as well.
- Click OK and Apply.
NOTE
If you use Redirect to address, the message is not delivered to the original recipients, however, the sender receives their delivery receipt if required.
Example 2 - Prohibiting sending messages to remote recipients for individual users
In the settings of each user, you can disable the user to send and receive messages outside their own domain.

With a special server rule you can limit this either to sending or receiving.
You want to disable John Smith (jsmith@company.com) to send messages outside his domain (company.com). However, he can receive messages from other domains.
- Verify that the This user can send/receive messages... option in the user settings is disabled.
- Go to the Configuration > Content Filter > Message Filters section.
- In the Outgoing rules section, click Add.
- Set the condition to Sender > Equals > jsmith@company.com.
- Click the plus sign to add another condition.
- Set the condition to Recipient > Does not contain > company.com.
- Set the action to Reject message and type the reason for rejecting that the user receives.
- Select Stop any other rules.
- Click OK and Apply.
NOTE
If the message has multiple recipients and some of them are from the user's domain, Kerio Connect delivers the message to the recipients from the user's domain and rejects to deliver to message to recipients outside the user's domain.
If you create the same rule in the Incoming rules section, neither remote nor local recipients get the message.
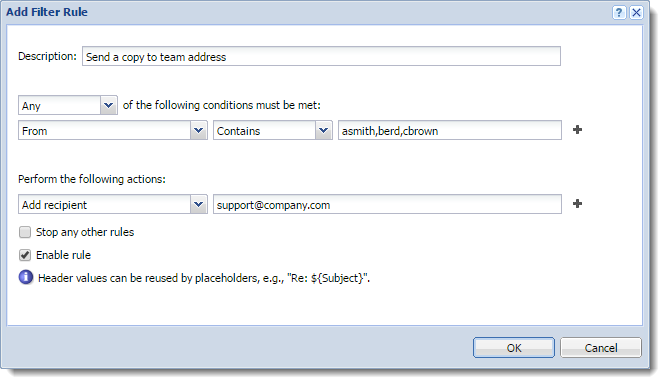
Example 3 - Sending a copy of a message to another email address
A team of support technicians help customers solve their problems. They communicate via their email addresses:
asmith@company.comberd@company.comcbrown@company.com
They also have a team address support@company.com.
You want to send a copy of all messages, which they send, to their team address so that the other team members are aware of the current issues
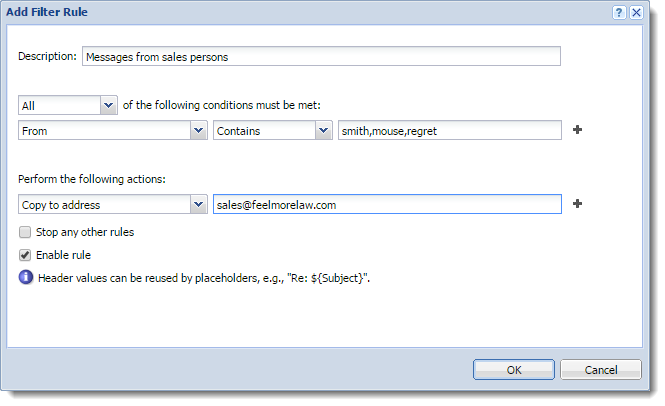
- In the Incoming rules section, click Add.
- Set the condition to From > Contains > asmith,berd,cbrown
- Set the action to Add recipient > support@company.com
- Click OK and Apply.
NOTE
You can also use Copy to address. Both Add recipient and Copy to address send a blind copy to the specified address. However, if the message cannot be delivered to that address, the sender gets notification only if you use Add recipient.
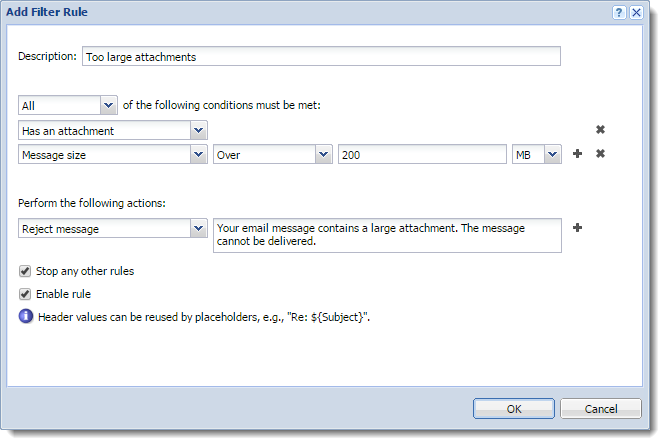
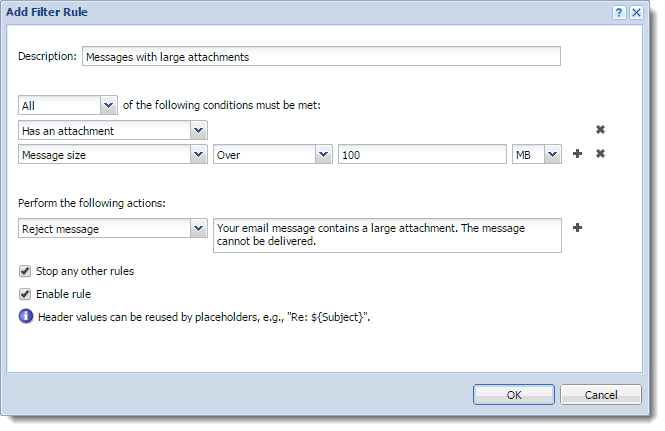
Example 4 - Rejecting messages with large attachments
You want to prevent your Kerio Connect to be overloaded with large attachments.
You can limit the size of messages with attachments that go through your server:
- In the Incoming rules section, click Add.
NOTE
If you create this rule in Outgoing rules, the Kerio Connect server may get overloaded if the message has many recipients.
- Select All in the drop-down list.
- Set the condition to Has an attachment.
- Click the plus sign to add another condition.
- Set the condition to Message size > Over > 100MB.
- Set the action to Reject message and type the reason for rejecting that the sender receives.
NOTE
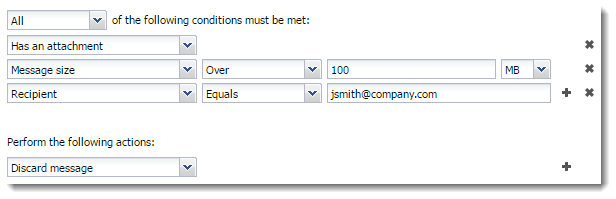
If you select Discard message, the sender is not notified.
- Select Stop any other rules.
- Click OK and Apply.
To limit large attachments only for specific users, create this rule in the Outgoing rules section and specify recipients.
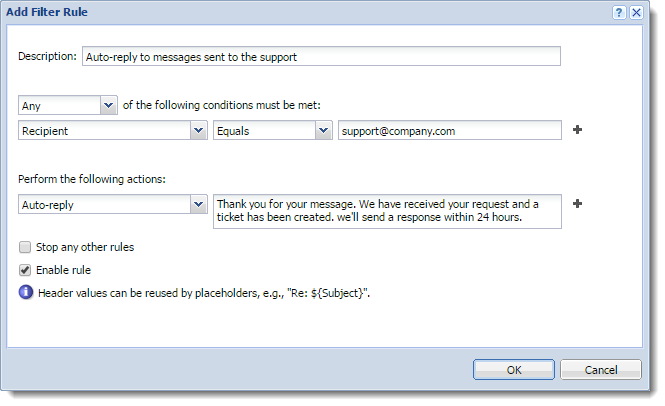
Examples 5 - Sending an auto-reply message
You want to send an automatic reply to each message that Kerio Connect delivers to your support team address.
- In the Incoming rules section, click Add.
- Set the condition to Recipient > Equals > support@company.com.
- Set the action to Auto-reply and type the text.
- Click OK and Apply.