Configuring IP address groups
In IP addressAn identifier assigned to devices connected to a TCP/IP network. groups, you can define:
- single IPv4Version 4 of the Internet Protocol. or IPv6Version 6 of the Internet Protocol. address
- groups of IPv4 or IPv6 addresses
- hostnames
- IP address ranges for IPv4 or IPv6
- IPv4 subnet with mask
- IPv6 prefixIPv6 prefix is a part of IPv6 address dedicated for routing in IPv6 networks.
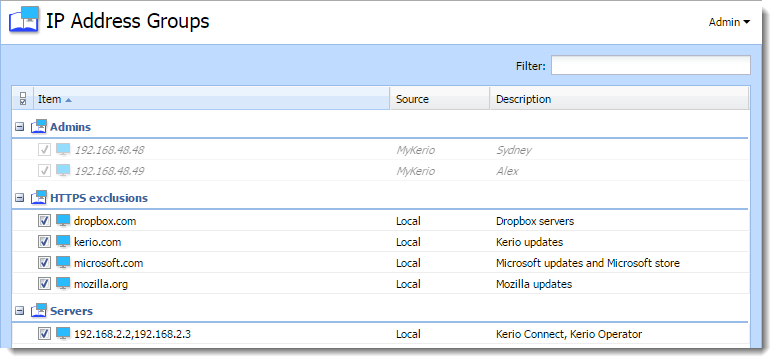
Kerio Control uses predefined IP address groups in other configuration dialogs such as the traffic and URL rules.

NOTE
If you have multiple Kerio Control appliances, you can manage them in MyKerio and use shared IP address groups across all your appliances. All shared IP address groups are labeled as MyKerio and all groups added in the appliance are labeled as Local in the Source column. For more details, read Sharing definitions across Kerio Control appliances with MyKerio.
Adding a new IP address group
- In the administration interface, go to Definitions > IP Address Groups.
- Click Add.
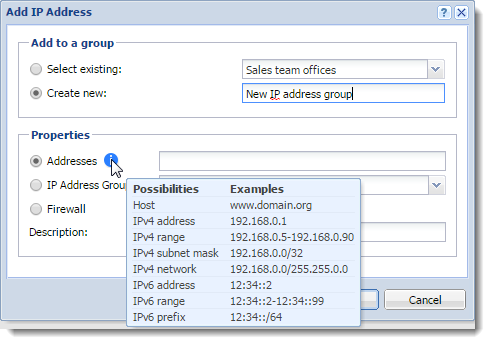
- In the Add IP Address dialog box, select Create new and type a name of the IP address group.
- Select:
- Addresses is the IP address, range, network, subnet or prefix. In the Properties part of the window, move the cursor above the information point. Help displays all patterns accepted by Kerio Control (see the screenshot below).

IMPORTANT
If you add a domain name, you must use the Kerio Control DNSDomain Name System - A database enables the translation of hostnames to IP addresses and provides other domain related information. server and enable the DNS cache.
If you use IP address or a host name you can use any DNS server.
- IP Address Group is a group of IP addresses. Groups can be cascaded.
- Firewall is a special group including all the firewall's IP addresses.
- You can add a description for better reference.
- Click OK.
Adding item into existing address group
If you wish to add items to an existing IP address group:
- In the administration interface, go to Definitions > IP Address Groups.
- Click Add.
- In the Add IP Address dialog box, select Select existing and specify the desired IP address group from the selection menu.
- In the Properties part of the dialog, define addresses, IP address group or firewall.
- Click OK.
NOTE
You can edit only individual items within an IP address group. You cannot edit or remove the IP address group itself. If you want to remove the IP address group, you must remove all items or move them to another IP address group. For more information refer to Moving items from one IP address group to another.
Moving items from one IP address group to another
If you add a new item to wrong IP address group, you can move it to the right one:
- In the administration interface, go to Definitions > IP Address Groups.
- Right-click the item.
- In the context menu, click Edit.
- In the Edit IP Address dialog box, select Move to existing and specify the desired IP address group from the selection menu.
- Click OK.