Configuring the Activation Wizard
The first logon to the administration interface after the installation automatically runs the product activation wizard:
Step 1: Select a language
This language is used by the activation wizard and it is also is set as a default language after the first logon to the administration interface. You can change the language settings later.
Step 2: Setup connection
NOTE
This step appears only if Kerio Control is not able to connect to the Internet.
Select an interface connected to the Internet. Configure the connection method (DHCPDynamic Host Configuration Protocol - A protocol that automatically gives IP addresses and additional configuration to hosts in a network., static configuration or PPPoEA type of tunneled link, which is established over top of a physical network interface.) and specify the required parameters.
If your internet connection is configured properly, click Next.
You can use other options:
It is also possible to select the Activate in unregistered mode link and register Kerio Control later.
If you have a file with license, select the Register offline by license file link.
Step 3: Set the time zone, date and time
Kerio Control requires a correct configuration of the date, time and time zone.
Select your time zone and verify the date and time settings.
We recommend to enable synchronization of time against a time server. Kerio Control uses the NTP servers of Kerio Technologies.
Step 4: Activate Kerio Control
This step allows you to:
- register a license number of the purchased product
- purchase Kerio Control
- use the 30-day trial version
- put the license.key file into Kerio Control
- skip the registration and register Kerio Control later
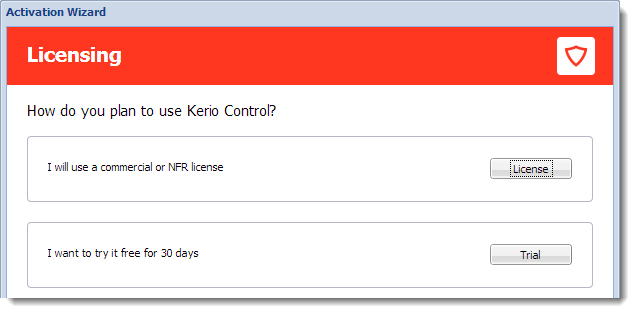
The Activation Wizard displays the licensing dialog.
Register Kerio Control trial version
Registration of the trial version allows testing of features unavailable in the unregistered trial version:
- the Kerio Control Web Filter module,
- updates of the integrated antivirus engine,
- the intrusion prevention system,
- free technical support for the entire trial period.
- Click Trial in the Licensing dialog.
- In the Registered trial activation dialog, type your trial license number. If you do not have a license number, click Get a Trial License number link.
- Enter the security code displayed in the picture and click Next.
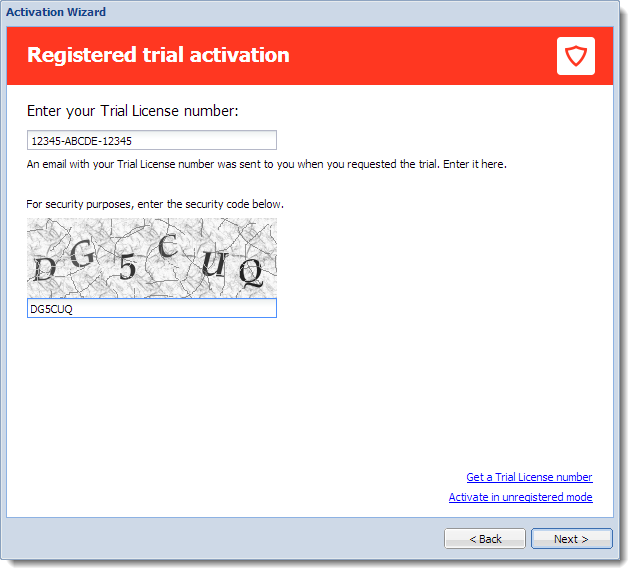
The Activation Wizard displays the registered trail activation dialog.
- Click the Finish button.
NOTE
Registration of the trial version does not prolong the trial period.
Insert Kerio Control license number
For registration, you need a license number for the purchased product.
- Click License in the Licensing dialog.
- In the next step, click Enter license.
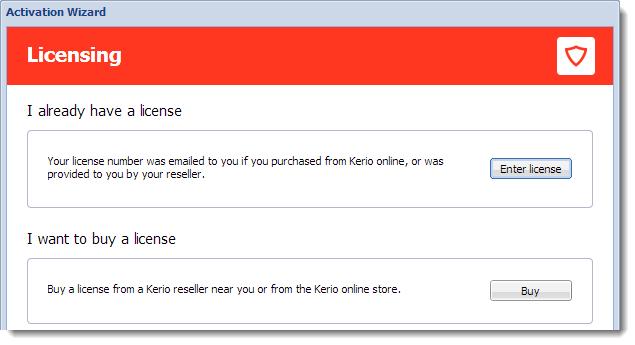
The Activation Wizard displays the licensing dialog.
- Insert the license number and enter the security code displayed in the picture.
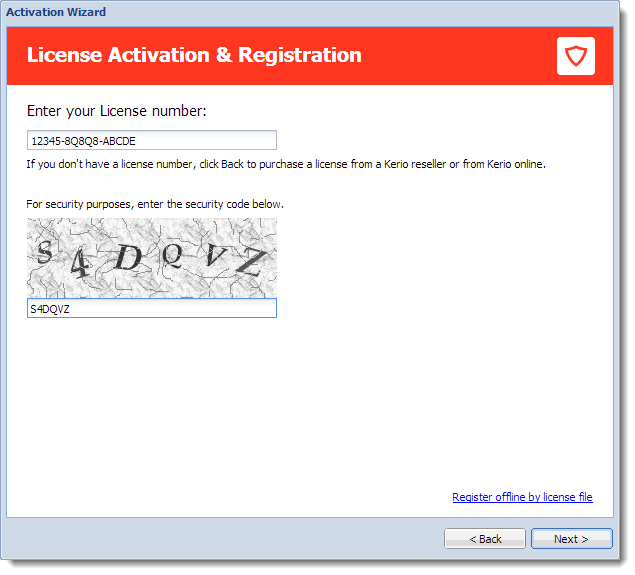
The Activation Wizard displays the license activation and registration dialog.
- In the License details dialog, verify the license details. If you want to add other license numbers, click Register multiple license numbers.
- In the Contact details dialog, type your contact information.
Upon a successful registration, the product is activated with a valid license.
Purchasing Kerio Control
To purchase Kerio Control:
- Click License in the Licensing dialog.
- In the next step, click Buy. This opens www.kerio.com in your browser.
- At www.kerio.com, purchase Kerio Control.
Register offline with a license key
If you have a file with a license key from your previous
installation of Kerio Control (usually license.key), you
can use link Register offline by license file.
Activate Kerio Control in unregistered mode
- In the Licensing dialog, click Trial.
- In the Registered trial activation dialog, click Activate in unregistered mode.
Step 5: Help us make Kerio Control even better
Information on the product usage helps us develop Kerio Control as close to your needs as possible. By sending your usage statistics, you participate in the product improvement.
Statistics do not include any confidential data (passwords, email addresses, etc.) and you can disable it any time under Advanced Options > Updates.
Step 6: Set the password for the administrator user account and sending alerts
Setting administrator password
Type the admin password — i.e. the password of the main administrator of the firewall. Username Admin with this password is then used for:
- Access to the administration of the firewall via the web administration interface
- Logon to the firewall's console.
IMPORTANT
Remember this password and keep it from anyone else!
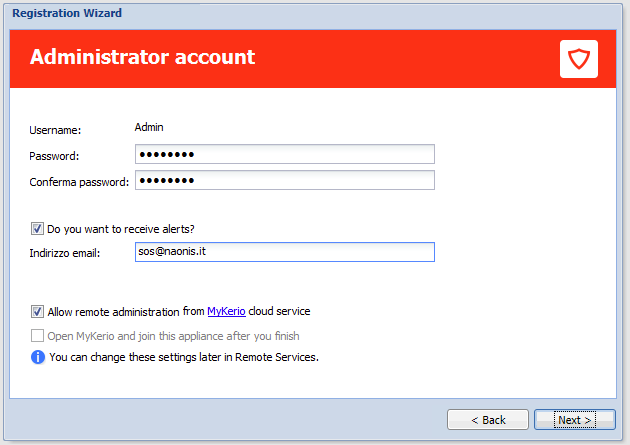
The Activation Wizard displays the administrator account dialog.
Sending default alerts
Kerio Control can send automatic email messages (alerts) about important events.
To enable sending alerts to defined email address:
- Select Do you want to receive default alerts?
- Type your email address to the Email address field. Kerio Control associates this address with the default Kerio Control Admin account.
From now on, Kerio Control includes the predefined alerts group in the Accounting and Monitoring > Alert Settings (see screenshot below).
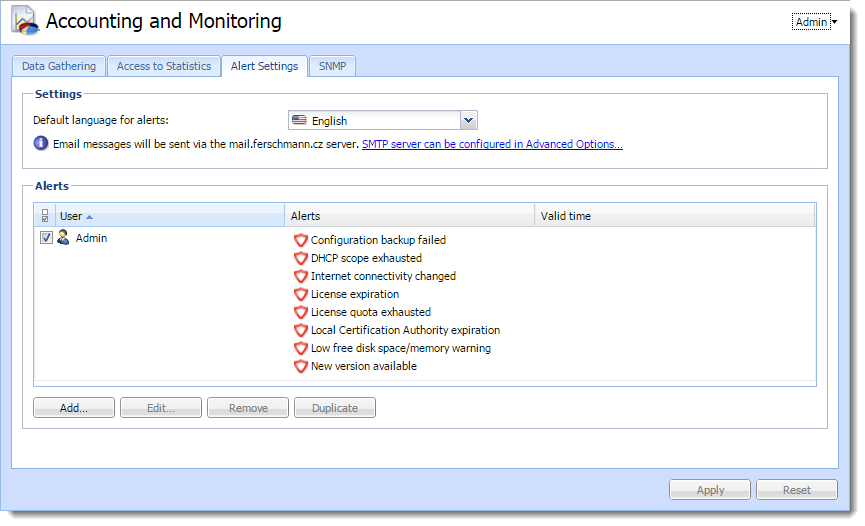
For more information refer to System alerts.
NOTE
Ensure your Kerio Control is connected to an SMTP server for sending alerts. For more information refer to Configuring the SMTP server.
After finishing the wizard, login page appears. Use the admin credentials for login and configure your Kerio Control.
Setting MyKerio cloud service
MyKerio is a cloud service which enables you to administer numerous Kerio Control appliances in a single dashboard.
To allow remote administration from MyKerio, select Allow remote administration from MyKerio cloud service.
To join this appliance of Kerio Control, select Open MyKerio and join this appliance after you finish.