Blocking messages from certain servers
Automatically blocking or allowing messages from certain servers
In Kerio Connect you can automatically block servers (IP addresses) that are known to be sending spam messages. You can also automatically allow messages from those you trust.
You can this in one (or both) of two ways:
- By creating your own lists of spam servers (blacklists) and trusted servers (whitelists)
- By using public Internet databases of spam servers
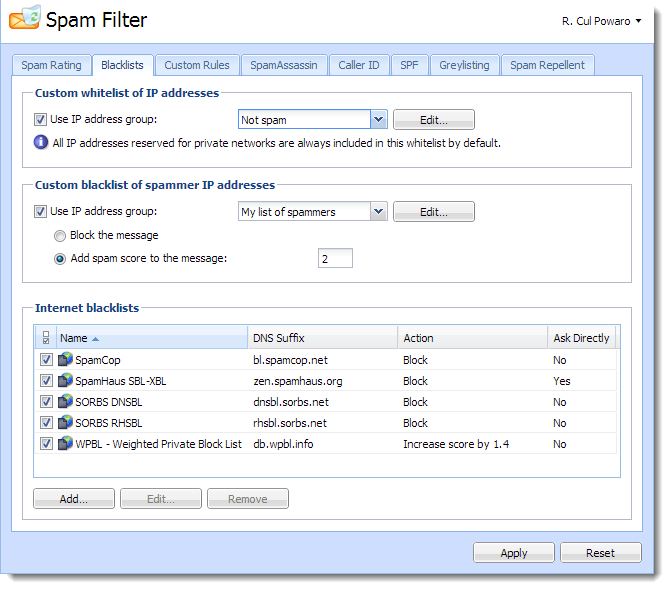
Blacklists tab
Blocking messages from spam servers — Custom blacklists
To create your own blacklists you first need the IP addresses of the servers you want to block
- Go to section Configuration > Definition > IP Address Groups and create a new group with IP addresses of spam servers.
- Go to Configuration > Content Filter > Spam Filter > Blacklists.
- In the Custom blacklist of spammer IP addresses section, select the option Use IP addressAn identifier assigned to devices connected to a TCP/IP network. group.
- Select or create a group of IP addresses to block from the drop-down menu.
- Select the option corresponding the action you want performed when messages arrive that meet your criteria:
- Block the messages (this marks them as spam)
- Add spam score to the message
- Click Apply in the bottom right corner.
Blocking messages from spam servers — Public databases
By default, Kerio Connect contains a few databases that can be downloaded from the Internet for free. It is also possible to define other databases.
To use blacklists from public databases:
- Go to section Configuration > Content Filter > Spam Filter > Blacklists.
- In the Internet blacklists section, select all the public databases you want to use.
- Double-click a blacklist and select the option corresponding to the action you want performed when messages arrive that meet the blacklist's criteria:
- Block the messages (this marks them as spam)
- Add spam score to the message
- Click Apply in the bottom right corner.
You can also add other blacklists from the Internet:
- In the same section, click Add.
- Type the DNSDomain Name System - Enables the translation of hostnames to IP addresses and provides other domain related information. name of the server that handles the of Kerio Connect enquires.
- Select the option corresponding to the action you want performed when messages arrive that meet the blacklist's criteria:
- Block the messages (this marks them as spam)
- Add spam score to the message
- Click Apply in the bottom right corner.
Once you have set up your blacklists, you can change any of them by double-clicking it.
NOTE
If you use a paid blacklist, always select the option Ask blacklist DNS server directly. The licenses are associated with a particular IP address, and queries are sent directly to the database, not to parent DNS servers.
Allowing messages from trusted servers — Custom whitelists
Messages from servers included in your whitelist will not be checked by spam filters in Kerio Connect.
To create your own whitelist:
- Go to Configuration > Definition > IP Address Groups and create a new group with the IP addresses of trusted servers.
- Go to Configuration > Content Filter > Spam Filter > Blacklists.
- In the Custom whitelist of IP addresses section, select the option Use IP address group.
- Select the group of IP addresses from the drop-down menu.
- Confirm your settings.