Creating an initial configuration using the Basic Wizard
The initial configuration wizard steps you through configuring the appliance's interfaces, IPInternet protocol settings, HTTP proxy settings, basic system information, license information, and storage volume. It also provides the option to upgrade the firmware and create the initial set of traffic policies.
- The Exinda appliance by default picks up an IP Address from DHCPDynamic Host Configuration Protocol. The IP address is available on the management interface.
NOTE
If a DHCP address is not picked up, the Exinda defaults to the IP Address 172.14.1.57. Open a web browser and connect to the Web User Interface by typing https://172.14.1.57 in the address field. To connect, configure the IP address of your PC to the same subnet as the Exinda Appliance. For example, set your IP Address to 172.14.1.58, netmask 255.255.255.0
- From the web browser, access Command Line Interface from Accessing the Command Line Interface.
- Enter
show interface eth0and note the IP address assigned to the interface.
- Navigate to https://<IP Address>, where IP Address is the address determined in the previous step.
- Login with username=admin and password=exinda.
- Select Configuration> Basic Install Wizard to start the configuration wizard .
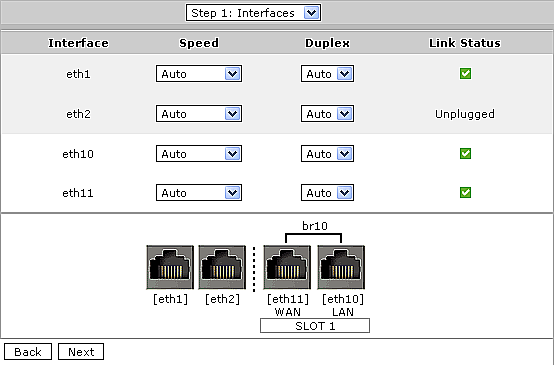
- Basic Wizard Step 1 - Interfaces: This screen lists all the system interfaces, as well as reports any problem with the interfaces. You can set interface speed and duplex settings from this screen.
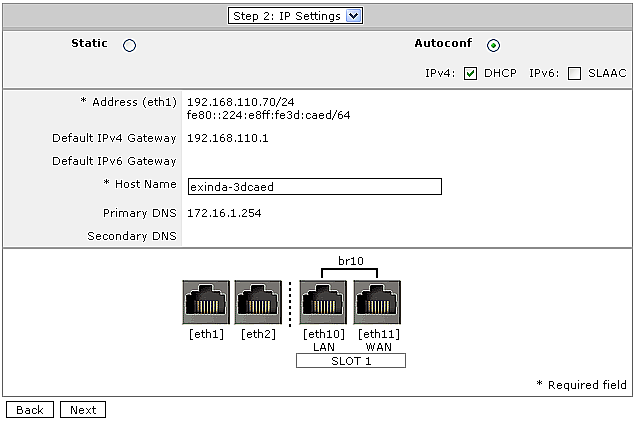
- Basic Wizard Step 2 - IP Settings: This screen allows you to configure basic network connectivity settings. You can either manually specify these settings or select Autoconf to automatically acquire these settings. The type of auto configuration selected depends on your network. For IPv4 networks select DHCP, for IPv6 use SLAAC.
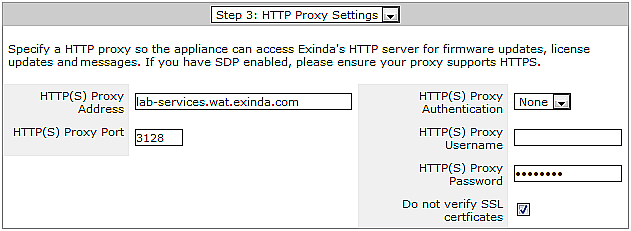
- Basic Wizard Step 3 - HTTP Proxy Settings: To allow the appliance to access Exinda's HTTP server for firmware updates, license updates, and messages, specify an HTTP proxy. If you have SDP enabled, ensure your proxy supports HTTPS.
- Basic Wizard Step 4 - System: This screen allows to configure basic system settings.

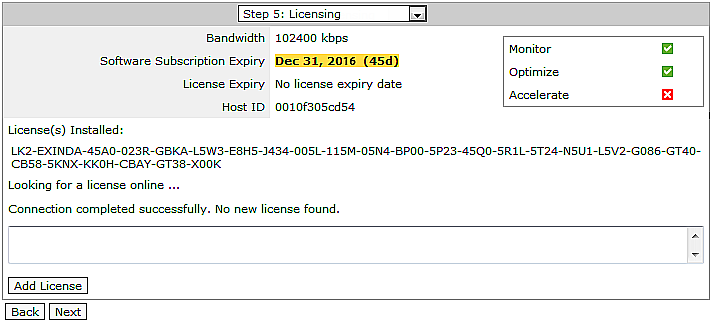
- Basic Wizard Step 5 - Licensing:This screen allows you to configure the system's license. When you enter the screen, the Exinda appliance attempts to contact the Exinda licensing server on the Internet. If the appliance has Internet connectivity and a new or updated license can be found, it is displayed in the text-box at the bottom of the screen. You can add this license to the system by clicking the Add License button.
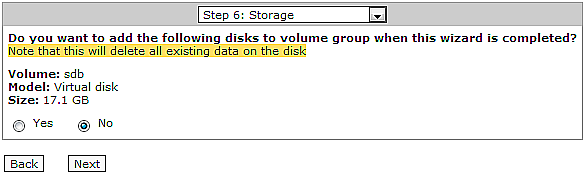
- Basic Wizard Step 6 - Storage: This screen displays the available disks that can be added to the volume group.
- Basic Wizard Step 7 - Firmware: This screen displays the status of the firmware running on the Exinda appliance. If the appliance has Internet connectivity, the system checks for any newer firmware that may have been released. If a newer firmware image is available, you are asked if you want to download and install it.

- Basic Wizard Step 8 - Optimization: The final screen allows you to configure default Optimizer policies.

NOTE
Settings on each step are automatically applied when clicking the 'Back' or 'Next' buttons.