Configuring WiFi guest networks on Kerio Control NG100W and NG300W
NOTE
New in Kerio Control 9.2!
Kerio Control includes the embedded WiFi access point. For more information refer to Managing WiFi in Kerio Control NG100W and NG300W. This article describes how to run a WiFi guest network as a separate network with a shared password so that guests can use WiFi without accessing your local network.
You can also configure WiFi as a network bridge. For more information refer to Wireless bridging on Kerio Control NG100W and NG300W.
Configuring WiFi for guests
To set up a guest WiFi network:
- Verify that the WiFi settings are configured properly. For more information refer to Configuring WiFi networks.
- In the administration interface, go to Interfaces and WiFi.
- Click the WiFi button.
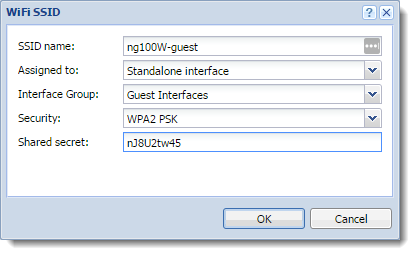
- Click Add to create a new SSID.
- In the WiFi SSID dialog box, type a name for the SSID. The SSID identifies the WiFi network. It displays on users' devices, so the name should be short and easy to remember.
- In the Assigned to drop down menu, select Standalone interface to create a new subnet in your network. For more information refer to Configuring Ethernet ports in Kerio Control hardware appliances.
- In the Interface Group drop down list, select Guest Interfaces.
- In the Security drop down list, select WPA2 PSK.
- In the Shared secret field, type a password. The password must be at least eight characters long.
- Click OK twice.
Give the password and SSID name to all guests who want to use this WiFi guest network. They need it for authentication to the network.
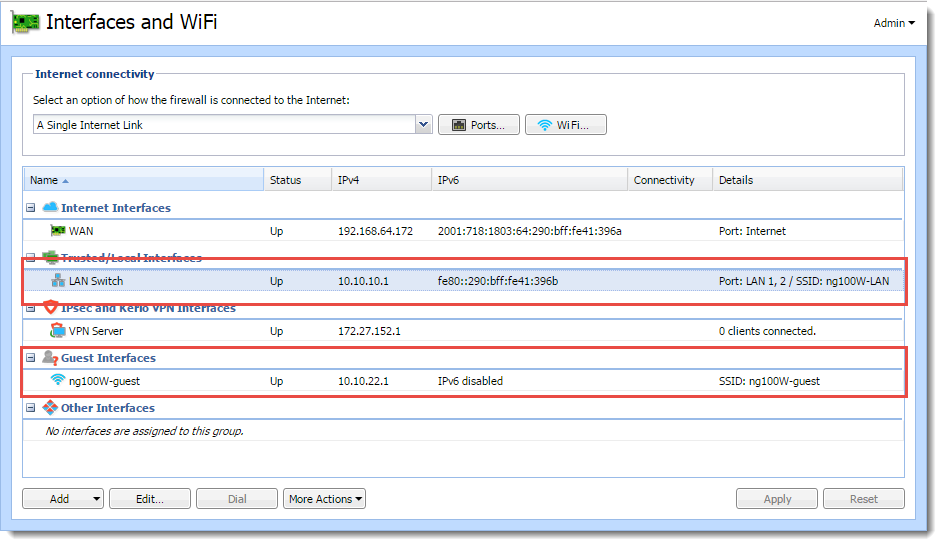
The new guest network is placed under the Guest Interfaces group in the Interfaces section. The WiFi interface is standalone, so all users connected through this WiFi are placed in a separate network segment.
Verify on your mobile device or laptop that you can see the new WiFi network and that you can connect your device to the new network. The WiFi requires the password you created.