Connecting multiple offices via Kerio VPN and IPsec VPN tunnels
In Kerio Control, you can create both Kerio VPNVirtual private network - A network that enables users connect securely to a private network over the Internet. and IPsecInternet Protocol security - A network protocol used to encrypt and secure data sent over a network. VPN tunnels. The article describes, how to configure routes between those two tunnels so that each host sees all other hosts in all subnets in the network.
The Kerio VPN tunnelKerio Control includes a VPN tunnel which allows to distributed offices to interconnect their offices securely. includes a routing daemon. So, by default, all subnets are visible behind the remote endpoint of the Kerio VPN tunnel. For the IPsec tunnel, you must add all routes manually.
The steps below use the scenario illustrated in the following diagram:
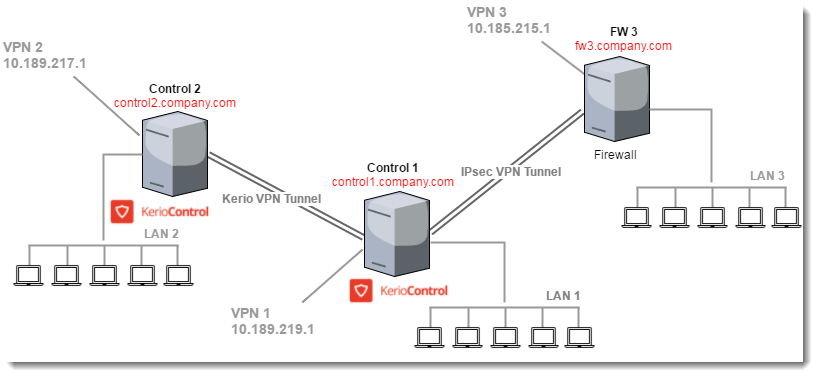
Subnets linked by VPN tunnels
Diagram nodes:
- The Control 1 server is connected with the FW 3 server via IPsec tunnel.
- The Control 1 server is connected with the Control 2 server via Kerio VPN Tunnel.
- The Control 1 server includes LANLocal area network - A network that connects computers and other devices in a small area. 1 and VPN 1 networks.
- The Control 2 server includes LAN 2 and VPN 2 networks.
- The FW 3 server includes LAN 3 and VPN 3 networks.
Configuring the Kerio VPN tunnel
For the initial tunnel configuration between Control 1 and Control 2, see Configuring Kerio VPN Tunnel.
Kerio VPN automatically shares all routes, including the Kerio Control VPN.
Be sure to verify that the tunnel works. For example, send a ping command from a computer connected to LAN 1 to a computer connected to LAN 2, and vice versa.
Also verify that users with VPN clients can ping all computers from LAN 1 and LAN 2.
Configuring the IPsec VPN tunnel
For the initial configuration of the IPsec VPN tunnel, see Configuring IPsec VPN tunnel. When adding remote networks to the Control 1 server, add LAN 3 and VPN 3.
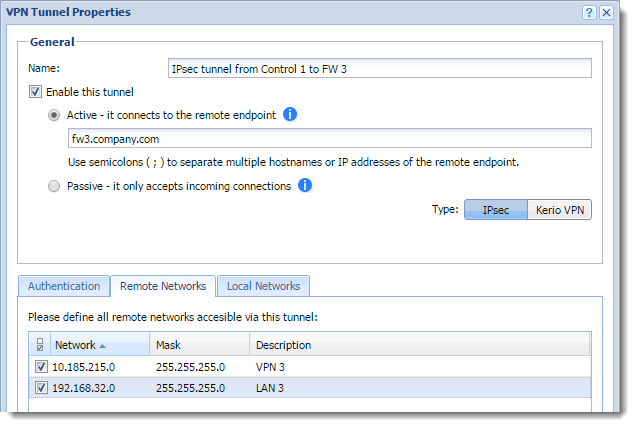
Enabling IPsec VPN tunnel
NOTE
You must also add all Control 1 routes to the FW 3 settings.
Verify that the tunnel works. For example, send a ping command from a computer connected to LAN 1 to a computer connected to LAN 3, and vice versa.
Check also that users with VPN clients can ping all computers from LAN 1 and LAN 3.
Configuring Kerio VPN + IPsec VPN interoperability
Both tunnels work separately at this point. The next step is to ensure that all users can communicate with each other using both tunnels:
- To ensure that the IPsec tunnel knows about LAN 2 and VPN 2, add LAN 2 and VPN 2 to the local networks of the Control 1 server.
- To ensure that LAN 3 and VPN 3 communicate with LAN 2 and VPN 2, configure the remote networks of the Control 2 server.
- To ensure that VPN 1 communicates with LAN 3 and VPN 3, add custom routes in the Kerio VPN server settings.
- On the FW 3 server, add LAN 1, LAN 2, VPN 1 and VPN 2 to remote networks.
 Configuring local networks on Control 1
The FW 3 server does not see local networks on the Control 2 server. You must add LAN 2 and VPN 2 to the local networks on Control 1:
- In the Control 1 administration interface, go to Interfaces.
- Double-click the IPsec VPN tunnel.
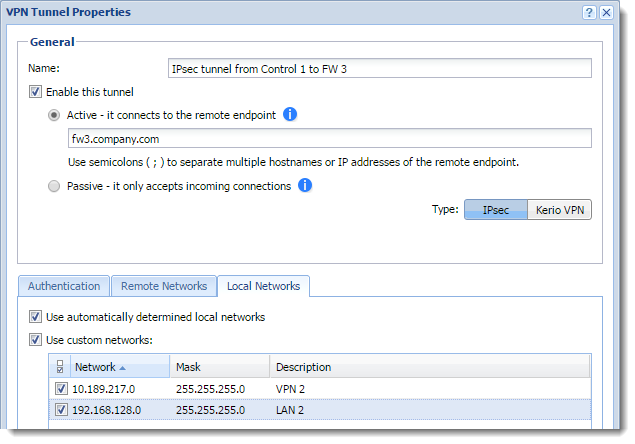
VPN tunnel properties
- On the Local Networks tab, select Use automatically determined local networks.
- Select Use custom networks.
- Click Add.
- In the Add Route dialog box, define all networks from the remote endpoint of Kerio VPN tunnel, and their masks and descriptions. In our example, the networks are LAN 2 and VPN 2.
- Click OK twice.
 Configuring networks for FW 3
The Control 2 server does not see local networks on the FW 3 server. You must add all FW 3 routes to the remote networks on Control 2.
- In the Control 2 administration interface, go to Interfaces.
- Double-click the Kerio VPN tunnel.
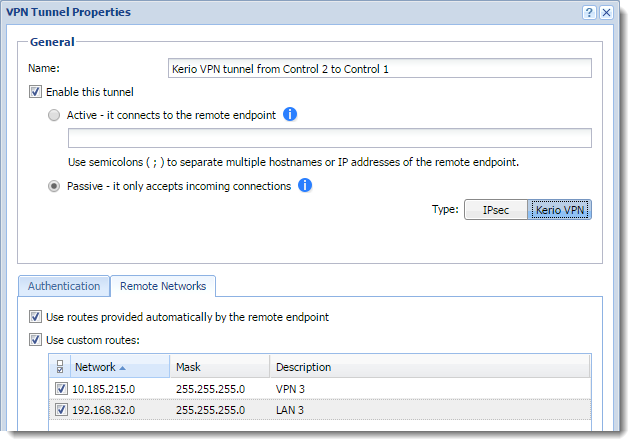
Remote Networks configuration
- On the Remote Networks tab, select Use custom networks
- Click Add.
- In the Add Route dialog box, define networks on the IPsec tunnel endpoint and their masks and descriptions. In our example, in the networks are LAN 3 and VPN 3.
- Click OK twice.
 Configuring local routes in Kerio VPN Server
To make VPN 3 and LAN 3 visible to users connected through VPN 1, you must add VPN 3 and LAN 3 to the local routes of the Kerio VPN Server.
- In the Control 1 administration interface, go to Interfaces.
- Double-click VPN Server.
- In the VPN Server Properties dialog box, click the Kerio VPN tab.
- Click Custom Routes
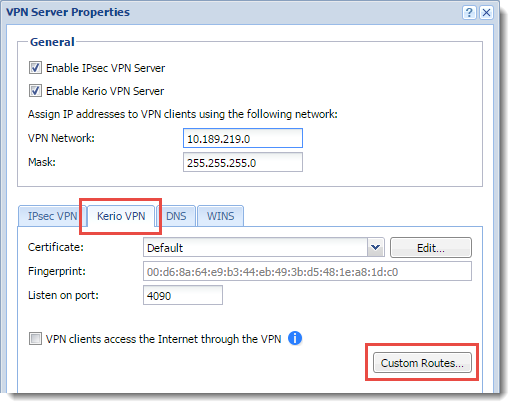
VPN Server properties
- In the Custom Routes dialog box, add LAN 3 and VPN 3.
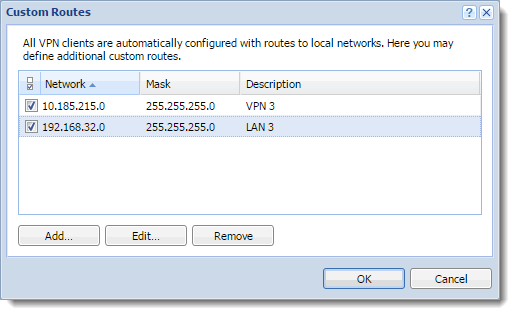
Adding custom routes
- Click OK twice.
From now on, all users connected through VPN 1 see all users connected to VPN 3.
At this point, the setup is finished. To verify that all computers and VPN subnets in the network can communicate, send multiple ping commands from one network to another.