Configuring VLAN objects
Virtual LANLocal area network (VLAN) objects are used to logically separate hosts (or groups of hosts) on a functional basis rather than on a physical basis. Once VLAN Objects are defined, they can be used in Optimizer policies to filter traffic.
 Configuring VLAN objects in the Exinda Web UI
By default, theExinda Appliance has a single VLAN defined called "ALL", which matches all traffic (regardless if that traffic is part of a VLAN or not). Additional VLAN Objects can easily be added.
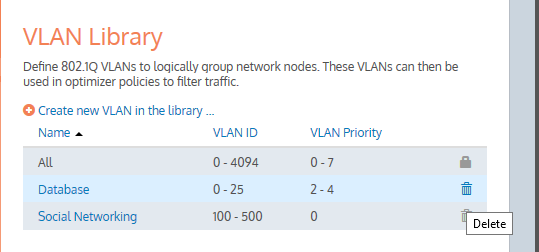
All the defined VLAN objects are shown in the table. Each VLAN object can be edited or deleted by clicking the appropriate button in the table. The ALL VLAN object is protected and cannot be edited or deleted.

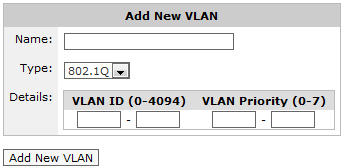
Adding a new VLAN.
To add a new VLAN object:
- Go to Configuration > Objects > VLANs.
- Enter a meaningful name for the VLAN object.
- Specify the type of VLAN to define. Currently only 802.1Q VLANs are available.
- Specify the range of VLAN IDs to define. To define all VLAN IDs, leave this field blank or type 0 - 4094. A single VLAN ID can be defined by entering the same value in both fields.
- Specify the VLAN Priority range to define. To define all VLAN Priorities, leave this field blank or type 0 - 7. A single VLAN Priority can be defined by entering the same value in both fields.
- Click the Add New VLAN button. The VLAN will be added to the list of VLANs in the table.
EXAMPLE
Consider VoIP traffic that has a VLAN ID of 10. Create a VLAN object with this ID. This object can then be used to prioritize VoIP traffic using the Optimizer.
Name: VoIP
Type: 802.1Q
VLAN ID: 10 - 10
VLAN Priority: 0 - 7 (or leave this field blank)
The VLAN priority is a field in the 802.1Q header that networking devices use for their own QoSQuality of Service-purpose. In order for the VLAN Object to work properly, the VLAN Priority field indicated in the object must match the Priority set in the 802.1Q header. If the priority set for a specific VLAN is unknown, Exinda recommends to configure the VLAN priority inside the VLAN object as “0 – 7”, which covers all possible scenarios. For most networking vendors, if the VLAN priority was not specified, the packets are tagged with Priority 0 by default.
 Configuring VLAN objects in the EMC
Virtual LAN (VLAN) Objects are used to logically separate hosts (or groups of hosts) on a functional basis rather than on a physical basis. Once VLAN Objects are defined, they can be used in Optimizer policies to filter traffic. By default, the Exinda Appliance has a single VLAN defined called ALL, which matches all traffic (regardless if that traffic is part of a VLAN or not). The ALL VLAN object is protected and cannot be edited or deleted. Additional VLAN Objects can easily be added.
 To add a new VLAN object
- Go to Library > VLANs.
- Click Create new VLAN in the librarythe Exinda repository for network objects and their definitions….
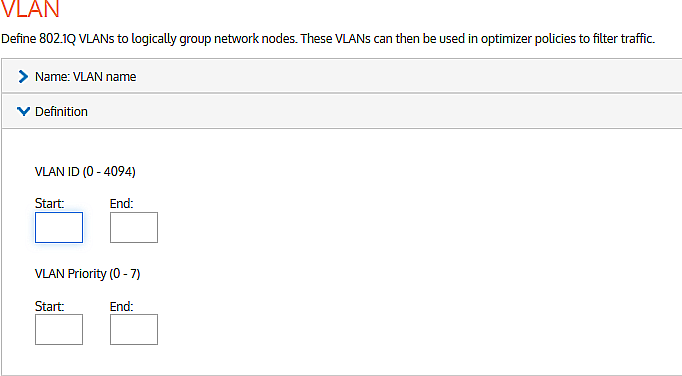
- In the Name field, key-in a meaningful name for the VLAN.

- Expand the Definition section:
- In the VLAN ID Start and End fields, key-in the range of VLAN IDs that must appear in the VLAN.
NOTE
The absolute range is 0–4094. This would equate to all VLAN IDs being in the VLAN. Leaving both fields blank would give the same result. To define a lesser range, type a range somewhere within the absolute range. To isolate one VLAN, type its ID value in both the Start and End fields.
- In the VLAN Priority Start and End fields, key-in the range of values for this VLAN.
NOTE
You can define priorities within a maximum range of 0–7. This would equate to all priorities being assigned to the VLAN. Leaving both fields blank would give the same result. To define a lesser range, type a range somewhere between the maximum range. To define just one priority, type the same value in both the Start and End fields.

- Click Create.
 Deleting a VLAN
NOTE
You can only delete those VLAN objects that are not currently in use. If a ![]() icon appears in the row of a VLAN object that you wish to delete, it means that the object cannot be deleted because it is in use. If you still want to delete it, you first need to unlink it from the appliances.
icon appears in the row of a VLAN object that you wish to delete, it means that the object cannot be deleted because it is in use. If you still want to delete it, you first need to unlink it from the appliances.
Also the ALL VLAN object is protected and cannot be deleted.

- Go to Library > VLANs.
- In the list of VLAN library objects, find the VLAN you need to delete.

- In the VLAN object row, click
 .
.

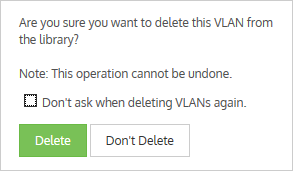
- Confirm and click Delete.