Scheduling a report
To schedule a report
- Click on the Default or Custom Reports option pane.
- Right-click on the report to be scheduled and select New > Scheduled report. This will launch the Scheduled Report Wizard. Click on Next to continue.

Report Scheduling Wizard: Data-set selection dialog
- Select the device usage period to be covered by this report.
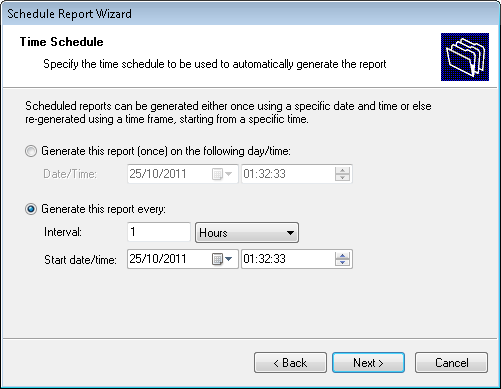
Report Scheduling Wizard: Time schedule dialogue
- Specify the report scheduling parameters (date/time/frequency). Click on Next to continue.
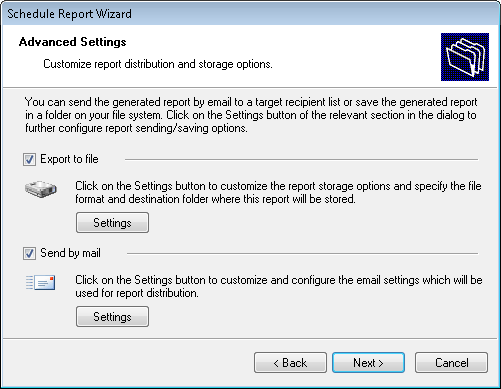
Report Scheduling Wizard: Configure export options
- To export the generated report to file, select Export to file option. To customize the report export configuration settings click on the Settings button underneath this option.
Note
For information on how to configure export-to-file settings refer to Configuring report export to file options section in this chapter.
- To automatically distribute generated reports via email, select the Send by mail option. To customize the email settings used for report distribution click on the Settings button underneath this option.
Note
For information on how to configure email settings refer to the Configuring report emailing options in this chapter.
- Specify a name and description for this scheduled report. Click on Next to continue.
- Click on Finish to finalize your settings.