Creating user groups in Kerio Connect
You can use user groups in Kerio Connect to:
- Set access rights to Kerio Connect administration for multiple users
- Deliver a single message to multiple users via a single email address (see also mailing lists)
You can:
User groups belong to a domain. Each domain may include any number of local and mapped groups. The number of groups is not limited by your license.
You can manage user groups in the administration interface in section Accounts > Groups.
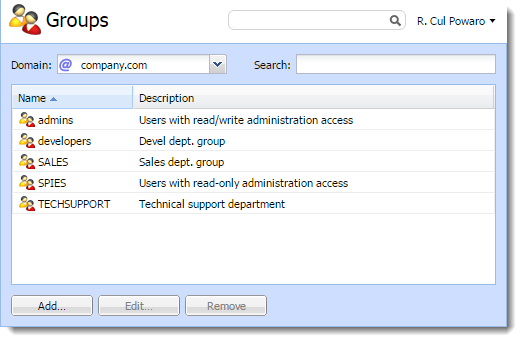
Creating user groups
- Go to section Accounts > Groups.
- Select a domain in which you want to create a group.
- Click Add.
- On the General tab, type a name for the group and description.
- On the Email Address tab, add email addresses for the user group. You can add any number of email addresses. You can also use an existing username as the email address — any messages sent to the group email address will also be delivered to the original user.
- On the Users tab, click Add.
- Select the local users you want to add to the group and click OK. You can also go to Accounts > Users and select a group in user's settings.
- On the Rights tab, set the access right to the administration interface. (For more information refer to Setting access rights in Kerio Connect.
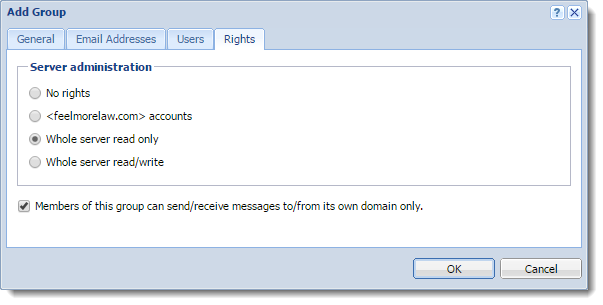
- Click OK.
Mapping groups from a directory service
To add groups from a directory service, you must:
- Connect Kerio Connect to a directory service. For more information refer to Connecting Kerio Connect to directory service.
- Activate groups in the administration interface
To activate groups:
- Go to section Accounts > Groups.
- Select a domain in which you want to create a group.
- Click Add > Add From a Directory Service.
- Select groups you want to map to Kerio Connect.
- Click Next.
- Click Finish.
NOTE
Kerio Connect does not map nested groups and users.
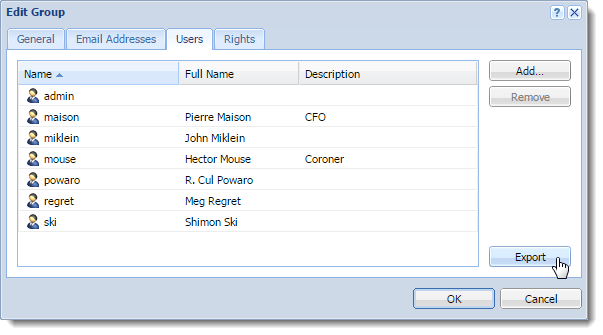
Exporting group members
To see the list of members in each group, you can export members of individual groups into a CSV file.
The data in the CSV file is organized as follows:
- Individual items are separated by semicolons
- Multiple information within individual items are separated by commas
To export,
- In the administration interface, go to the Accounts > Groups section.
- Double click a group.
- On the Users tab, click Export.
Kerio Connect saves the CSV file to your hard drive.
The filename has the following format: users_<domain_name>_<group_name>_<date>.csv (for example, users_company.com_TECHSUPPORT_2015-09-09.csv)
Use a spreadsheet or a text editor to open the file.