Configuring temporary access privileges
GFI EndPointSecurity enables you to grant temporary access to users. This enables them to access devices and connection ports on protected target computers for a specified duration/time window. You can do this on a policy-by-policy basis.
When temporary access is granted, any permissions and settings (e.g. file-type filters) set in the protection policy applicable for the target computer, are temporarily overridden.
For more information refer to How GFI EndPointSecurity works - Temporary Access.
This section contains information about:
- Requesting temporary access for a protected computer
- Granting temporary access to a protected computer.
Requesting temporary access for a protected computer
To generate a request code: tool:
![]()
Devices Temporary Access icon
- From the Control Panel click Devices Temporary Access.

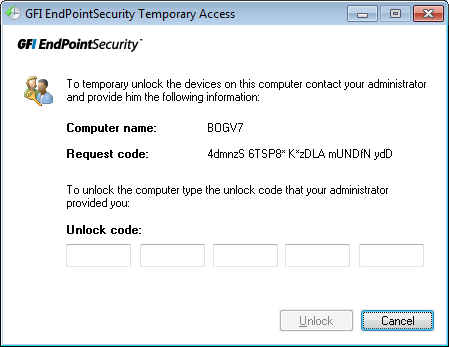
GFI EndPointSecurity Temporary Access tool
- In theGFI EndPointSecurity Temporary Access dialog take note of the Request code generated. Communicate the following details to your security administrator:
- Request code
- Device/connection port type
- When you require access
- For how long you require access.
Keep the GFI EndPointSecurity Temporary Access tool open.
- When the administrator sends the unlock code, key it in the Unlock code field.
Note
An unlock code keyed in on the protected target computer outside the specified validity period will not activate temporary access.
- Click Unlock to activate temporary access. You are now able to access the required device and/or connection port.
Granting temporary access to a protected computer
To grant temporary access:
- From GFI EndPointSecurity management console, click Configuration tab > Protection Policies sub-tab.
- From the left pane, select the protection policy that includes the computer on which temporary access needs to be granted.
- From the right pane, click Grant temporary access in the Temporary Access section.

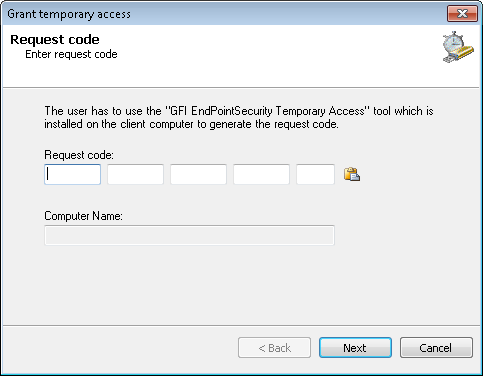
Grant temporary access options - Request code
- In the Grant temporary access dialog key in the request code received from the user, in the Request code field. The computer name from which the request code was generated, is displayed in the Computer Name field. Click Next.

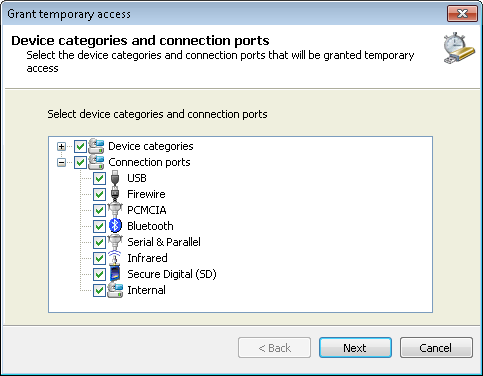
Grant temporary access options - Device categories and connection ports
- Enable the required device categories and/or connection ports from the list, to which you will be granting temporary access, and click Next.

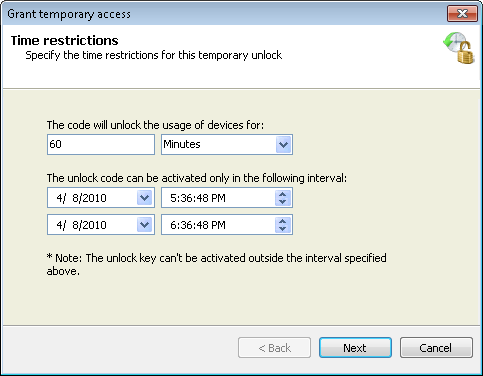
Grant temporary access options - Time restrictions
- Specify the duration during which access is allowed, and the validity period of the unlock code, and click Next.
- Take note of the Unlock code generated. Communicate the code to the user requesting temporary access and click Finish.