Create a new SQL Server Instance
Important
This topic assumes that a single SQL Server instance is already installed on the server. The following instructions explain how to install a separate SQL server instance side by side on the same server.
To setup a new instance of SQL Server® 2012 or SQL Server® 2012 Express, acquire the installation media. Start the installation wizard and follow the instructions below:
1. Click setup.
2. From the left menu, click Installation.
3. Click New SQL Server stand-alone installation or add features to an existing installation.
4. Wait for the installation wizard to search for the latest updates. Click Next.
5. The installation will now run the Setup Support Rules wizard. Click OK when the operation is completed.
6. In the Installation Type screen, select Perform a new installation of SQL Server 2012.
7. In the Product Key screen, enter your license key. Unless your organization requires something different for licensing compliance, this should be the same key as the license key for the original instance of SQL server installed.
NOTE
For SQL Server Express this screen will not be available, since this is free.
8. Read the EULA, click I accept the license terms and click Next.
9. Select SQL Server Feature Installation and click Next.
NOTE
This screen is only available for SQL Server and not for SQL Server Express. For SQL Server Express move to the next step.
Select features to install
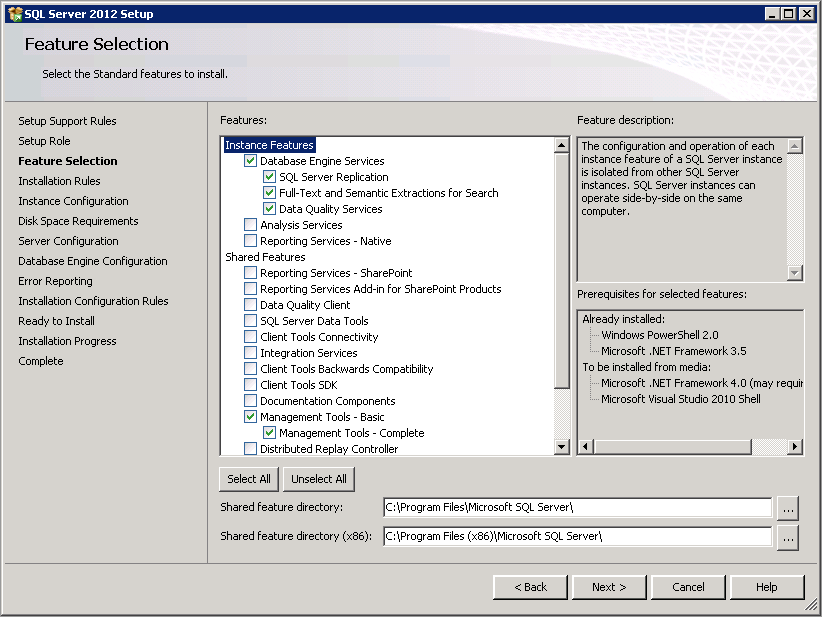
10. In the Feature Selection screen select the components that are going to be installed:
- Database Engine Services
- SQL Server Replication
- Full-Text and Semantic Extractions for Search
- Data Quality Services
NOTE
For SQL Server Express install the list of features will be much less than the one shown in this screen shot.
11. Click Next. The wizard runs through another rule check for the Installation Rules. Click Next.
12. Select Named instance and enter a name for the new SQL server instance. This should be something informative and easy to recognize. This name will be used to access the instance created. For example, NEW_INSTANCE. Click Next.
13. Wait for the installation wizard to complete the Disk Space Requirements check. Click Next.
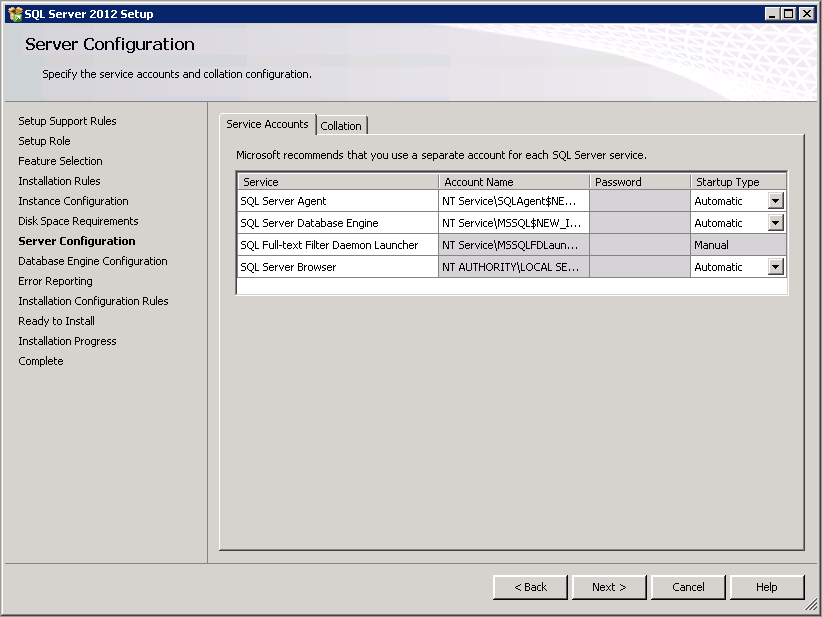
Setting service startup type to start automatically
14. The Server Configuration dialogue box allows you to configure what services of this instance you would like to automatically start. Change all of the services to Automatic. Click Next.
15. In the database engine configuration screen, select Mixed Mode (SQL Server authentication and Windows authentication).
16. (Optional) Specify a password for the SQL Server system administrator (sa).
17. Click the Add Current User to add the user you are logged in as, or the Add… button to add a specific account for this purpose. Once complete, click Next.
18. In the Error Reporting screen, click Next.
19. The last rule checking window ensures all previous information entered will allow the installation for the new SQL server instance to complete successfully. Review any required information and click Next.
20. Click Install. Installation process takes some time depending on the available resources.
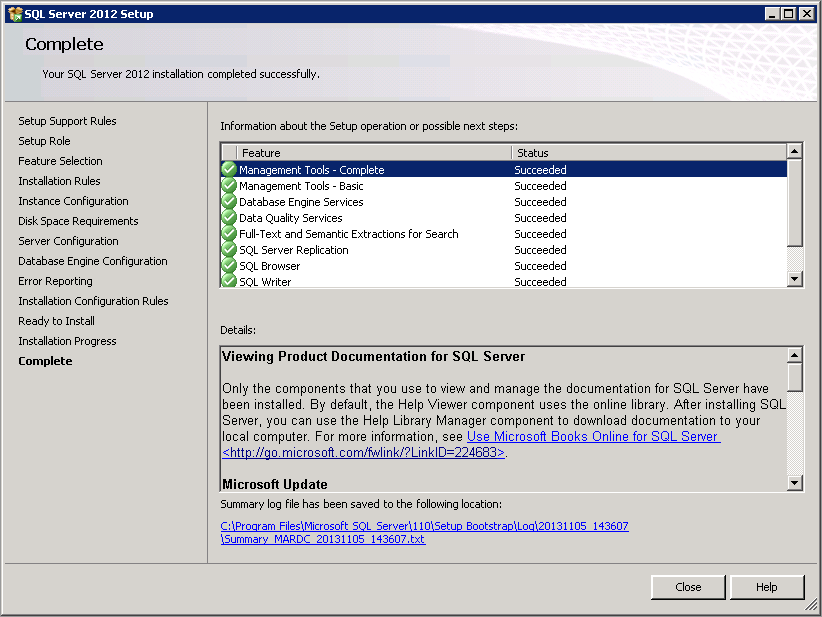
Review installation status
21. When the installation is complete, click Close.