Adding Kerio Control to MyKerio
MyKerio is a cloud service that enables you to administer multiple instances of Kerio Control appliances through a centralized web interface. This topic describes a process for adding Kerio Control to MyKerio. There are two ways how to accomplish it:
- Adding Kerio Control to MyKerio through Kerio Control Administration
- Adding Kerio Control to MyKerio during the Kerio Control installation
Adding Kerio Control to MyKerio through Kerio Control Administration
To link Kerio Control to MyKerio you must enable access to MyKerio in Kerio Control and sign up for MyKerio.
- In the Kerio Control administration interface, go to Remote Services.
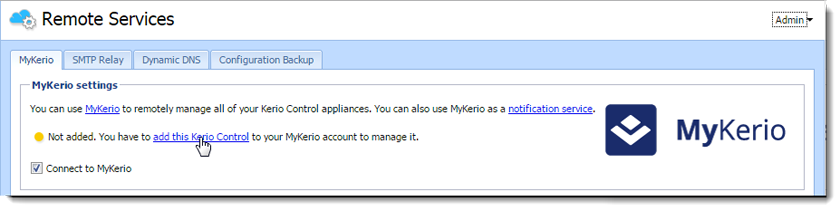
- Ensure that Connect to MyKerio is checked.
- Click the link add this Kerio Control. Your web browser opens https://my.kerio.com/, where you can register or log in if you are already registered.
- After successful login, MyKerio displays the Add a New Appliance dialog box.
- Type the name of the Kerio Control appliance (for example, your company name). If you have more organizations created in MyKerio, select also the organization. For more information refer to Adding and managing organizations.
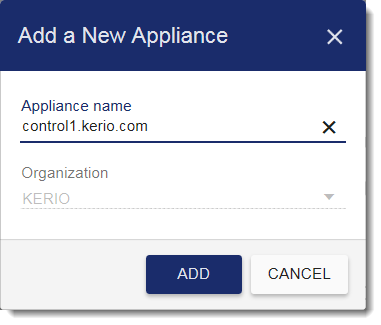
- Click Add.
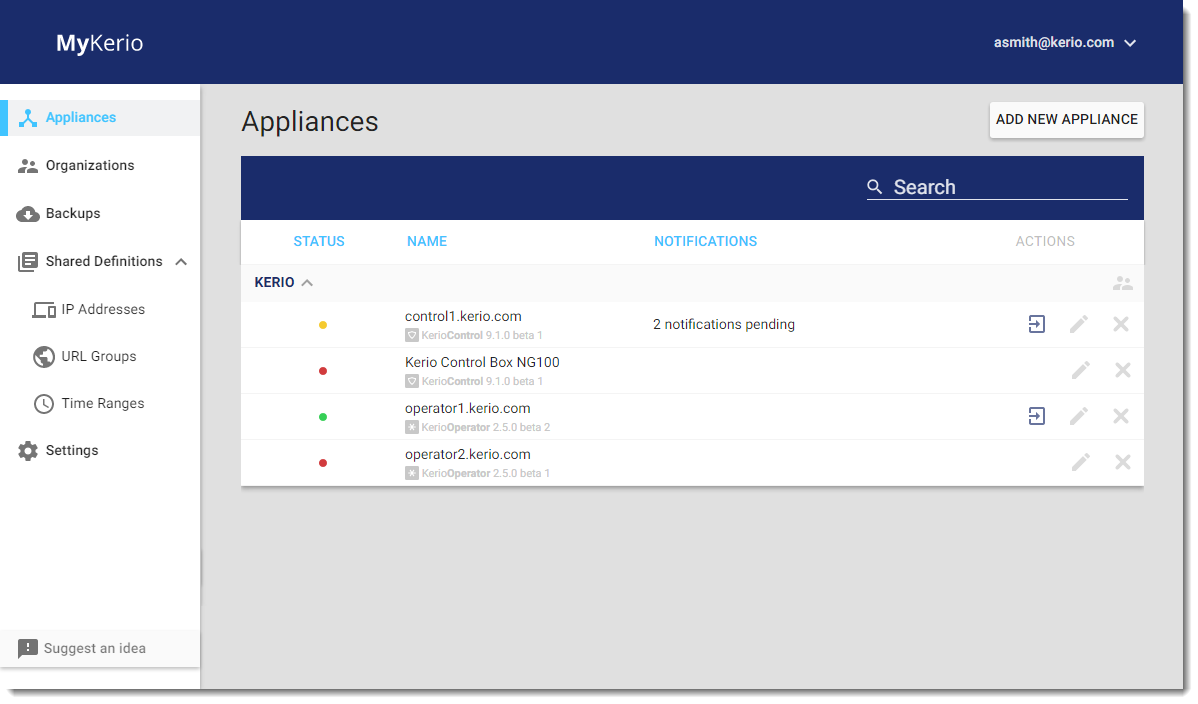
You are now connected to MyKerio and you can see the Kerio Control appliance in the MyKerio dashboard.
Adding Kerio Control to MyKerio during the Kerio Control installation
When you install a new Kerio Control appliance, you can add it to MyKerio during the installation process. In the last installation dialog in the Kerio Control console, you can find a link to MyKerio (see figure below):
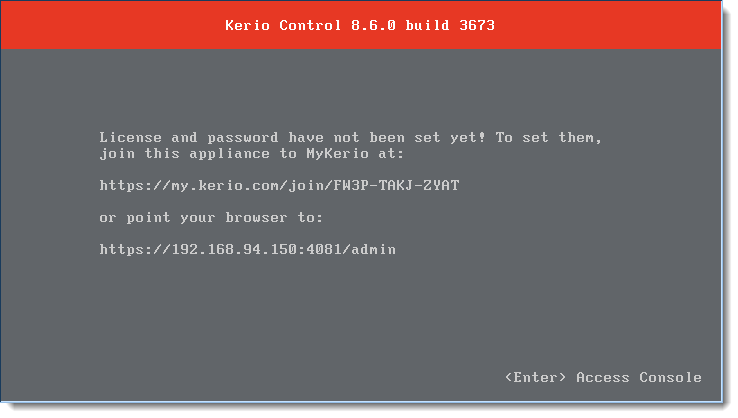
- Type the link to your browser. Your web browser opens https://my.kerio.com/login, where you can register or log in if you are already registered. MyKerio with the Add a New Appliance dialog box opens.
- Type the name of the newly installed appliance.
- Click Add.
The MyKerio dashboard appears, the appliance is displayed and its status is Up (status bullet is green).
If you miss the correct link during the installation, you can add Kerio Control to MyKerio later in the Kerio Control Administration.